


Bosch Security Systems
Divar | Installation Manual | Menu system EN | 5-12
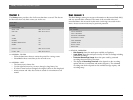
• The entire history list is erased if you select the Clear History item.
• Date/time changes of stored video are always logged and cannot be
disabled or cleared.
>> LOCAL PASSWORDS
• Set or change the password that allows access to playback functions.
• Set or change the password that allows access to the configuration
functions.
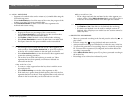
• Use the camera keys (1 to 9) on the front of the unit to enter a four-digit
password in the dialog box that appears.
• Enter the same password again to have it verified.
• Press F2 to remove password protection.
>> CONNECTIVITY
The Connectivity menu gives access to settings that control the behavior of the
unit with respect to all external devices or a network. It also gives access to
settings for connecting multiple units to each other and for connecting
computers via the communications port.
>>> Keyboard access restrictions
• Four external keyboards can be connected to the unit.
• Allow these keyboards to control monitor A only, monitor B only,
both or neither.
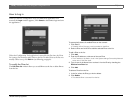
>>> Network setup
•Set DHCP to Yes to have IP address, subnet mask and default
gateway assigned automatically by the network server. The actual
values are displayed.
• Enter a Divar name to be used in the network.
• Fill in the IP, subnet mask and default gateway addresses when
DHCP is set to No. If required, change the default http port (80) to
a new value. The MAC address is read only.
•If Discovery is set to Enabled, the Control Center can carry out
automatic discovery and read the IP address of the unit.
• Restrict the network bandwidth by entering an Mbps between 0
and 100 for the bandwidth limit.
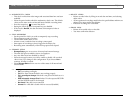
>>> Network access
• Access to the unit via the network can be set for up to six different
users.
• Restrict access to the unit by listing an IP address range. The range
you use will normally depend on your network setup.
• Select a user number to set up the configuration for that remote
user. The administrator is user 1 and is identified as
ADMINISTRATOR.
IP Range
• Eight IP ranges can be entered to allow access.
• Enter the same begin and end address to specify a single IP address.
Enter different begin and end addresses to specify an IP address
range.
• Use the up/down arrow keys to move to an IP entry. Press the select
key to edit the entries. Press F1 to set the default values
(000.000.000.000 to 255.255.255.255).
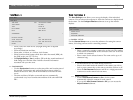
List of Users
• Enter a name, up to 16-characters long, for each user. Enter a
password up to 12-digits long.
•Set User Rights to Live to restrict viewing rights to live video only.
• Select the cameras in the Camera Lock Out submenu that are not
accessible for the user.
• Set the camera sequence list and dwell time (from 3 to 59 seconds)
for the remote viewer. All connected cameras are listed by default.
•Set Camera Control to allow control of controllable cameras
remotely.
>>> Expand system
• When you have multiple units linked, give each unit a unique
identification number (from 1 to 30).
• Enter a first camera number (from 1 to 999) to offset the camera
numbers for the different Divars.
• Only default camera identification numbers (Camera 1, Camera 2,
etc.) are offset.