


7
MAX675VDII
5
MAX675VDII
6
MAX675VDII
English
Owner’s manual
English Français Español
English
Owner’s manual
3. CONTROLS/COMMANDES/
CONTROLES
[
SRC
]
[
iPod
]
[
MAP
]
[
BAND
]
[
MENU
]
[ ] (
POWER
)
[ ]
(
OPEN/CLOSE
)
Sensor
[
ISR
]
[
ADJ
]
Blink LED
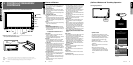
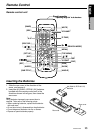
Note : Be sure to unfold this page and refer to the front diagrams as you read each chapter.
Remarque : Veuillez déplier cette page et vous référer aux schémas quand vous lisez chaque chapitre.
Nota : Cuando lea los capítulos, despliegue esta página y consulte los diagramas.
[
RESET
]
●
With the operation panel open / Avec le panneau de commande ouvert /
Con el panel de funcionamiento abierto
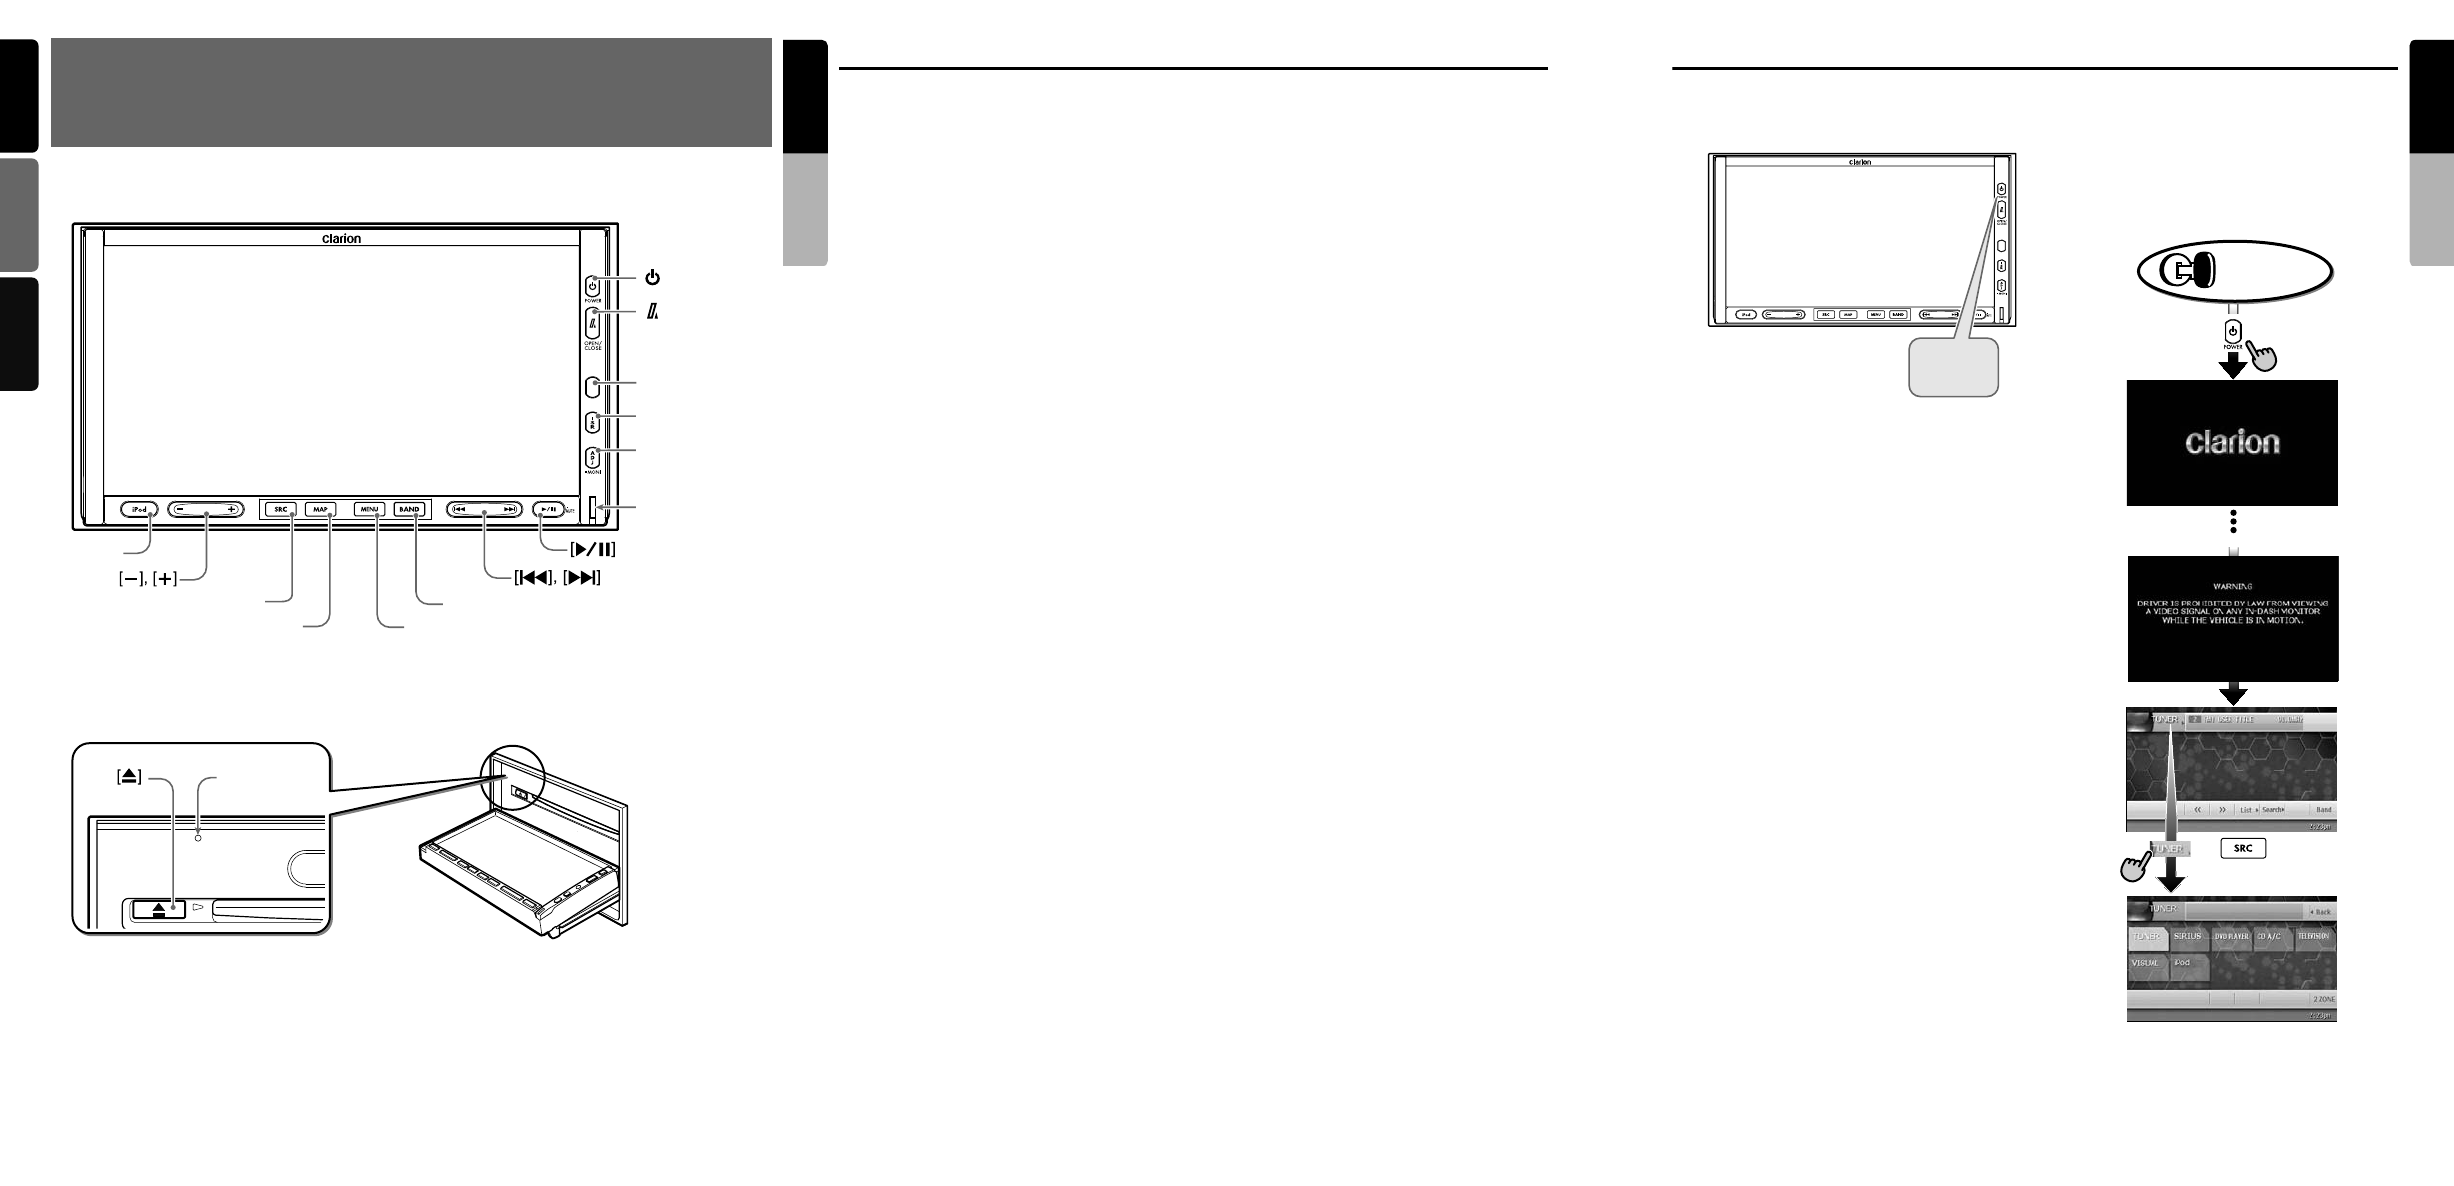
● Operation panel / Panneau de commande / Panel de funcionamiento
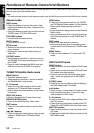
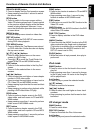
Names of Buttons
Note:
• Be sure to read this chapter while referring to the
front diagrams for chapter “3. CONTROLS” on
page 5 (unfold).
[&] (POWER) button
• Press this button to turn on the power. Keep
pressing this button more than 1 second to turn
off the power.
• Press this button to turn off the back light of the
liquid crystal panel.
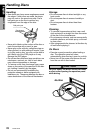
[7] (OPEN/CLOSE) button
• Use this button to open/close the operation
panel.
• Keep pressing this button more than 2 seconds
to adjust the angle of the operation panel. The
angle of the operation panel is adjustable in the
range of 0q to 30q.
Sensor
• Receiver for the remote control unit (operating
range: 30q in all directions).
[ISR] button
• Use this button to enter/exit the ISR (Instant
Station Recall) standby mode.
• Keep pressing this button more than 2 seconds
to store the current station into ISR memory in
the TUNER mode.
* The [ISR] button is disabled when the SUB
zone is selected in the 2-ZONE mode.
[ADJ] button
• Press this button to enter/exit the ADJUST
mode to change the settings.
• Keep pressing this button more than 1 second
to enter/exit the Monitor Adjust mode.
Blink LED
•
When the BLINK LED function is set to “
ON
”
from the GENERAL menu in the ADJUST
mode, blinks when the ACC power is turned off.
[p] button
• Press this button to enter the play pause mode
in the DVD PLAYER/iPod/changer modes.
Press the button again to resume playback.
• Keep pressing this button more than 1 second
to mute the sound in the DVD PLAYER/iPod/
changer modes.
• Press this button to mute the sound in the
TUNER/Satellite Radio/TV/VISUAL modes.
[R], [F] buttons
• Use these buttons to change to the previous/
next preset station in the TUNER/Satellite
Radio/TV modes.
• Use these buttons to select a track in the CD,
Video CD, MP3/WMA, iPod and CD changer
modes.
• Use these buttons to select a chapter in the
DVD video mode.
[BAND] button
• Press this button to switch the receiving bands
for TUNER/Satellite Radio/TV modes. Keep
pressing this button more than 1 second to
switch the Seek/Manual tuning modes.
• Use this button to move to the first track in the
CD, Video CD and iPod modes, or the first
chapter in the DVD video mode.
• Use this button to move to the next folder in the
MP3/WMA mode.
• Use this button to switch to the next disc in the
changer modes.
• Keep pressing this button more than 1 second
to play all tracks in the iPod mode.
[MENU] button
• Pressing this button in the Navigation mode
shows the Menu screen of the Navigation
system.
• When the menu screen of a DVD video/Video
CD is displayed, pressing this button displays
the Key Pad on the screen. When the other
screen than the menu screen is displayed,
keep pressing this button more than 1 second
to display the Key Pad.
• When displaying the GENERAL menu screen
in the ADJUST mode, keep pressing this
button more than 2 seconds to display a screen
for entering your personal code of the anti-theft
function.
[MAP] button
• Press this button to show the Map screen of the
current location in the Navigation mode.
• Pressing this button in the audio/visual modes
changes to the Navigation mode.
• Pressing this button switches the display to a
Visual input screen to lock the monitor (To
enable this function, go to the GENERAL menu
(within the ADJUST menu), and touch the
[CONNECT] key, and select the desired item
other than “NONE”).
[SRC] button
• Press this button to display the Source menu
screen to switch the mode.
[+], [–] buttons
• Use these buttons to increase/decrease the
volume.
[iPod] button
• Press this button to switch to the iPod mode.
[o] (EJECT) button
• Use this button to eject the disc set in this unit.
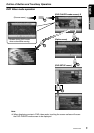
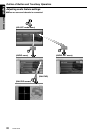
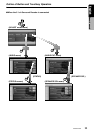
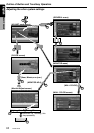
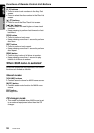
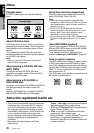
Outline of Button and Touchkey Operation
Turning the power on
∗2
&
(POWER)
System check
The CeNET format utilized on this unit is
provided with a system check function. When
the system check function is performed
under the following conditions, the power is
automatically turned off. Press the [&]
(POWER) button again.
•When power is first turned on after initial
installation.
•When an external device is connected or
disconnected.
•When Reset button is pressed.
∗In addition to the above conditions, the
system check function can be performed
from the GENERAL menu in the ADJUST
mode.
•You can change the media
sources.
or
∗1
Engine ON
position