


Page 1
Page 2 Page 3 Page 4
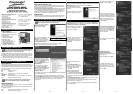
Insert your WinTV Installation CD-
ROM and click on Start then
Computer, you should then see
the HCW3_x CD, double click on this CD-ROM then double click on the
file called HCWDriverInstall.
WinTV-HVR-4000
WinTV-NOVA-HD-S2
Quick Installation Guide
for Windows XP / Vista 32-bit
© 2007 Hauppauge Computer Works · QI-WINTV-SC-V1.1-ENG · 2007/06/25
● WinTV-HVR-4000 or
WinTV-NOVA-HD-S2 PCI board
● Remote control transmitter with
2 AAA batteries
● Remote control receiver
with velcro dot fastener
● FM Radio antenna
(WinTV-HVR-4000 only)
● S-Video/Composite Adapter
(WinTV-HVR-4000 only)
● Installation CD-ROM with:
· CyberLink PowerCinema 5.1
1. Contents of the WinTV-package
Hauppauge Computer Works, Ltd.
10 Borough High Street
Bank Chambers
London, UK, SE1 9QQ
www.hauppauge.co.uk
Tech Support: (+44) 0207 378 0202
Telephone: (+44) 0207 378 1997
Fax: (+44) 0207 357 9171
Hauppauge Computer Works, Inc.
91 Cabot Court
Hauppauge, NY 11788
www.hauppauge.com
Tech Support: (+1) 631 434 3197
Telephone: (+1) 631 434 1600
Fax: (+1) 631 434 3198
Hauppauge Digital Asia, Pte. Ltd.
Blk 1093, Lower Delta Road #04-05
Tiong Bahru Industrial Estate
Singapore 169204
www.hauppauge.com.sg
Tech Support: (+65) 276 4412
Telephone: (+65) 276 9163
Fax: (+65) 276 9167
N
ote: Your PC could be damaged by electrostatic discharge.
Avoid this by contacting the earthed chassis of your PC,
before you open it or touch the PCI card.
To install, switch off the computer and remove the computer cover. The
manufacturer of your PC supplies instructions on removing the PC cover.
● Locate a free PCI slot (a short white slot). Unscrew and remove the
metal cover plate which covers the back of the empty slot.
● Plug the WinTV board into the PCI slot, and screw the WinTV metal
cover plate to the PC.
2. Installing the WinTV-board
WinTV-HVR-4000
With the HVR you can watch and record analog TV, DVB-Terrestrial,
DVB-Satellite and DVB-S2 HD channels. You can also connect sources
via the composite and S-Video inputs and listen to FM Radio as well.
You can now connect the leads provided to the WinTV-HVR-4000 in
the following order.
FM FM Radio-Antenna
TV TV-Antenna
SAT SAT-Cable from the LNB of your satellite dish
S-VIDEO IN S-Video-Input *
LINE IN Stereo-Audio-Input, from the output of your source
IR Input for the Infra-red-Sensor
N
ote: for using a RCA Yellow Phono composite input you
must use the supplied S-Video to composite adapter.
WinTV-NOVA-HD-S2
With the WinTV-NOVA-HD-S2 you can watch and record DVB-Satellite
and DVB-S2 HD channels.
You can now connect the leads provided to the WinTV-NOVA-HD-S2
in the following order.
SAT SAT-Cable from the LNB of your satellite dish
IR Input for the Infra-red-Sensor
3. Connections of the WinTV-board
DVB-T (WinTV-HVR-4000 only)
Please ensure that you have a suitable TV aerial connected to the
WinTV card. You should then ensure you are located in a area that
supports Digital Terrestrial TV by visiting:
www.dtg.org.uk/retailer/coverage.html and entering your post code.
If your area does have digital Terrestrial TV coverage, please check
your TV antenna as most antenna’s that are over 8 years old may not
support the Digital Terrestrial TV broadcasts and you may need to
update yours to a ‘Wideband or Highgain’ antenna.
DVB-S/DVB-S2
Please ensure that your satellite dish is correctly aligned and the Sat
cable is connectly directly from the LNB and not via a set top box.
4. WinTV DVB reception advice
To start the software installation, click Start / Run then type your CD-
ROM drive letter (for example: D:\) and then Setup.exe.
6. CyberLink Software Installation
Click Next and follow the on
screen instructions to install the
software.
Once the installation is complete,
please re-start your computer.
Select the type of speaker setup
that you are using and click Next.
PowerCinema detect the TV
tuners.
The WinTV-HVR-4000 has a
Hybrid tuner and can be config-
ured for all types of signals:
1.Analogue (Cable TV and
Antenna)
2.DVB-T (Digital Terrestrial)
3.DVB-S (Digital Satellite)
and DVB-S2 (Digital Satellite HD)
In addition you can also connect
a composite or S-Video source (Hi-8 camcorder, VCR, cable or satel-
lite box).
The WinTV-NOVA-HD-S2 has a HD satellite tuner and can be config-
ured for DVB-S (and HD DVB-S2) only.
You need to ensure that you have connected the cables correctly
before performing a channel scan.
You can configure or change the signal input by selecting Settings /
TV / Signal settings.
The Setup Wizard will appear
which will guide you through the
setup and configuration of the
application, click Next.
Select the type of screen that you
are using (4:3 is normal TV /
Monitor screen size and 16:9 is a
widescreen TV / Monitor) and
click Next.
Select the region that you are
located in and click Next.
Select the signal type that you
want to configure and click Next.
Scanning for DVB-S channels will
also scan for HD DVB-S2 channels.
Select the location where you
want to save recorded TV files
and click Next.
TV Setup (WinTV-HVR-4000 only)
If you have a cable system con-
nected click on Scan Channels, if
you do not then click Next and
Scan Channels for scanning TV
antenna channels.
Once the channel scan is finished
click on Next.
Digital DVB-T Setup
(WinTV-HVR-4000 only)
Select Scan Channels to start the
channels scan.
When complete click on Next.
The DVB-T EPG allows you to
view now and next channel pro-
gram information, refer to the
online help for more information.
Click on Next.
WinTV-HVR-4000
To start the PowerCinema application double click on the CyberLink
PowerCinema Icon on your desktop or click on Start / All Programs /
CyberLink PowerCinema / PowerCinema.
7. CyberLink PowerCinema
N
ote: If you have any anti-virus software enabled, please dis-
able it during the installation of the software.
Start your computer, the Found
New Hardware Wizard will
appear, Click on Cancel.
5. Install the WinTV Windows driver
You will now need to check that
the drivers are installed correctly.
Right Click on My Computer and
Left Click on Properties.
Click on Hardware tab and then
Device Manager.
In the Device Manager click on
the + symbol on the Sound
Video and Game controllers sec-
tion. If the driver is installed cor-
rectly you should see the
Hauppauge WinTV.
You will then be presented with a blue screen which will begin
installing and updating the drivers for your product.
If any of them have a yellow exclamation mark, follow this procedure:
1.Close Device Manager
2.On the Hauppauge Installation CD-ROM double click on the file
called HCWclear.exe and select the last 2 options and click on OK.
3. Once the black screen has closed down, re-start the computer and
continue from page 3 above or contact our technical support
department.