


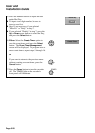

Page 6-2
User and
Installation Guide
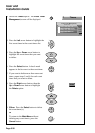
SUMMARY OF INSTALLATION
Following is a summary of the procedures to install and set up your system.
Perform the procedures in the order presented.
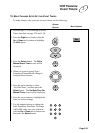
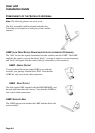
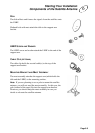
1. Unpack the satellite antenna*, recorder, and parts (see pages 6–3 through 6–5) and the
optional installation kit, if you purchased one (see page 6–7).
*Supplied with HM-DSR100DU. Sold separately for HM-DSR100RU.
2. Review "What You Need" (see pages 6–6 through 6–8). Connect the recorder to your
TV set.
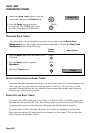
3. Determine the approximate location of the satellites (see pages 6–9 through 6–12).
4. Find the best location on your property, with a clear line of sight to the satellites, for the
satellite antenna (see pages 6–13 through 6–19).
5. Assemble the satellite antenna and attach it to a solid surface (see pages 7–1 through
7–7).
6. Ground the satellite antenna, and wire it to the recorder (see pages 7–8 through 7–11).
7. Aim the satellite antenna for the strongest possible signal (see pages 7–12 through
7–14).
8. Connect the recorder to an active telephone connection (see pages 7–15 through 7–16).
With the recorder wired to the TV and the antenna properly installed, you will be able
to see the Preview Channel, which tells you about available programs, channels, and
services.
9. Order your programming by calling the Service Center (see page 7–17).
When the services are authorized, you will see channels other than the Preview Channel.
10. Wire the recorder to your other electronic equipment (see pages 7–18 through 7–24).
11. Program the remote control to control the recorder and your other electronic equipment
(see pages 4–39 through 4–43).
12. Customize your system. See Local TV Link on page 3–13, Favorites Lists on page
4–14, Security Features on page 4-19.