97
INSTALLING OPTIONS
You will require a Phillips screwdriver when installing
the optional units.
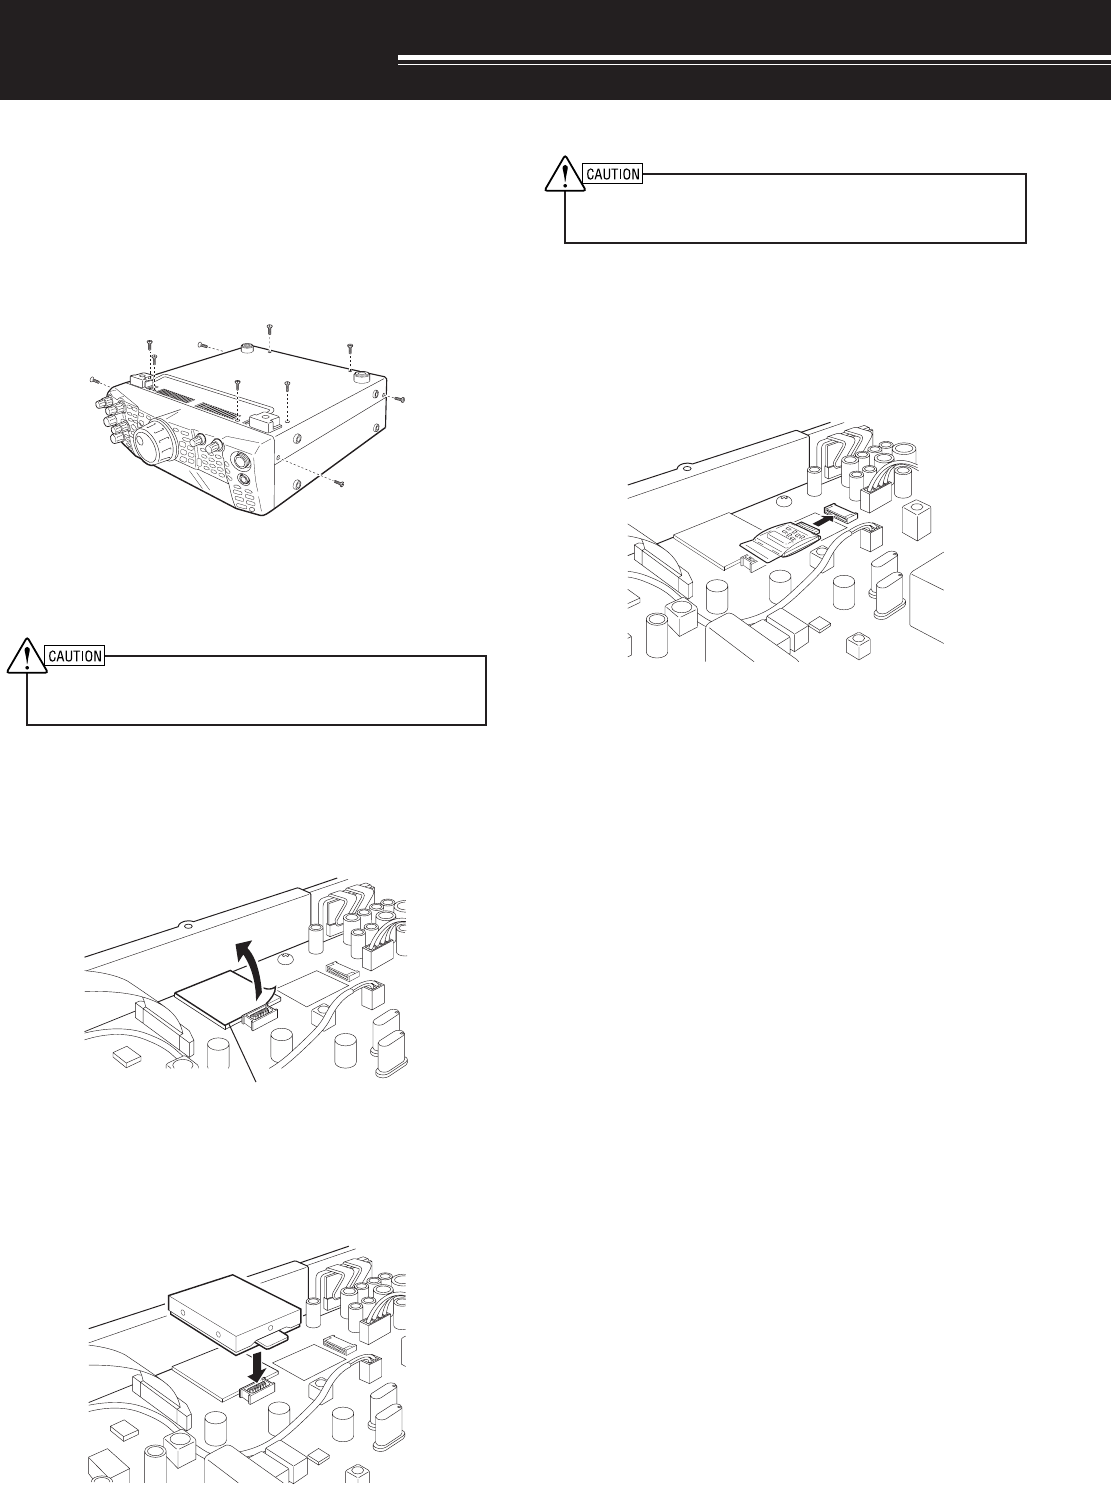
REMOVING THE BOTTOM CASE
When installing the optional DRU-3A or VS-3 unit,
remove the bottom case first.
1 Remove the 10 screws.
2 Lift off the bottom case.
DRU-3A DIGITAL RECORDING UNIT
SWITCH OFF THE POWER AND UNPLUG THE DC POWER
CABLE BEFORE BEGINNING INSTALLATION.
1 Remove the bottom case (10 screws).
2 Locate the DRU-3A connector.
3 Peel off the paper on the cushion attached to the
PC board of the transceiver.
4 Plug the DRU-3A into the DRU-3A connector of
the PC board.
5 Press the top of the DRU-3A to affix it to the
cushion.
DRU-3A
6 Replace the bottom case (10 screws).
Note: After the installation, you can adjust the DRU-3A playback
volume by selecting Menu No. 14.
VS-3 VOICE SYNTHESIZER UNIT
SWITCH OFF THE POWER AND UNPLUG THE DC POWER
CABLE BEFORE BEGINNING INSTALLATION.
1 Remove the bottom case (10 screws).
2 Locate the VS-3 jack.
3 Hold the VS-3 unit with the component side facing
up, and insert the VS-3 connector into the VS-3
jack.
4 Replace the bottom case (10 screws).
Note: After the installation, you can adjust the VS-3 playback volume
by selecting Menu No. 15.
Cushion


