76
15 OPERATOR CONVENIENCES
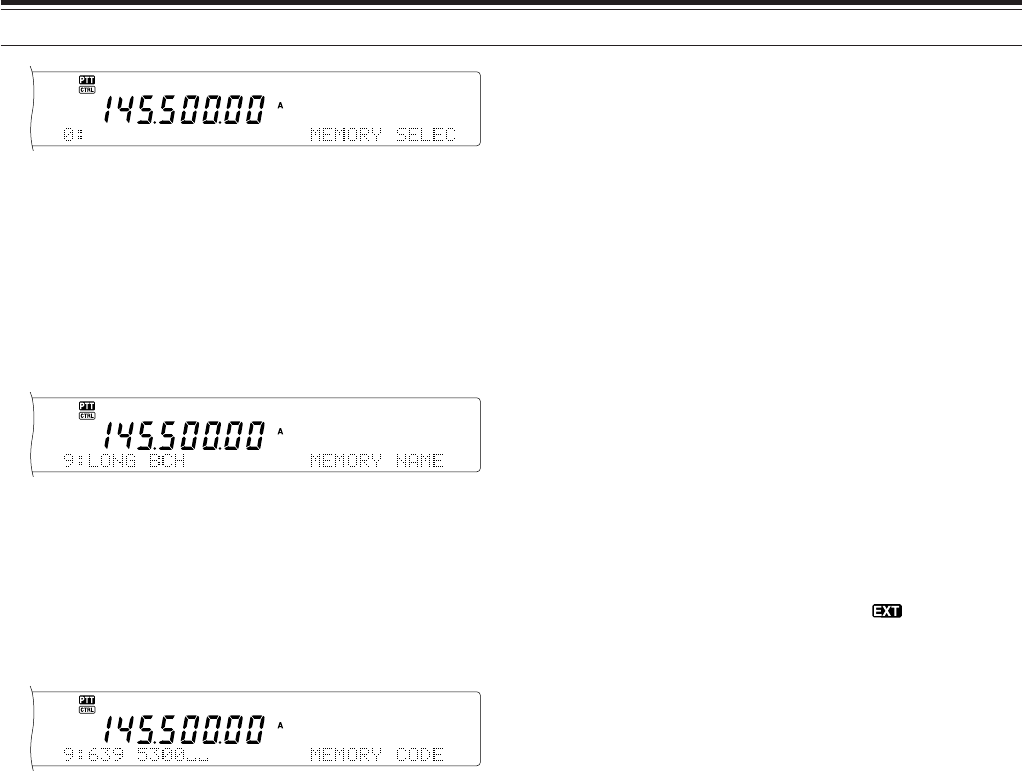
4 Select a DTMF Memory Channel (0 to 9) using the
MULTI/ CH control.
5 Press [SUB] to enter the desired memory name.
Use [+]/ [–] to select the characters. Press
[MAIN] or [SUB] to move the cursor left or right
while entering the DTMF memory name. You can
also use the Mic DTMF keys to enter the
characters. Refer to the table on page 63 for the
available characters and numbers.
6 Press [M.IN] to store the name into memory.
7 Select the desired DTMF tone using [+]/ [–], then
press [SUB] to move the cursor to the right to
enter the next DTMF tone.
8 Repeat step 7 until you enter all the desired DTMF
tones. You can enter a maximum of 16 DTMF
tones for each DTMF Memory Channel.
9 Press [M.IN] to store the data into memory.
■ Transmitting DTMF Memory Channel Data
To send the DTMF Memory Channel data while you
are transmitting:
1 Press QUICK MEMO [MR] while you are
transmitting.
2 The DTMF Memory Channel number and the
memory name appear on the main dot-matrix
display.
3 Turn the MULTI/ CH control to select the DTMF
Memory Channel you want to transmit.
4 Press QUICK MEMO [MR] to transmit the DTMF
tones.
• The DTMF tones are monitored through the
speaker while they are transmitted.
■ DTMF Tone Time Length
When transmitting a series of DTMF tones, each tone
duration is set to the 50 ms (tone)/ 50 ms (mute)
format as default. Some repeaters or auto patch
controllers may require longer DTMF tones and mutes.
1 Press [MENU], then turn the MULTI/ CH control to
access Menu No. 45B.
2 Press [–] to select SLOW.
3 Press [MENU] to exit the Menu mode.
The DTMF tones will now be sent using the 100 ms
(tone)/ 100 ms (mute) format.
DTMF Pause Period
In the DTMF Memory, you can enter blanks (pauses)
among a series of DTMF tones. The default pause
period is set to 500 ms, but you can change this
value by accessing Menu No. 45C.
1 Press [MENU], then turn the MULTI/ CH control to
access Menu No. 45C.
2 Press [+]/ [–] to select the desired DTMF Pause
period (default is 500 ms).
3 Press [MENU] to exit the Menu mode.
HF RX ANTENNA
If you have a separate HF antenna (below 30 MHz)
only for receiving, connect the antenna coaxial cable
to the HF RX ANT connector on the rear panel. This
connector is considered to be connected to a
beverage antenna or directional loop antenna for low-
band operation.
To use the HF RX ANTENNA connector, access
Menu No. 18 and select ON. When the HF RX
ANTENNA is selected for receiving, “ ” appears on
the display.
LINEAR AMPLIFIER CONTROL
When you connect an external HF linear amplifier
to the TS-2000(X) transceiver using the REMOTE
connector, select 1 (fast switching/ 10 ms delay) or
2 (slow switching/ 25 ms delay) to activate the
internal relay so you can interface with the HF
linear amplifier {page 94}.
Some linear amplifiers require a long transmission
delay time because of the slow antenna relay
switching time. In this case, select 2 for the slow
switching.
If you have 50 MHz, 144 MHz, 430/ 440 MHz, or 1.2
GHz band linear amplifiers, connect the linear
amplifier control cable to the EXT.CONT connector
for these bands {page 96}.
1 Press [MENU], then turn the MULTI/ CH control
to select Menu No. 28A (HF), 28B (50 MHz),
28C (144 MHz), 28D (430 (440) MHz), or
28E (1.2 GHz).
2 Press [+]/ [–] to select OFF, 1, or 2.
• OFF disables the TS-2000(X) relay.
• 1 is 10 ms transmission delay.
• 2 is 25 ms transmission delay.
Note: If CW full break-in is enabled, 10 ms transmission delay is
applied regardless of the Menu No. 28 settings.


