


36
37
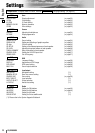
CQ-VD6505U
English
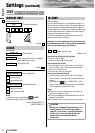
: enables the test tone.
: disables the test tone.
default:
¡
When the test tone is set to on, test signal (a continu-
ous tone) is output from each speaker for approximately
2 seconds.
Adjust the output balance so that the tone appears to
have the same volume from each speaker.
Adjusting the output balance:
Adjust the volume of all of the other speakers to the vol-
ume level of the speaker from which the test signal
appears to be the quietest.
OFF
OFF
ON
(Test tone output)
TEST TONE
Note:
¡
While the private
mode is active, only
and
can be
adjusted.
FRONT R
FRONT L
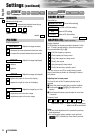
CROSS OVER
Cut off frequency
: down, : up
Setting range: 63 Hz to 200 Hz
default: 125 Hz
: down, : up
Setting range: off, 63 Hz to 200 Hz
default: off
Note:
¡
This setting is not available if
is set to .
¡
is enabled only on the front speakers
(R/L) and rear speakers (L/R).
HPF CUT OFF
ONCS Auto
[
]
(High Pass Filter)
HPF CUT OFF
[
]
(Sub-woofer Low Pass Filter)
LPF CUT OFF
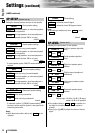
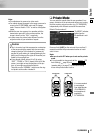
TIME ALIGNMENT
(Delay time setting of each speaker)
Adjusting the timing with which the audio from each
speaker reaches the listener’s position
: down, : up
Setting range: 0 ms to 5 ms (1 ms steps)
1 ms = 0.001 seconds
default: 0 ms
: down, : up
Setting range: 0 ms to 15 ms (1 ms steps)
1 ms = 0.001 seconds
default: 0 ms
¡
Make this adjustment while listening to sound.
¡
If the speaker setting is for a speaker, that
speaker cannot be selected.
¡
When “PRO LOGIC” is displayed, 15 ms are automatically
added to the delay time setting for the surround speakers.
NONE
[
]
(Surround speaker delay time
setting)
SUR
[
]
(Center speaker delay time set-
ting)
CENTER
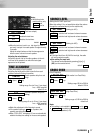
SOURCE LEVEL
Setting the AV1/AV2 input level
Make this setting if it is not possible to adjust the volume
through the connected device (on the output side).
: sets the level low/sound volume increases.
: sets the level high/sound volume decreases.
default:
: sets the level low/sound volume increases.
: sets the level high/sound volume decreases.
Note:
¡
If the input level from AV1/AV2 is too high, the audio
will not be output normally.
¡
After setting the input level
The volume can be adjusted by pressing
[+]
or
[–]
(VOL) on the remote control.
default:
HIGH
HIGH
LOW
(Setting for AV2)
AV2 LEVEL
HIGH
HIGH
LOW
(Setting for AV1)
AV1 LEVEL