DESCRIPTION
The HSWM12 Wall Mount is designed for use with the HS4012 High-Security Enclosure. The
mount features tamper-resistant hardware and manually adjustable pan/tilt positioning. The
wall mount is fabricated from 10-gauge steel and will support loads up to 40 pounds (18 kg).
INSTALLATION
To install the HSWM12 mount, perform the following steps (refer to Figure 1):
1. Determine the mounting location. The mounting surface should be able to support four
times the combined weight of the mount, enclosure, and camera.
2. Use the flanged end of the HSWM12 as a template and mark the four fastener hole posi-
tions on the mounting surface. Set the HSWM12 mount to the side and prepare the holes
for the fasteners.
3. Position the HSWM12 mount over the mounting holes. Secure with a minimum of four
3/8-inch fasteners (not supplied). If you install the HSWM12 outdoors, seal the fastener
holes with an appropriate sealant to prevent water damage. Apply the sealant between
the mount and the mounting surface.
4. Attach the enclosure or camera with the two 1/4-20 tamper-resistant screws (supplied).
5. Loosen the tamper-resistant bolts on the top and lower brackets. Adjust the pan and tilt to
the desired settings. Tighten bolts and lock into place.
Service Manual
If you need parts for your unit, obtain a service manual in one of the following ways:
• Go to Pelco’s web site at ftp://www.pelco.com and find service manual C259SM.
• Contact Pelco’s Literature Department and request service manual C259SM.
C259M-A (3/00)
HSWM12 High-Security
Wall Mount
300 W. Pontiac Way,
Clovis, CA 93612-5699
USA
In North America & Canada:
Tel (800) 289-9100
FAX (800) 289-9150
International Customers:
Tel +1 (559) 292-1981
FAX +1 (559) 348-1120
www.pelco.com
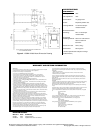
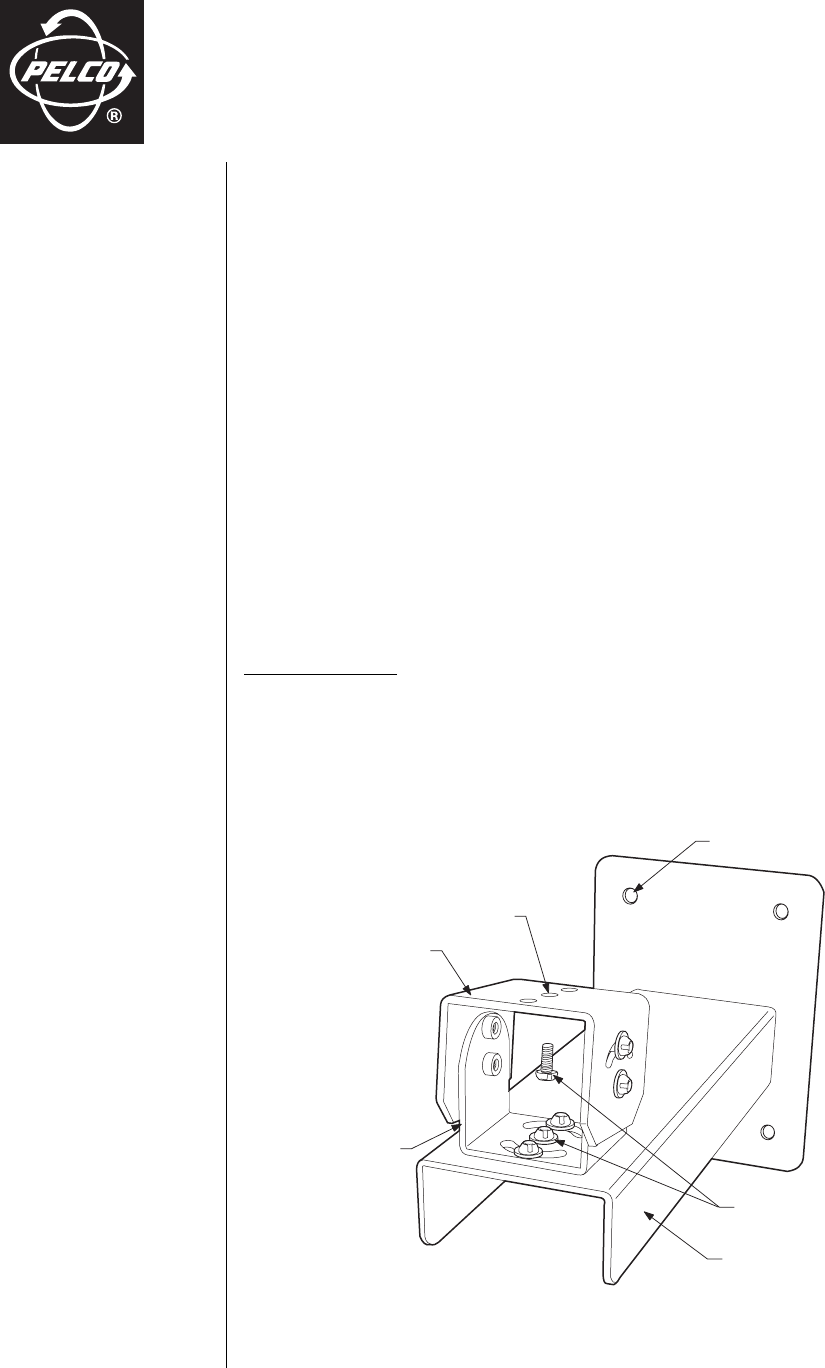
Figure 1. HSWM12 Wall Mount
FASTENER HOLE
ENCLOSURE/CAMERA
MOUNTING HOLES
TOP BRACKET
LOWER
BRACKET
TAMPER-
RESISTANT
SCREWS
ARM