


7
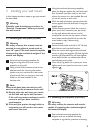
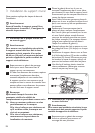
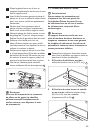
2 Determine the correct diameter of bolt to
use by carefully trying one bolt each from
Bags 1 - 4 of the hardware kit. Do not force
any of the bolts – if you feel resistance stop
immediately and try a smaller diameter bolt.
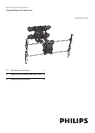
3 Attach the arms to the back of your display
using the bolts identified in Steps 1 and 2
along with the corresponding Lock Washer
(C, F, I, or L).
5
5
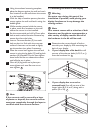
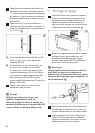
A) If you are using the M4, M5, or M6 bolts
(Bags 1, 2, and 3 respectively), you will also
need to use the M6 Washers (O).
B) If you are using one of the longer bolts on
a display with a curved or recessed back,
you will also use a spacer (M or N). Use the
smaller spacer (M) for M4 and M5 bolts and
the large spacer (N) for M6 and M8 bolts.
4
Make sure all screws are secure, but do not
over-tighten them.
E Tip
Use a longer bolt and spacer for displays
with curved or recessed backs. Do not use
the M6 Washer (O) if you are using the M8
Bolts (J or K).
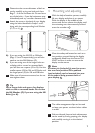
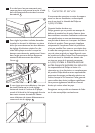
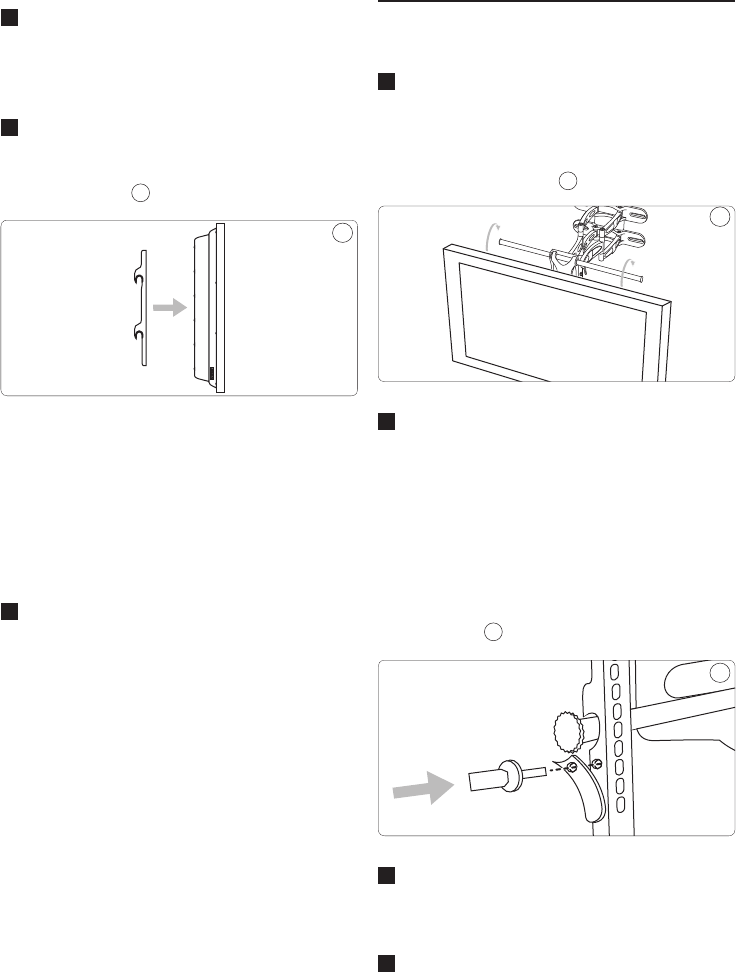
4 Mounting and adjusting
1 With the help of another person, carefully
lift your display and place it on mount.
Place the display in the middle of the
mount, and do not release the display until
the mounting arms have securely hooked
onto the crossbars.
6
6
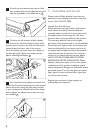
2
Move the safety tab located on each arm
into position to avoid having the display
accidentally lifted from the mount. This
MUST be done in order to secure the
display to the mount.
D Note
A cotter pin (included) is used to secure
the arm into position OR a padlock
(not included) can be inserted into one
of the tabs to help prevent theft of
your display.
7
7
3
The cable management clips can be used
to keep your power cord and other cables
in order.
4
Side-to-side and front-to-back adjustments
can be made by firmly grasping your display
and carefully moving it to the desired
position.