


If an “F” appears in the upper
right hand corner of the
screen, it indicates the TV is in
factory mode. To restore
normal operation, press and
hold the CHANNEL DOWN
and the VOLUME DOWN
keyboard buttons on the side
of the TV for a few seconds.
The “F” should
disappear.
If the TV still does not communicate
with the internal interactive card,
select FEATURES in the CONFIGURA-
TION menu and press Æ to enter the
FEATURES menu.
Press
ï
and select LOW POWER
STANDBY.
Press Æ and select NO.
D
POWER
SLEEP
GUID E
CH
CC
RESET
SMART
GUEST
DCM
SETUP
TEXT
RECALL
1
4
7
8
0
9
2
5 6
3
To power outlet
AC in
To wall socket
Change the settings of the
channels as desired (delete
unwanted channels, assign
digital channels, assign input
sources). Refer to “Changing the
settings of a channel” section in
this guide.
Change the TV settings as
desired. Refer to “Conguring
Volume / Picture and Other
Common settings” section in this
guide. For detailed explanation,
refer to the user manual.
Record the TV conguration
settings into a USB device. Refer
to the “Cloning the TV
conguration” section in this
guide.
Slide the button
to the Setup
position.
Power on the TV.
Connect the RF signal and
plug the TV into a power
outlet.
Press M on the remote to
display the Setup menu.
Press ï repeatedly until
AUTO INSTALL TV is
highlighted.
Press Æ to start automatic
channel installation.
A
B
C
D
E
F
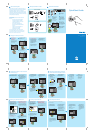
How to use this guide What you can nd in the box
2
Stand alone installation
3
Quick Start Guide
4
Changing the settings of a channel
Conguring the Volume / Picture and Other
Common settings
Note: This section is only
applicable after channels
have been installed in the
TV (see Section 3 on
channel installation).
Press the M button on the remote
to display the Setup menu.
Press ï repeatedly until CHANNEL
INSTALL is highlighted.
Cloning the TV conguration to a USB Device
and the USB Device conguration to the TV
5
Installing a Pay-Per-View SmartCard
Installing a Pay-Per-View Box
6
M6 (18mm) x 4
M5 (25mm) x 2
x 2
Quick Start Guide
x 4
Quick Start Guide
37” / 42” / 52” models
A
Set the SOURCE option to USB.
To clone the TV conguration to
the USB device, set the DIREC-
TION option to UPLOAD.
A
Press Æ to enter into the CHANNEL
INSTALL menu and press 0 - 9 to
select a channel.
B
© 2008 Koninklijke Philips N.V.
All rights reserved
Document order number: 3139 285 20011
Press ï to select INPUT and press Í or
Æ to select the input source.
C
Press ï repeatedly until DIGITAL is
highlighted. Press Æ to select YES.
Set the RF CHANNEL NUMBER to
the physical channel where the
digital program is located and the
MPEG PROGRAM NUMBER to the
program desired within that
physical channel.
Note : You can also highlight the
DIGITAL CH SCROLL item and press Í
or Æ to select the digital channel
numbers.
D
Press ï to select RINGS and press Æ
repeatedly to select RING 1 to 4.
Press Î or ï to save or remove the
channel from each ring.
The ‘X’ means the channel is saved.
E
Press M on the remote to display the
SETUP menu and press ï repeatedly
until CONFIGURATION is selected.
A
Press Æ to enter into the CONFIGURA-
TION menu and press Æ again to enter
the SWITCH ON / OSD menu.
Press ï to select SWITCH ON CHANNEL.
Press Æ to select the channel that you
want to appear when the TV is powered
on. Do likewise for SWITCH ON
VOLUME, SWITCH ON PIC FMT and
WELCOME MESSAGE.
B
In the CONFIGURATION menu, select
PICTURE / SOUND. Press Í or Æ to
enter the PICTURE / SOUND menu
and change to your desired picture
and sound settings.
C
D
E
In the CONFIGURATION menu, select
CONTROL. Press Í or Æ to enter the
CONTROL menu and select MAX
VOLUME to set your desired maximum
volume setting.
In the CONFIGURATION menu,
select VIDEO ADJUSTMENT
and press Æ to enter the VIDEO
ADJUSTMENT menu. Select
HORIZONTAL or VERTICAL and use
Í or Æ to adjust picture horizontally
or vertically.
A
Note : Ensure that the TV is turned o.
Insert the Pay-Per-View SmartCard into
the SmartCard slot on the rear of the TV
(available for certain models only) and
connect the other cables as directed by
the Pay-Per-View provider.
After SmartCard has been inserted and
the cables connected, turn on the TV.
B
C
26” / 32” models
To power outlet
POWER
SLEEP
GUID E
CH
CC
RESE T
SMART
GUEST
DCM
SETUP
TEXT
RECALL
1
4
7
8
0
9
2
5 6
3
POWER
SLEEP
GUID E
CH
CC
RESET
SMART
GUEST
DCM
SETUP
TEXT
RECALL
M
A/CH
1
4
7
8
0
9
2
5 6
3
+
++
_
POWER
SLEEP
GUID E
CH
CC
RESET
SMART
GUEST
DCM
SETUP
TEXT
RECALL
M
A/CH
1
4
7
8
0
9
2
5 6
3
+
++
_
POWER
SLEEP
GUID E
CH
CC
RESET
SMART
GUEST
DCM
SETUP
TEXT
RECALL
M
A/CH
1
4
7
8
0
9
2
5 6
3
+
++
_
POWER
SLEEP
GUID E
CH
CC
RESET
SMART
GUEST
DCM
SETUP
TEXT
RECALL
M
A/CH
1
4
7
8
0
9
2
5 6
3
+
++
_
POWER
SLEEP
GUID E
CH
CC
RESET
SMART
GUEST
DCM
SETUP
TEXT
RECALL
M
A/CH
1
4
7
8
0
9
2
5 6
3
+
++
_
7
8
POWER
SLEEP
GUID E
CH
CC
RESET
SMART
GUEST
DCM
SETUP
TEXT
RECALL
M
A/CH
1
4
7
8
0
9
2
5 6
3
+
++
_
POWER
SLEEP
GUID E
CH
CC
RESET
SMART
GUEST
DCM
SETUP
TEXT
RECALL
M
A/CH
1
4
7
8
0
9
2
5 6
3
+
++
_
POWER
SLEEP
GUID E
CH
CC
RESET
SMART
GUEST
DCM
SETUP
TEXT
RECALL
M
A/CH
1
4
7
8
0
9
2
5 6
3
+
++
_
Note : Step B in this section may not be needed
as the Communication mode by default is set
to SP - SPI. Perform this step only if you want
to conrm the Communication mode is set
correctly.
In the SETUP menu, select COMMUNICATION.
Press Æ to enter the COMMUNICATION menu.
Press Æ to select SP - SPI. Press ï and select
STORE and press Æ button to store selection.
C
Press RECALL on the remote and check SP
- SPI is ONLINE. If SP - SPI shows
“OFFLINE”, check that the RJ12 cable and
connection between terminal and TV.
is properly connected.
Connect to the Data 1 (RJ 12)
connector at the rear of the TV.
Sample of
Pay-Per-View
box
OR
NOTE : Perform this step only if
you are installing digital channels.
Diagnosing Basic Problems
9
If the TV does not seem to communicate with the external interactive terminal,
perform the following steps:
A
Press RECALL on the remote
(in Setup position). Item 08 of
the menu should read COM-
MUNICATION SP - SPI ONLINE.
B
POWER
SLEEP
GUID E
CH
CC
RESET
SMART
GUEST
DCM
SETUP
TEXT
RECALL
1
4
7
8
0
9
2
5 6
3
01 26HF7945D / 27
02 SV1A0707100003
03 IC7U1 - 0 .11 / M3 .22
04 LC72HUL1 - 0 .13
05 OPT (30) 22 20 1C 23
06 OPT - MODEL 26HF7945D / 27
07
08 COMMUNICATION SP - SPI ONLINE
09 TV 2 NOT TUNED
If it is not SP -SPI, press the M button
on the remote to display the Setup
menu. Press ï to select COMMUNICA-
TION and press Æ repeatedly to select
SP - SPI.
Press Æ to select STORE and press Æ to
store selection.
If the TV still does not communicate
with the external interactive termi-
nal, press RECALL on the remote.
Check item 08 of the menu.
For Pay-Per-View Box, if it reads
“COMMUNICATION SP -SPI OFFLINE”,
check that the RJ12 cable and
connection between terminal and TV
is properly connected.
For the Pay-Per-View SmartCard,
check the SmartCard is correctly
inserted into the card slot of the TV.
POWER
SLEEP
GUID E
CH
CC
RESET
SMART
GUEST
DCM
SETUP
TEXT
RECALL
1
4
7
8
0
9
2
5 6
3
01 26HF7945D / 27
02 SV1A0707100003
03 IC7U1 - 0 .11 / M3 .22
04 LC72HUL1 - 0 .13
05 OPT (30) 22 20 1C 23
06 OPT - MODEL 26HF7945D / 27
07
08 COMMUNICATION SP - SPI OFFLINE
09 TV 2 NOT TUNED
Press RECALL on the remote and check SP -
SPI is ONLINE. If SP - SPI shows “OFFLINE”,
check the Pay-Per-View SmartCard is correctly
inserted into the card slot
of the TV.
D
COMMUNICATION
COMMUNICATION SP - SPI
STORE >
DCM TYPE >
A
Note : Step B in this section may not
be needed as the COMMUNICATION mode
by default is set to SP - SPI. Perform
this step only if you want to conrm the COM-
MUNICATION mode is set correctly.
In the SETUP menu, select COMMUNICATION. Press
Æ to enter the COMMUNICATION menu. Press
Æ to select SP - SPI. Press ï to select STORE and
press Æ to store your selection.
COMMUNICATION
COMMUNICATION SP - SPI
STORE >
DCM TYPE >
B
In the CONFIGURATION menu, select
FEATURES and press Æ to enter the
FEATURES menu.
Press ï and select LOW POWER
STANDBY.
Press Æ and select NO.
Note: For the Pay-Per-View SmartCard to
function, NO must be selected.
POWER
SLEEP
GUID E
CH
CC
RESET
SMART
GUEST
DCM
SETUP
TEXT
RECALL
1
4
7
8
0
9
2
5 6
3
01 26HF7945D / 27
02 SV1A0707100003
03 IC7U1 - 0 .11 / M3 .22
04 LC72HUL1 - 0 .13
05 OPT (30) 22 20 1C 23
06 OPT - MODEL 26HF7945D / 27
07
08 COMMUNICATION SP - SPI OFFLINE
09 TV 2 NOT TUNED
POWER
SLEEP
GUID E
CH
CC
RESET
SMART
GUEST
DCM
SETUP
TEXT
RECALL
1
4
7
8
0
9
2
5 6
3
01 26HF7945D / 27
02 SV1A0707100003
03 IC7U1 - 0 .11 / M3 .22
04 LC72HUL1 - 0 .13
05 OPT (30) 22 20 1C 23
06 OPT - MODEL 26HF7945D / 27
07
08 COMMUNICATION SP - SPI OFFLINE
09 TV 2 NOT TUNED
CHANNEL INSTALL
SWITCH ON / OSD
WELCOME MESSAGE >
SWITCH ON CHANNEL TV 2
SWITCH ON VOLUME 30
SWITCH ON PIC FMT WIDESCREEN
POWER ON LAST STATUS
VOLUME INDICATOR YES
CHANNEL DISPLAY ALL
CHANNEL INSTALL
SETUP
LANGUAGE ENGLISH
COMMUNICATION >
CHANNEL INSTALL >
AUTO INSTALL TV >
CABLE TUNING NO
USE CHANNEL TABLE NO
CURRENT RING RING1
DIGITAL SETUP >
CONFIGURATION >
CHANNEL INSTALL
PICTURE / SOUND
BRIGHTNESS 45
COLOR 38
CONTRAST 70
SHARPNESS 50
TINT 36
ACTIVE CONTROL YES
TREBLE 52
BASS 55
BALANCE 0
AVL ON
CHANNEL INSTALL
CONTROL
ESP
DIGIT TIMEOUT
2
3.0
3DIGIT ENTRY NO
SOURCE MENU YES
CHANNEL NO
MIN VOLUME 10
MAX VOLUME 35
CHANNEL INSTALL
VIDEO ADJUSTMENT
HORIZONTAL < >
VERTICAL < >
CHANNEL INSTALL
SETUP
LANGUAGE ENGLISH
COMMUNICATION >
CHANNEL INSTALL >
AUTO INSTALL TV >
CABLE TUNING NO
USE CHANNEL TABLE NO
CURRENT RING RING1
DIGITAL SETUP
>
CONFIGURATION
>
POWER
SLEEP
GUID E
CH
CC
RESET
SMART
GUEST
DCM
SETUP
TEXT
RECALL
M
A/CH
1
4
7
8
0
9
2
5 6
3
+
++
_
CHANNEL INSTALL
CHANNEL
INPUT
DIGITAL
RINGS
(1 ) (2 ) (3 ) (4 )
LABEL ) >
MUTE NONE
(
TUNER
TV 8
NO
CHANNEL INSTALL
CHANNEL
INPUT TUNER
DIGITAL NO
RINGS (1 ) (2 ) (3 ) (4 )
LABEL
) >
MUTE NONE
CHANNEL INSTALL
TV 8
(
CHANNEL
INPUT TUNER
DIGITAL
RINGS (1X ) (2 ) (3 ) (4 )
LABEL ( ) >
MUTE NONE
CHANNEL INSTALL
TV 8
NO
SETUP
LANGUAGE ENGLISH
COMMUNICATION >
CHANNEL INSTALL >
AUTO INSTALL TV >
CABLE TUNING NO
USE CHANNEL TABLE NO
CURRENT RING RING1
DIGITAL SETUP >
CONFIGURATION >
Note : Ensure that the TV is turned o.
Insert the RJ12 cable of the Pay-Per-
View box to the DATA 1 (RJ12)
connector on the rear of the TV and
connect the other cables as directed
by the Pay-Per-View provider. After
all the connection of cables are
completed, turn on the TV.
SLEEP
GUID E
CH
CC
RESET
SMART
GUEST
DCM
SETUP
TEXT
M
A/CH
1
4
7
8
0
9
2
5 6
3
+
++
_
SLEEP
GUID E
CH
CC
RESET
SMART
GUEST
DCM
SETUP
TEXT
M
A/CH
1
4
7
8
0
9
2
5 6
3
+
++
_
SLEEP
GUID E
CH
CC
RESE T
SMART
GUEST
DCM
SETUP
TEXT
M
A/CH
1
4
7
8
0
9
2
5 6
3
+
++
_
SLEEP
GUID E
CH
CC
RESET
SMART
GUEST
DCM
SETUP
TEXT
M
A/CH
1
4
7
8
0
9
2
5 6
3
+
++
_
F
Set the SW TYPE option to
CLONE DATA.
Highlight START and press
Æ to clone the USB device
to the TV conguration.
The TV automatically
restarts with the cloned
software installed.
E
To clone the USB device to
the another TV, insert the
USB device in the USB Side
slot. Proceed to SW DOWN-
LOAD as instructed on the
previous page.
Set the SOURCE option to
USB.
Set the DIRECTION option
to DOWNLOAD.
C
SLEEP
GUID E
CH
CC
RESET
SMART
GUEST
DCM
SETUP
TEXT
M
A/CH
1
4
7
8
0
9
2
5 6
3
+
++
_
FEATURES
SMARTPOWER LOW
SMART SOUND KEY SMART SOUND
DEFAULT HDMI 1 AUDIO AV AUDIO
LOW POWER STANDBY NO
LOUD SPEAKER MUTE NO
SW DOWNLOAD >
DEFAULT HDMI 2 AUDIO AV AUDIO
FEATURES
SMARTPOWER LOW
SMART SOUND KEY SMART SOUND
DEFAULT HDMI AUDIO AV AUDIO
LOW POWER STANDBY NO
LOUD SPEAKER MUTE NO
RF DOWNLOAD >
CVI
P C
AUDIO IN
HDMI 1
AV 1
HDMI 2
SERVICE
RS 232
SPDIF
DATA 1
S- VIDEO
VGA
8
AUDIO IN
AV
To wall socket
B
Press the M button on the
remote to display the Setup
menu.
Enter CONFIGURATION uisng ï to
scroll down. Press Æ to enter.
Enter FEATURES.
Enter SW DOWNLOAD.
Prepare the USB stick by
creating a folder called
“SSB_NVM” in the root direc-
tory. Then create a folder within
this folder called
“ChannelTable”.
Insert the prepared USB Stick
into the USB slot on the TV.
POWER
SLEEP
GUID E
CH
CC
RESET
SMART
GUEST
DCM
SETUP
TEXT
RECALL
M
A/CH
1
4
7
8
0
9
2
5 6
3
+
++
_
SOURCE USB
DIRECTION
DOWNLOAD
SW TYPE
ALL
START
>
SW DOWNLOAD
C
SOURCE USB
DIRECTION
UPLOAD
SW TYPE
ALL
START
>
SW DOWNLOAD
POWER
SLEEP
GUID E
CH
CC
RESET
SMART
GUEST
DCM
SETUP
TEXT
RECALL
M
A/CH
1
4
7
8
0
9
2
5 6
3
+
++
_
SOURCE USB
DIRECTION
DOWNLOAD
SW TYPE
ALL
START
>
SW DOWNLOAD
POWER
SLEEP
GUID E
CH
CC
RESET
SMART
GUEST
DCM
SETUP
TEXT
RECALL
M
A/CH
1
4
7
8
0
9
2
5 6
3
+
++
_
D
Set the SW TYPE option as
CLONE DATA.
Highlight START and press
Æ to clone the TV congu-
ration to the USB device.
POWER
SLEEP
GUID E
CH
CC
RESET
SMART
GUEST
DCM
SETUP
TEXT
RECALL
M
A/CH
1
4
7
8
0
9
2
5 6
3
+
++
_
CHANNEL INSTALL
CHANNEL TV 2
INPUT TUNER
DIGITAL CH SCROLL >
RF CHANNEL NUMBER 8
MPEG PROGRAM NUMBER 2
RINGS (1 ) (2 ) (3 ) (4 )
LABEL ( ) >
MUTE NONE
CHANNEL INSTALL
DIGITAL YES
Sample of
Pay-Per-View
SmartCard
The purpose of this Quick Start Guide is to assist you
in getting this Philips Commercial television installed
as quickly as possible. It contains the necessary
information needed for most typical connections and
installations. For detailed documentation of additional
features, please consult the user manual or online help
at www.philips.com/hospitality.
Go through this Quick Start Guide and read the
instructions on :
How to:
- perform a Stand alone installation
- change the settings of a channel
- congure the Volume / Picture and
other common settings
- clone the TV conguration to a
USB device and from the USB device
to the TV
- install a Pay-Per-View SmartCard
- install a Pay-Per-View Box
- diagnose basic problems
The complete directions for use can be downloaded
from the Philips Professional & Business Solutions website
(www.philips.com/hospitality) by selecting the Hospitality
Products link and then the model of the TV.
1