


38
Chapter 5 Setting/Changing Sounds (Patches)
7. Press [PLAY] to return to Play mode.
* If you send data for a single patch to the GR-33, you will need
to perform the Patch Write operation (p. 36) on the GR-33 to
store the patch in a patch memory location. When writing the
received patch, you can specify the desired destination, so you
are not forced to overwrite the same-numbered patch if it is one
you wish to keep.
* Except for the receiving of A11 through D84 as single patches,
no special conditions apply for storing patch or system
parameter data received via SysEx.
* Since data can be lost should unexpected events occur, we
strongly recommend regularly using the Bulk Dump feature to
back up your GR-33 data.
Naming the Patches (PATCH NAME)
You can assign a name of up to twelve characters to each
patch. Assign a name that will help you remember the
sound, or the song for which the patch is intended.
■ Assigning a Name to a Patch
1. Select the patch whose name you want to change, and
press [COMMON] to enter Patch Edit mode.
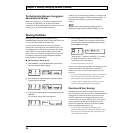
2. Press [PARAMETER] to select “PATCH NAME.”
fig.5-10
3. Use [PARAMETER] to move the cursor to the character
you wish to modify.
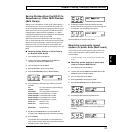
4. Turn [VALUE] to select the desired character, number
or symbol.
fig.5-11
* You can press [COMMON] to switch between uppercase and
lowercase characters.
5. Repeat Steps 3 and 4 to complete the name.
6. Press [WRITE] to perform the Patch Write operation (p.
36).
* After performing the Patch Write operation, you will
automatically return to Play mode.
* If you don’t wish to save the Patch’s new name, press [PLAY]
to return to Play mode instead of pressing [WRITE].
Setting the Volume Level of Each Patch (PATCH LEVEL)
For things like switching between multiple patches while
playing, having the volume of backing patches set lower than
the volume of solo patches is a convenient feature. You can
make these kinds of volume settings by recording the patch
level (PATCH LEVEL) of each patch.
■ Determining and Recording Patch Volumes
1. Select the patch whose volume you want to change, and
press [COMMON] to enter Patch Edit mode.
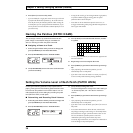
2. Press [PARAMETER] to select “PATCH LEVEL.”
fig.5-12
3. Use [VALUE] to change the value.
The value changes within a range of 0 to 100. A setting of
“0” silences to patch, and “100” sets it to maximum
volume.
4. Press [WRITE] to perform the Patch Write operation (p.
36).
* After performing the Patch Write operation, you will
automatically return to Play mode.
* If you don’t want to save the Patch, press [PLAY] to return to
Play mode.
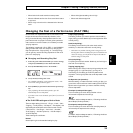
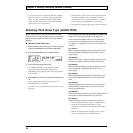
* Even with PATCH LEVEL values the same, volume levels
may change according to other settings. In the example below,
the level has been set high. If PATCH LEVEL is then set to a
low level, the balance of another patch is used. (The
combination of the settings shown below may cause
excessively high volume levels, so be careful not to allow this to
result in damage to amps and speakers.)
Cursor
Space
—
—
—