


12_ installation
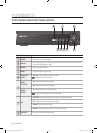
installation
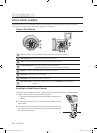
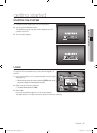
NIGHT-VISION CAMERA
Equipped with the IR LED and the illumination sensor, enables you to monitor at night as well as in daytime.
You can also use it indoors as well since it is designed for outdoor use.
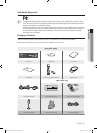
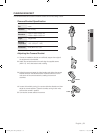
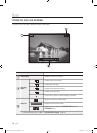
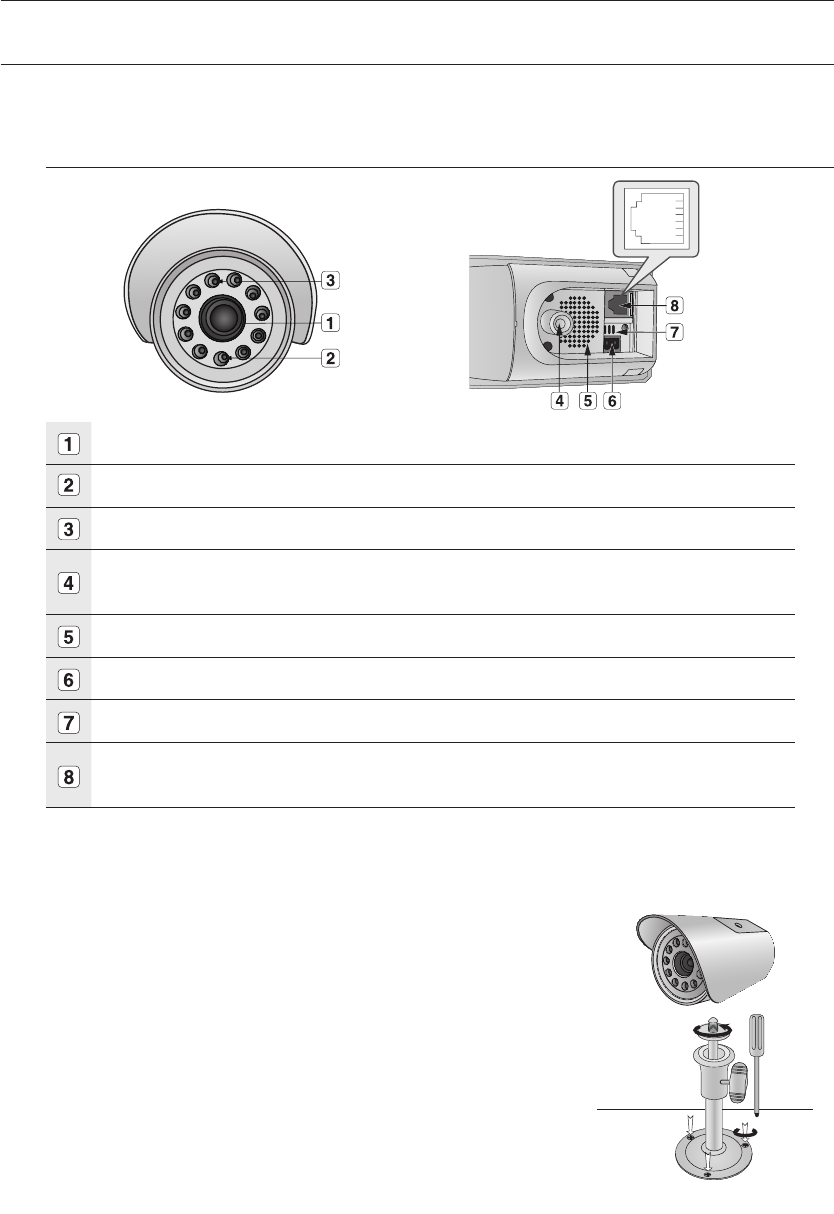
Camera Part Names
Lens : Focal length of 3.8mm enables you to cover relatively longer range of monitoring.
Illunination Sensor : Detects incoming light to control the IR LED.
IR LED : This is an infrared LED that is controlled by the illumination sensor.
Camera fitting groove : Groove that is used to fit the camera bracket.
There exist two grooves; one on the top and one on the bottom.
Speaker : Transfers out the audio signal incoming from the monitor.
Sensor jack : Connects the sensor to the camera.
Microphone : Transfers the onsite sound to the monitor.
6-pin modular jack : Connects the camera to the monitor. See “Pin Setting” for the connection.
(page 11)
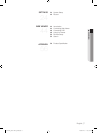
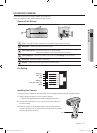
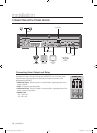
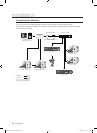
Installing the Night-Vision Camera
The camera can be installed on the wall, ceiling, shelf or a desired position using the provided bracket.
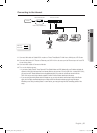
Select a position where you want to install the camera.
A place where it can tolerate 5 times of the total weight of the camera before
installing.
Use the screw bolts (M4 X L15) to mount the camera bracket onto the
wall or ceiling.
Place the camera on the selected position and fit the hole either on the
top or the bottom of the camera into the fixing bolt of the bracket, and
turn the camera clockwise.
1.
2.
3.
M4 x L15 sized screws
wall or ceiling
02235A_SHR-1041K_ENG.indb 12 2009-02-17 오전 10:50:28