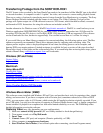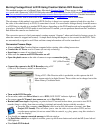
8. Connect camera (DV port) to computer using Firewire cable. Camera Connected message should show
on screen. If it isn’t make sure the mode switch is set to camera mode:
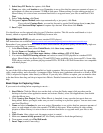
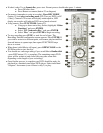
9. Click Import button to start capturing the whole tape from current point,
OR
10. Use Capture Controls below the screen to preview and cue the tape a few seconds before you want to
begin capturing. Press play, then Import button or space bar to begin capturing.
iMovie will create separate clips each time the capture process is interrupted.
11. You can now edit your movie within iMovie before exporting (see iMovie help for more info).
Exporting/Sharing your Movie
iMovie has many options for exporting movies in a variety of formats. Look in the Sharing your finished movie
section of the iMovie help for details.
Exporting to a DVD playable in a standard DVD player, from iMovie
1. Choose Share > iDVD
2. Click Share to open iDVD
3. Select theme and configure as needed
When you are finished editing the iDVD project, and ready to burn to DVD:
4. Check free space on your hard drive - make sure you have twice as much as your project uses before
burning (check Project > Project Info)
5. Click the Burn DVD icon, or select File>Burn DVD
6. Insert blank recordable DVD (DVD-R generally recommended)
Automatically exporting a movie from camera with Magic iMovie (with title, scene transitions,
music soundtrack)
1. Make sure camera is fully powered (AC cord firmly attached or fresh charged battery)
2. Turn camera on and set to Play/Edit mode
3. Connect camera to computer using Firewire cable.
4. Start iMovie. Click the iMovie icon on the dock, or from the Finder menu (click anywhere on the
desktop to deselect other application menus and activate Finder), select Go>Applications, then double
click the iMovie icon.
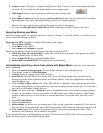
5. Click the Make a Magic iMovie icon. (Note: When iMovie is launched, it may open the last movie that
was being edited. Before you begin, make sure you aren’t working on a previous project. You can start a
new one from File>Make a Magic iMovie)
6. Name your movie and select a location to save to. Remember to use a drive that has generous amounts
of space, as each minute of video can consume 178 MB of disk space. When working on video editing
projects at Mann Library it is wise to have an external hard drive to copy and move your files to and
from.
7. Select DV video format.
8. Click the Create button
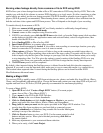
9. Select settings you wish to use for creating movie (title, rewind, transitions, soundtrack). If you wish to
have the movie file automatically sent to iDVD for burning to DVD afterward, check that option as well.
10. Click Create button. The camera will automatically start, with video captured in real time. A title,
transitions, and soundtrack will be added as designated.
If you selected the export to iDVD option, your movie will be loaded into iDVD where you can set up titles,
menus and other options. Check iDVD help for details


