


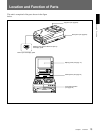
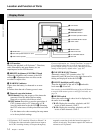

Chapter 1 Overview
Chapter 1 Overview 21
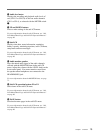
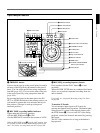
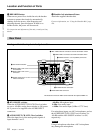
4 AUDIO IN button
In insert editing, press this button together with the
ENTRY/SHIFT button 5 to set audio IN point
separately from video IN point (audio split editing).
After setting audio IN points, you can press this button
alone to display them in the sub LCD.
5 ENTRY/SHIFT button
Press together with the IN button, the OUT button, or
the AUDIO IN button to set edit points. The buttons
for the edit points that you set light.
Pressing this button together with a button with two
functions, such as the REC/SEQ button, selects the
function indicated in orange on the button.
6 DELETE button
Press together with the IN/OUT buttons 7 or the
AUDIO IN button 4 to delete edit points. The buttons
go out or flash. A flashing button indicates that the edit
point needs to be set again.
The DELETE button flashes to indicate contradictions
that will prevent previews and automatic editing, for
example when the durations are different on the player
and recorder, or when the IN and OUT points are equal
or reversed. In this case, set the edit points again.
7 IN/OUT (IN point/OUT point) buttons
Press these buttons, lighting them, together with the
ENTRY/SHIFT button 5 to set an IN point (edit start
point) or OUT point (end point). After setting edit
points, you can press either of these buttons alone to
display the IN or OUT point in the sub LCD.
8 PREVIEW button
Press this button, lighting it, when you want to preview
editing results on the monitor after setting edit points
but before executing an edit. If an IN point has not
been set, the point where you press this button is used
as the IN point in the preview. This button lights
during the preview and goes out when the preview
finishes.
9 AUTO EDIT button
After setting edit points, press this button, lighting it to
execute an automatic edit (record to the recorder). If an
IN point has not been set, the point where you press
this button is used as the IN point in the automatic edit.
This button lights during execution and goes out when
execution finishes.
!º REVIEW button
After executing an automatic edit, press this button,
lighting it to review the results of the edit.
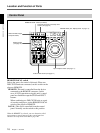
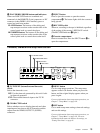
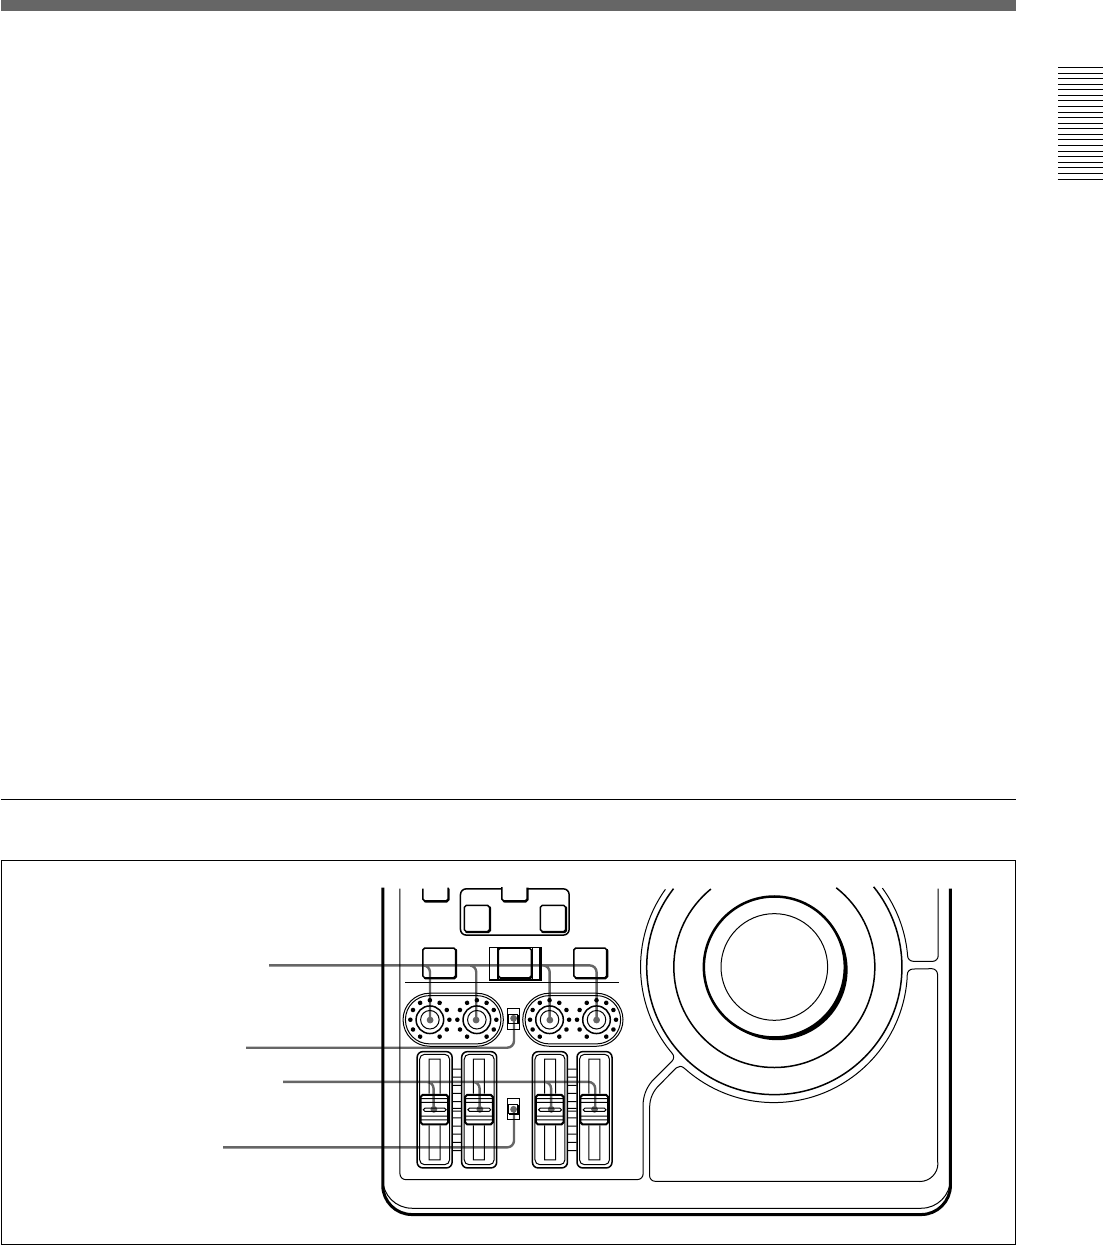
Audio control section
1 AUDIO INPUT CH-1 to CH-4 level adjustment
knobs
Adjust the levels for each channel of analog audio
signals input to the AUDIO INPUT CH-1/CH-2
connectors on the rear panel, or of the audio signals
input to the SDI, SDTI(QSDI), and DV IN/OUT
connectors of the optional boards.
2 AUDIO INPUT PRESET/VARIABLE switch
Select the adjustment function for the levels of analog
audio signals input to the AUDIO INPUT CH-1/CH-2
connectors on the rear panel, or of the audio signals
input to the SDI, SDTI(QSDI), and DV IN/OUT
connectors of the optional boards.
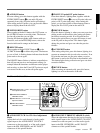
IN OUT
AUTO EDIT
AUDIO INPUT
PB
AUDIO
PREVIEW REVIEW
PRESET
VARIABLE
CH-1
PRESET
VARIABLE
CH-2 CH-3 CH-4
2 AUDIO INPUT PRESET/
VARIABLE switch
4 PB AUDIO PRESET/
VARIABLE switch
3 PB AUDIO CH-1 to CH-4 level
adjustment sliders
1 AUDIO INPUT CH-1 to CH-4
level adjustment knobs