


26
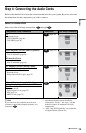
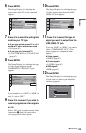
13Press X/x to select the type of
jack (if any) you are using to
connect to an amplifier (receiver),
then press ENTER.
Choose the item that matches the audio
connection you selected on pages 20 to
23 ( through ).
• If you connect just a TV and nothing
else, select “NO.” Quick Setup is
finished and connections are complete.
• Select “LINE OUTPUT L/R
(AUDIO).” Quick Setup is finished and
connections are complete.
• Select “DIGITAL OUTPUT.” The
Setup Display for “DOLBY DIGITAL”
appears.
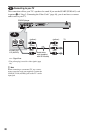
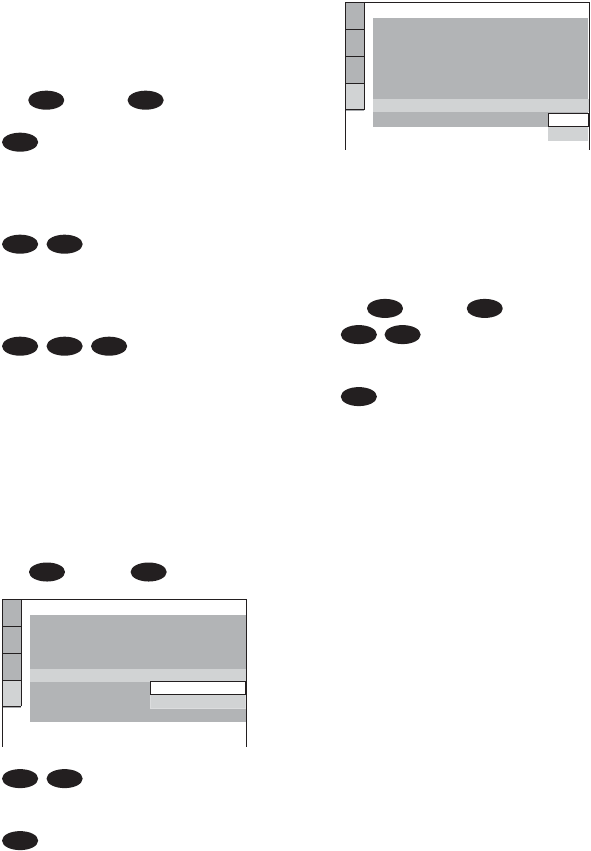
14Press X/x to select the type of
Dolby Digital signal you wish to
send to your amplifier (receiver).
Choose the signal that matches the audio
connection you selected on pages 21 to
23 ( through ).
• D-PCM (page 71)
• DOLBY DIGITAL (only if the
amplifier (receiver) has a Dolby Digital
decoder) (page 71)
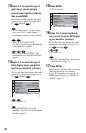
15Press ENTER.
“DTS” is selected.
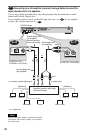
16Press X/x to select whether or
not you wish to send a DTS signal
to your amplifier (receiver).
Choose the item that matches the audio
connection you selected on pages 21 to
23 ( through ).
• OFF (page 71)
• ON (only if the amplifier (receiver) has
a DTS decoder) (page 71)
17Press ENTER.
Quick Setup is finished. All connections
and setup operations are complete.
If your AV amplifier (receiver) has an
MPEG audio decoder, set “MPEG” to
“MPEG” (page 71).
A D
A
B-1 C-1
B-2 C-2 D
B D
AUDIO SETUP
AUDIO ATT:
AUDIO DRC:
DIGITAL OUT:
DOLBY DIGITAL:
MPEG:
OFF
STANDARD
ON
DOWNMIX:
DOLBY SURROUND
D-PCM
48kHz/96kHz PCM:
48kHz/16bit
DTS:
DOLBY DIGITAL
D-PCM
B-2 C-2
D
AUDIO SETUP
AUDIO ATT:
AUDIO DRC:
DIGITAL OUT:
DOLBY DIGITAL:
MPEG:
OFF
STANDARD
ON
DOWNMIX:
DOLBY SURROUND
D-PCM
PCM
DTS:
OFF
OFF
ON
48kHz/96kHz PCM:
B D
B-2 C-2
D