


84
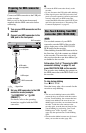
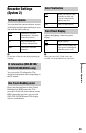
Aerial Reception
Settings (Channel)
You can make tuner and channel settings for
the recorder.
Presets channels automatically.
1 Select your country/region using </
,, and press m.
2 Select the channel type you want to
preset using </,, and press m.
3 Select an item using M/m, and change
the settings using </, or number
buttons.
• When you set “Digital Source” to
“Antenna” in “Easy Setup” (page 23),
set the following items.
– “Service Type”: To scan all the
channels including pay-per-view
digital channels, select “All
Services.” To scan only free
channels, select “Free Services.”
– “Start Frequency”/“End Frequency”:
Set the start/end frequency for scan.
• When you set “Digital Source” to
“Cable” in “Easy Setup” (page 23), set
the following items.
– “Service Type”: See above.
– “Scan Type”: Normally select
“Quick Scan” for quick tuning. If no
channel is found using “Quick
Scan,” try “Full Scan” though it may
take some time.
– “Frequency”: Set this according to
the information supplied from your
cable provider.
– “Network ID”: Set this according to
the information supplied from your
cable provider. The recorder will
receive the selected network.
4 Select “Start” using M/m, and press .
The recorder starts scanning the
channels.
5 Select “Yes,” and press .
When you select “All” in step 2, the
recorder proceeds to scan analogue
channels.
To cancel scanning
Press O RETURN. When a result display
appears, select “Yes” to save the result.
b
When you set channels using “Auto Channel
Setting,” the timer settings in the Timer List will
be erased.
Presets digital channels on a specific
frequency.
When some digital terrestrial channels
cannot be set using “Auto Channel Setting,”
use this function to set them manually.
1 Select “Service Type” using </,,
and press m (page 84).
2 Set “Channel Number” using </,.
The “Frequency” and “Band width” will
be adjusted accordingly. When you
want to set “Frequency” and “Band
width” manually, select the item using
M/m, and change the settings using </
, or number buttons.
3 Select “Start” using M/m, and press .
The recorder starts scanning the digital
channels.
4 Select “Yes,” and press .
To cancel scanning
Press O RETURN. When a result display
appears, select “Yes” to save the result.
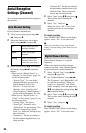
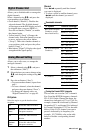
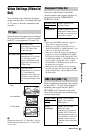
Auto Channel Setting
All Scans both digital and
analogue channels.
Digital Scans only digital
channels.
Analog Scans only analogue
channels. When you
select this, go to step 4.
Digital Manual Setting