


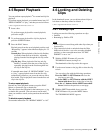

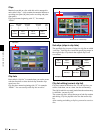

Chapter 5 Scene Selection
47
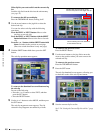
5-2 Creating Clip Lists
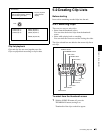
To search
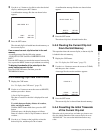
Use the jog and shuttle dials.
2
At the point you want to set as the In point, hold down
the G/IN button and press the SET button.
An In point is set, and the IN indicator lights.
3
In the same way, search for the point you want to set
as the Out point, and then hold down the g/OUT
button and press the SET button.
An Out point is set, and the OUT indicator lights.
To check the duration
Press the G/IN button and the g/OUT button at the
same time.
The duration appears on the screen.
To reset an In point or Out point
With the G/IN button or g/OUT button held down,
press the RESET button.
4
With the SHIFT button held down, press the SET
button.
The section between the In point and Out point is
added to the end of the current clip list as a sub clip.
When you set In and Out points stretching across
several clips
One sub clip is created for each of the clips.
5
Repeat steps 1 to 4 until you have added all of the clips
you want to the current clip list.
6
Save the current clip list to disc.
See 5-2-6 “Saving the Current Clip List to Disc” (page
50).
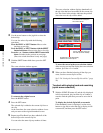
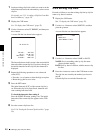
5-2-2 Reordering Sub Clips
1
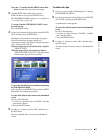
Press the SUBCLIP button, turning it on.
2
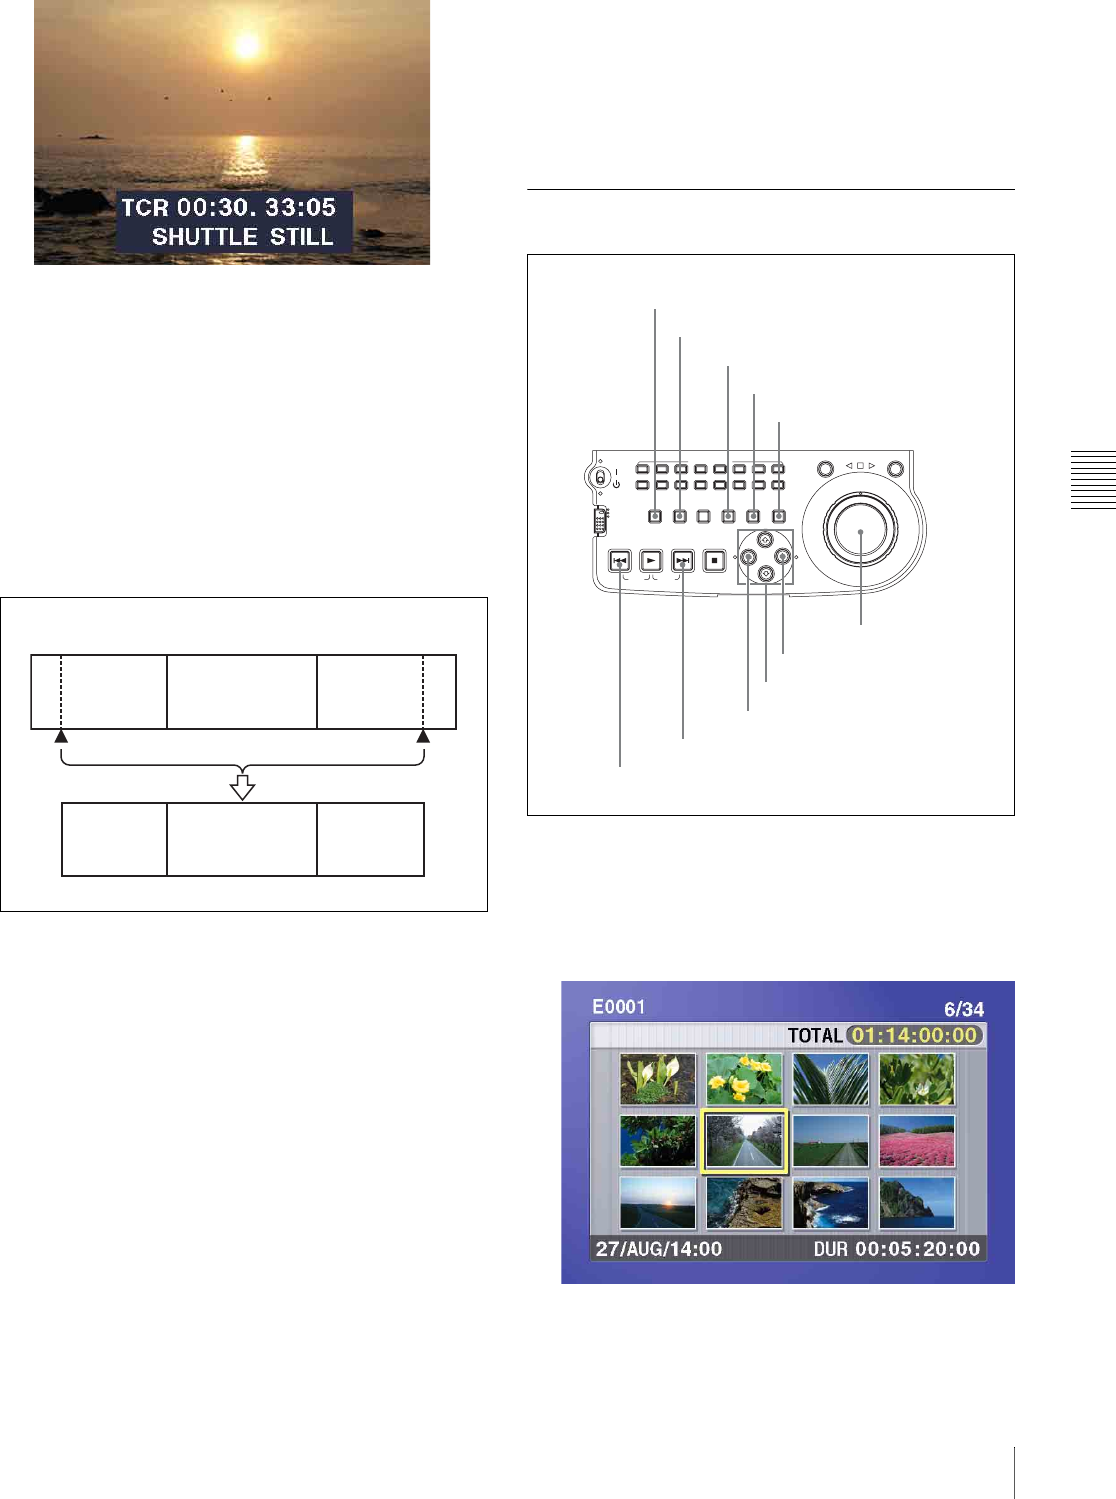
Press the THUMBNAIL button, turning it on.
Thumbnails of the sub clips in the current clip list
appear.
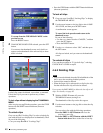
Clip 1
Sub clip 1
Clips recorded on the disc
Clip 2 Clip 3
Sub clip 2 Sub clip 3
In point Out point
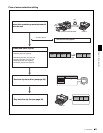
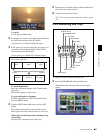
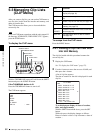
ACCESS
L
R
NETWORK
LOCAL
REMOTE
AUDIO MONITOR
L
R
CH-1
CH-2 CH-3 CH-4 CH-5 CH-6 CH-7 CH-8
SHUTTLE JOG
THUMBNAIL
ESSENCE
MARK
MARK1
MARK2
IN
OUT
MENU
S.SEL
SET
RESET SHIFT
TOP F REV F FWD END
PREV NEXTPLAY STOP
CLIP
MENU
SYSTEM
MENU
SUBCLIP
SUBCLIP button
THUMBNAIL button
SET button
RESET button
SHIFT button
PREV button
NEXT button
G/IN button
Arrow buttons
g/OUT button
Jog dial