Teledyne Analytical Instruments
14
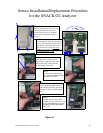
Sensor Installation/Replacement Procedure
for the SNACK O2 Analyzer
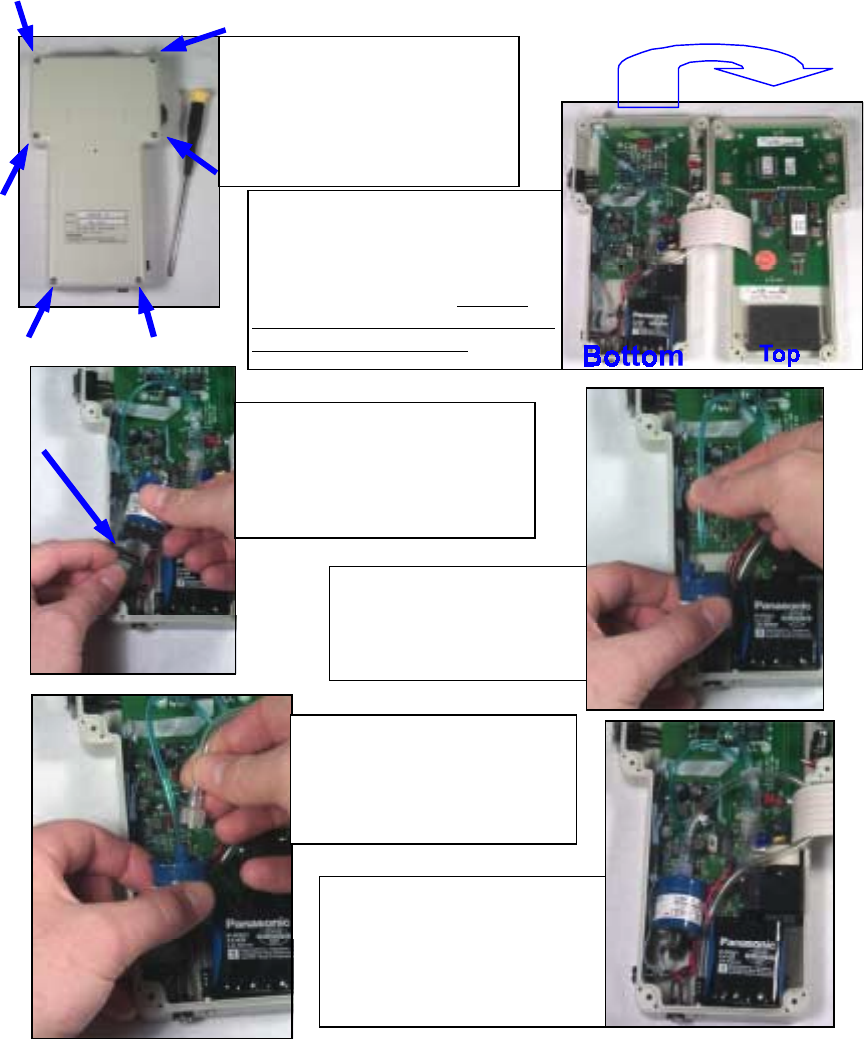
STEP 1
Place the analyzer face down on a soft
surface and remove the six screws
from the back of the case. Without
opening the case, place the analyzer
face up.
STEP 2
With the analyzer faced up, carefully lift
the top section from the bottom section.
Place the top section face down to the
right of the lower section. Be aware
that the two sections are connected by a
non-detachable ribbon cable
.
STEP 3
Locate the sensor connector cable
(ribbon cable). Gently push the cable
plug into the sensor socket until the
two Side Ejector locks close.
STEP 4
Locate the blue sample supply
tube. Gently push the tube onto
the center sensor barb.
STEP 5
Locate the Sample Discharge tube
with the lure lock fitting. Screw the
lure lock to the sensor discharge fit-
ting.
STEP 6
Carefully place the sensor back
down into the case as shown. Close
the case and replace the six screws.
CALIBRATE THE SENSOR BE-
FORE USE.
Figure A


