


58 EN58 EN
SPECIAL PLAYBACK
Zoom
Note
• When selecting a smaller factor than the current one,
the zoom area will not be displayed.
• To exit the zoom menu, press [DISPLAY] repeatedly.
• To cancel the zoom function, select “x1.0” using
[K / L], then press [ENTER] at step 3.
• You cannot slide the zoomed picture on some JPEG
files.
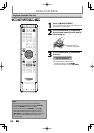
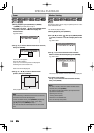
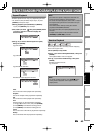
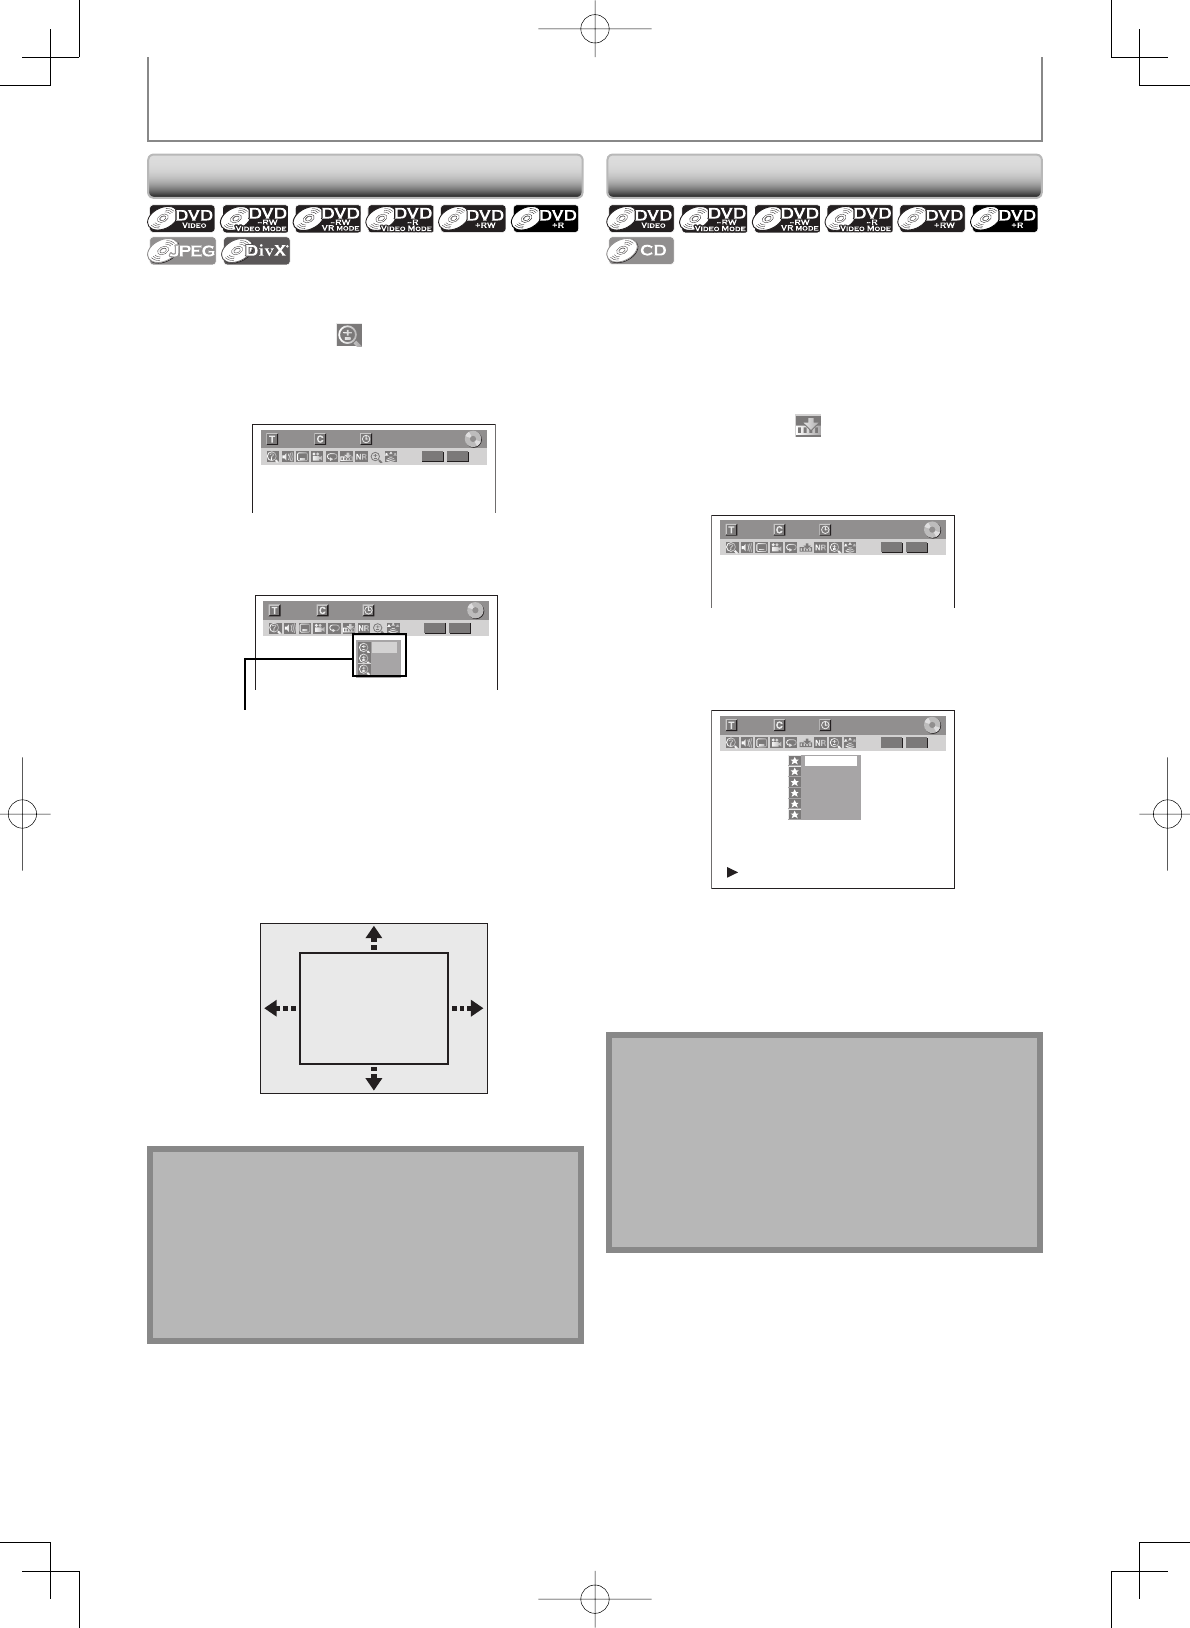
1) During playback, press [DISPLAY] or [ZOOM].
• If [ZOOM] is pressed, skip to step 3.
2) Use [{ / B] to select
, then press [ENTER] within
1 second, or wait for 1 second to display the
selection menu.
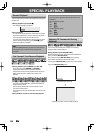
e.g.) DVD-video
1/ 5 1/ 5
DVD
0:01:00 / 1:23:45
Video
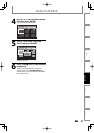
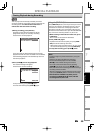
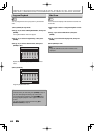
3) Use [K / L] to select a desired zoom factor to zoom,
then press [ENTER].
1/ 5 1/ 5
DVD
× 1.2
× 1.5
× 2.0
0:01:00 / 1:23:45
Video
Zoom menu will appear.
There are four options
(x1.0, x1.2, x1.5 and x2.0), these are displayed
excluding the current zoom rate.
Zoom area will be displayed.
4) Use [K / L / { / B] to select a desired zoom
position, then press [ENTER].
Zoom playback will start.
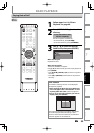
This feature allows you to assign a specific point on a disc
to be called back later.
• For audio CD, skip to step 2.
1) During playback, press [DISPLAY].
2) Use [{ / B] to select
, then press [ENTER] within
1 second, or wait for 1 second to display the marker
list.
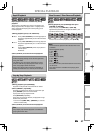
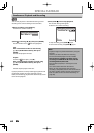
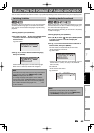
e.g.) DVD-video
1/ 5 1/ 5
DVD
0:01:00 / 1:23:45
Video
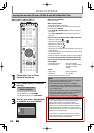
3) Use [K / L] to select a desired marker number.
When it reaches the desired point, press [ENTER].
e.g.) DVD-video
1/ 5 1/ 5
DVD
---
---
---
---
---
---
1
2
3
4
5
6
0:01:00 / 1:23:45
Video
The title (track) number and the time will be displayed.
4) To return to the marker:
Use [K / L] to select the desired marker number,
then press [ENTER].
Marker Setting
Note
• To clear a marker, select the marker number to be
cleared, then press [CLEAR].
• All markers will be erased when you operate these
operations listed below.
– Opening the disc tray
– Turning off the power
– Record on a recordable disc
• You can mark up to 6 points.