25
Operations
24
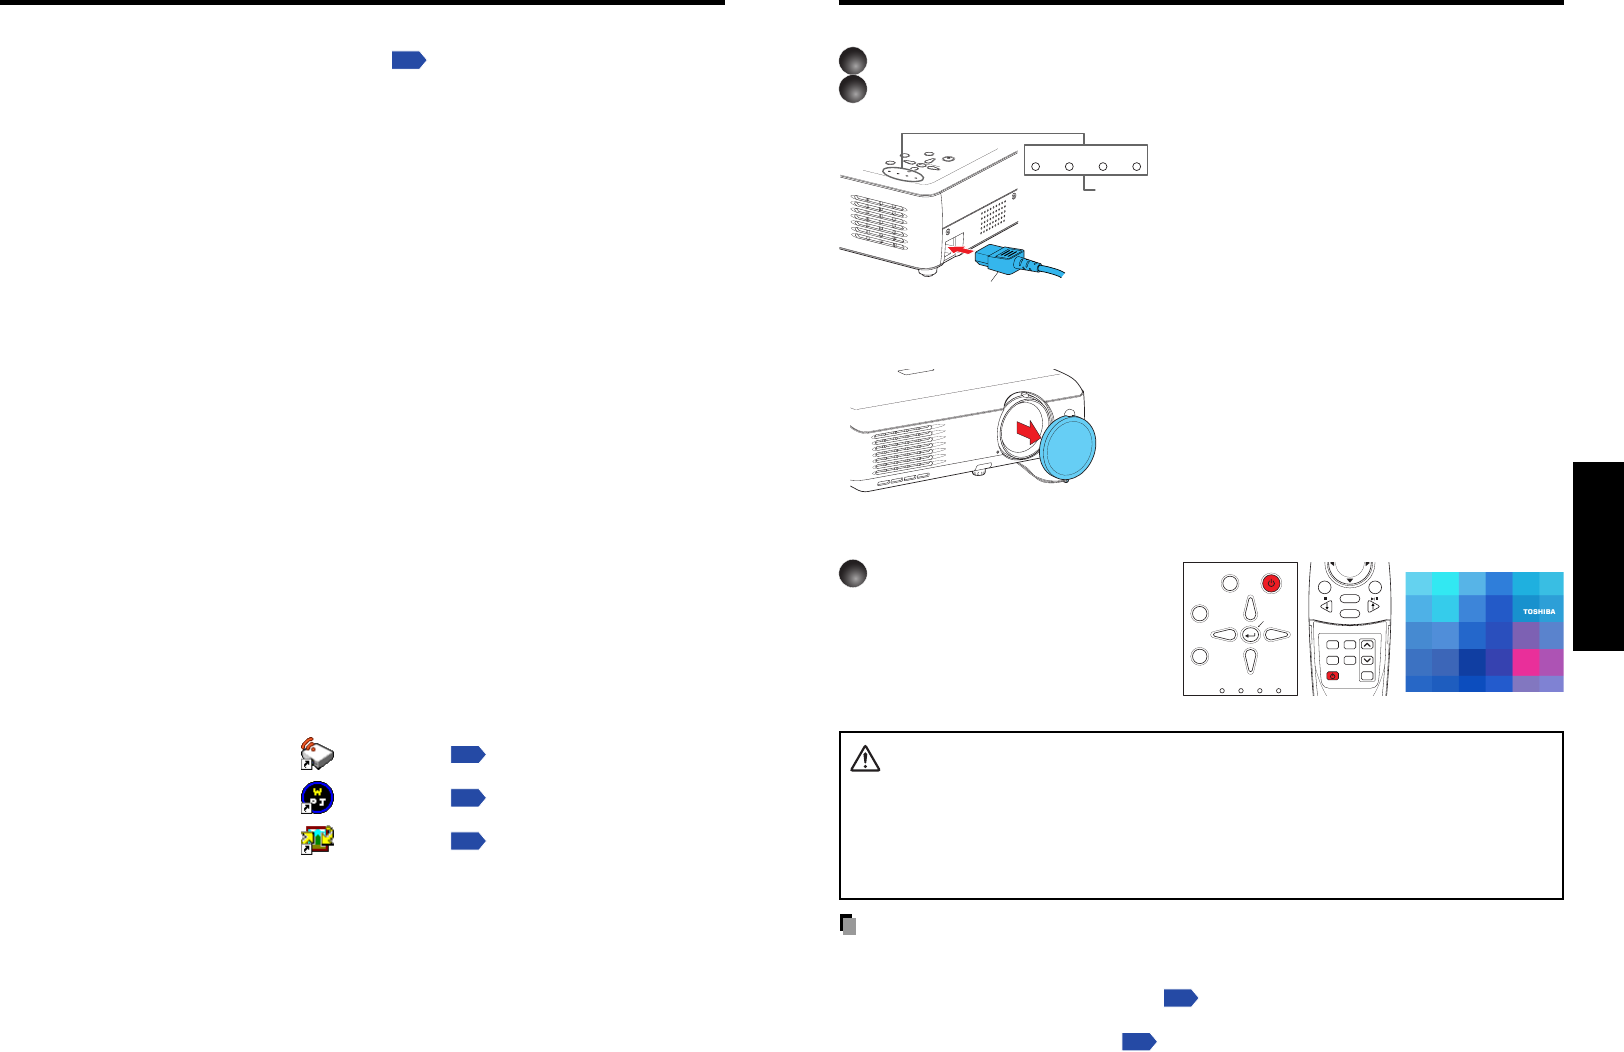
■ Connecting the power cord
1
Insert the power cord connector into the AC IN socket of the projector.
2
Insert the power cord plug into a wall or other power outlet.
ON/S
TAN
DBY
IN
P
U
T
M
E
N
U
A
U
T
O
S
E
T
F
A
N
T
E
M
P
L
A
M
P
O
N
V
O
L
.
+
V
O
L
.
-
A
U
TO
KEYSTONE
FAN TEMP LAMP ON
Removing the lens cover
Be sure to remove the lens cover when the power is
turned on. If it is left on, it could become deformed due
to heat.
■ Turning the power on
Press the ON/STANDBY
button.
The power turns on, and the
following 3 green indicators light:
ON, LAMP, and FAN. After a
moment, the start-up screen
appears.
CAUTION
• Do not look into the lens during operation. Doing so could damage your vision.
• Do not block the air intake or exhaust. Doing so could cause a fire due to internal
overheating.
• Do not place your hands, face, or other objects near the air exhaust. Doing so could
cause burns, deform/break the object.
Notes
• The start-up screen will disappear after a moment. You can dismiss the start-up screen
before this by performing any operation. You can also configure the start-up screen not to
appear via the Display setting menu
p.55
.
• The first time you use the projector after purchase, after the start-up screen disappears,
the Language menu is displayed
p.27
.
Turning the power on and off
When the power cord is plugged in, the following three
green indicators will come on for several seconds: ON,
TEMP, and LAMP. Next, the ON indicator will change to
orange, indicating standby mode.
(Do not perform any operations while the 3 green
indicators are lit.)
(Supplied) Power cord connector
Start-up screen
ON/
STANDBY
AUTO
KEYSTONE
MUTE
AUTO SETFREEZE
INPUT
R-CLICK
PJ MODE LASER
VOL
.
+
VOL
.
-
MENU / ENTER
RESIZE
OFF
ON/STANDBY
INPUT
FAN TEMP LAMP ON
VOL.
+
VOL.
-
AUTO
KEYSTONE
MENU
AUTO SET
Control panel
Remote
Control
Please read this chapter if the model you purchased includes a PC card slot.
If you will use the wireless LAN PC card function
p.33
, install the application on the
supplied CD-ROM onto your computer.
■ System Requirements
Supported OSs: Windows
®
98SE, Windows
®
Me, Windows
®
2000, Windows
®
XP
CPU: Pentium III 750 MHz or higher recommended
RAM: 256 MB or more recommended
Screen area (resolution): 1024 by 768 pixels recommended
■ Application Types and Major Functions
Wireless utility
This application is used for wireless connections. Use it to send the images from the
computer’s screen to your projector, and display on the screen.
Projector Configuration Tool
Use to modify wireless LAN and TCP/IP settings.
JPEG Conversion Tool
Use to convert JPEG and other files into a format that can be displayed as a slide show
using a memory PC card.
■ How to install
In the supplied CD-ROM, select the Applications folder, and run setup.exe. Follow the
instructions on your computer screen.
If you are using Windows
®
XP or Windows
®
2000, during installation a dialog box may
appear with the following message: has not passed Windows Logo to verify its
compability with Windows XP (2000). Click “Continue Anyway”, and continue with the
installation.
When installation is finished, the following shortcuts will appear on your computer’s
desktop:
Wireless Utility →
Operations
p.36
Projector Configuration Tool → Operations
p.60
JPEG Conversion Tool → Operations
p.62
■ How to uninstall
Select [Start Menu] → [Settings] → [Control Panel] → [Add/Remove Programs],
and remove Toshiba Data Projector from currently installed programs.
Installing the applications


