7
2.4 Recording from the Radio
When you hear something on the radio you would like to record, click once on the REC
button. The REC button will light up red to indicate that a recording is taking place. Click it
again when you want to stop the recording. The file name for this recording will be
RADIOxxxx.mp3, where xxxx are incremental numbers. It will be saved in the last folder
you were in before you switched to the FM mode. You can change the recording gain while
recording, by pressing the rocker to the left (less gain) or to the right (more gain).
2.5 Retro Recording and Editing
Retro-recording: This a feature that allows you to capture the 30 seconds (approximately) of
Radio before the record button is pressed. It does this by continuously recording 30 seconds
of music in a buffer, then when you click on Rec to record the Radio, it adds this 30 seconds
to the front of your recording. This way, if you start recording a radio song after it has started,
you will actually have the entire song in the recording. The Retro-Record setting must be set
to ON in order for this to work. On the Jukebox, go to Setup > [FM Radio] > Retro-
Recording: On. You will notice that when a retro-recording begins, the display will already
show an elapsed time of 00:28 (28 seconds).
Editing: Once a retro-recorded song has been recorded, it can be edited on the Jukebox itself.
Often, the beginning of the recording will include a commercial or announcer talk that you do
not want to keep, but was also recorded during the buffered 30 seconds. Locate this file on your
Jukebox and play it. You notice that F1 is now called Edit. Click on F1 and you will go into the
Editing mode to cut out portions from the beginning and end of the song that you do not want.
The song will continually loop while in editing mode. You can use the regular Forward
and Reverse buttons to move around within the song. While the song is playing, wait for
the precise moment that you want the edited song to start and click F1 I-cut (In cut). This is
the point that your new edited song will start. Let the song continue and then at the precise
moment you want the edited song to stop, click on F2 O-cut (Out cut). This is the point that
your new edited song will stop. Now click on F3
Close
, which will ask you if you want to
keep your edit. If you are not happy with your edit, just click on No and retry another edit.
If you click Yes, the Jukebox will run through a short Read/Write process and create a new
file which will be your edited file. It will have the same name as the original file but with the
word edit appended to it.
2.6 Recording from the Microphone
From the browse mode, go to the folder where you want your voice recording to be saved. Then,
simply press on the REC button and speak into the microphone (the small hole next to the
MP3/FM button). The REC button will light up red to indicate that a recording is taking place.
Click it again when you want to stop the recording. The file name for this recording will be
VOICExxxx.mp3, where xxxx are incremental numbers. You can change the recording gain
while recording, by pressing the rocker to the left (less gain) or to the right (more gain).
8
2.7 Playing MP3 files
While in browse mode, you can use the FM remote to search for and play MP3 files. If you
are in the FM mode, just click on the MP3/FM button to go to Browse mode. Use the Rocker
button as you would the LEFT, PLAY, and RIGHT buttons on the Jukebox itself. Use
the Increase and Decrease buttons on the Remote FM as you would the Up and
Down buttons on the Jukebox itself. Thus you will be able to move through the directory
structure with your Remote FM to find and play MP3 or other files.
2.8 Setting Parameters
To change the Remote FM parameters, you must, on the Jukebox itself, go to Setup, then
[FM Radio].
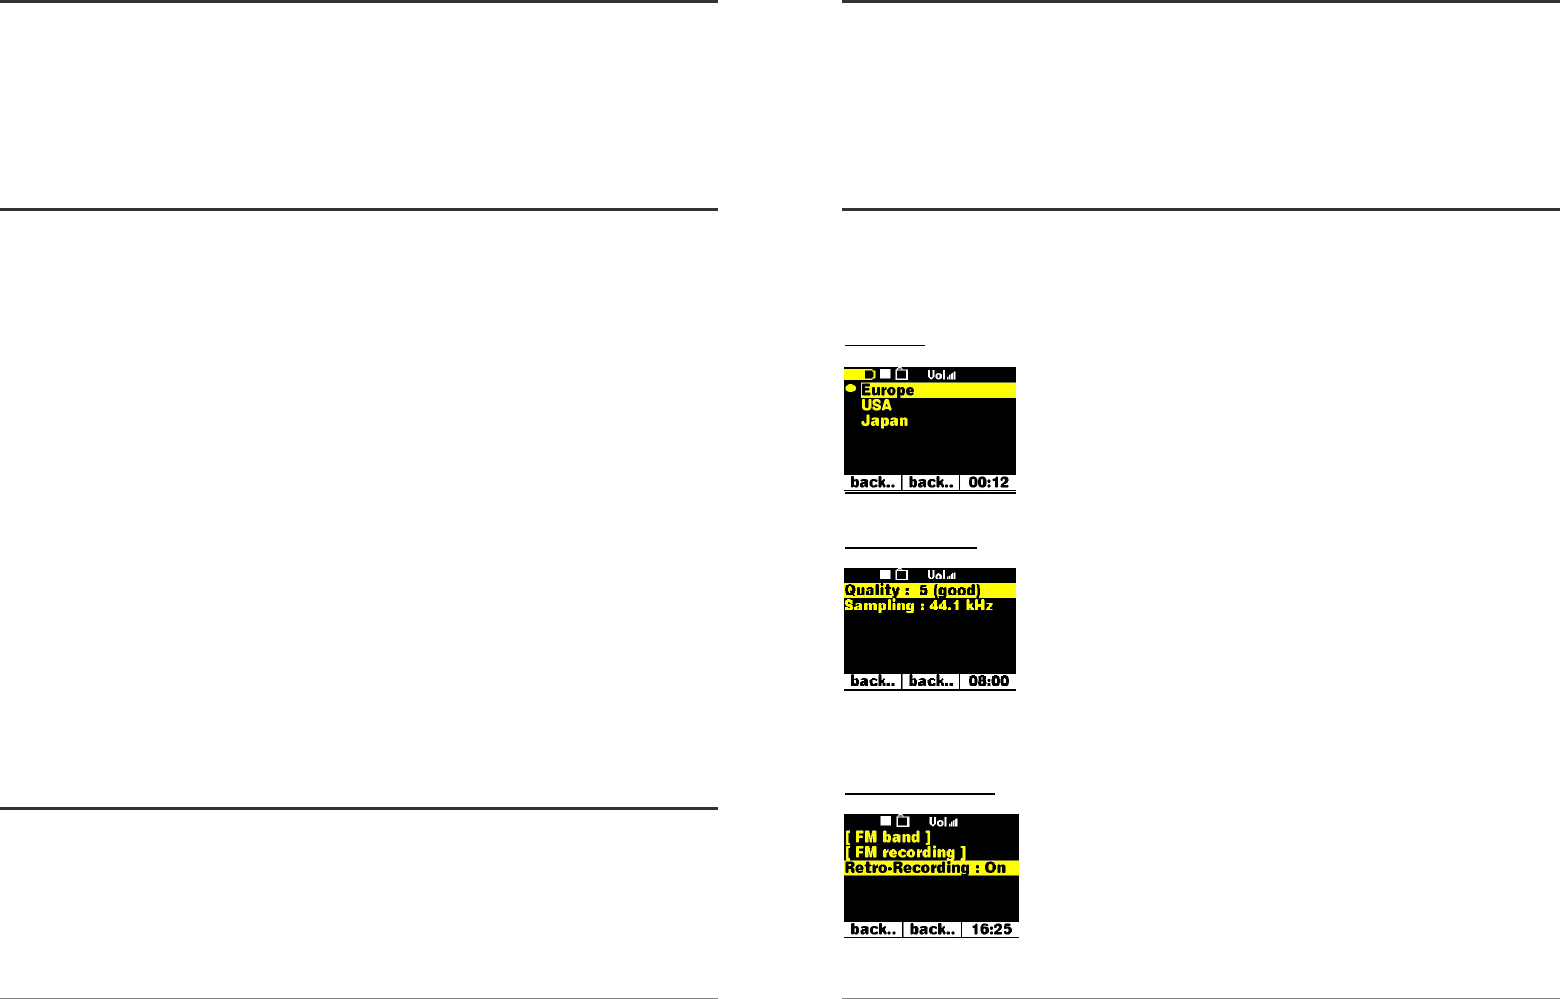
FM Band
Make sure you have the correct FM setting. Go to your Jukebox
Setup [F3] then go to FM Radio then to FM Band. The
specifications for the modes are as follows:
USA: 87.5 - 108 Mhz de-emphasis 75µs
Europe: 87.5 Mhz – 108 Mhz de-emphasis 50 µs
Japan: 76 Mhz - 91 Mhz de-emphasis 50 µs
FM Recording
(and microphone)
You can adjust the quality of the FM recording or the microphone
recording with this setting. A setting of 5 on quality, and a sample
rate of 44.1 kHz corresponds to CD quality. The higher each of
these settings is made, the more space will be consumed on your
hard drive. See your Jukebox manual for the table listing the
approximate bit rates for these settings. The microphone recording
quality is set with this same setting. Setting the bitrate to 3 and the
sample rate to 22kHz, will save space on your hard drive and you
will hear little difference in the recorded voice quality.
Retro-Recording
As explained in the section above, the retro-recording must be set
to On in order to work. When off, radio recordings start within a
second of the moment you click the REC button.


