English
2
First Setup
Thank you for purchasing this high performance monitor!
This monitor comes with the following accessories :
Power cable Audio cable
D-Sub cable (15 pin) User’s guide
DVI cable (Optional)
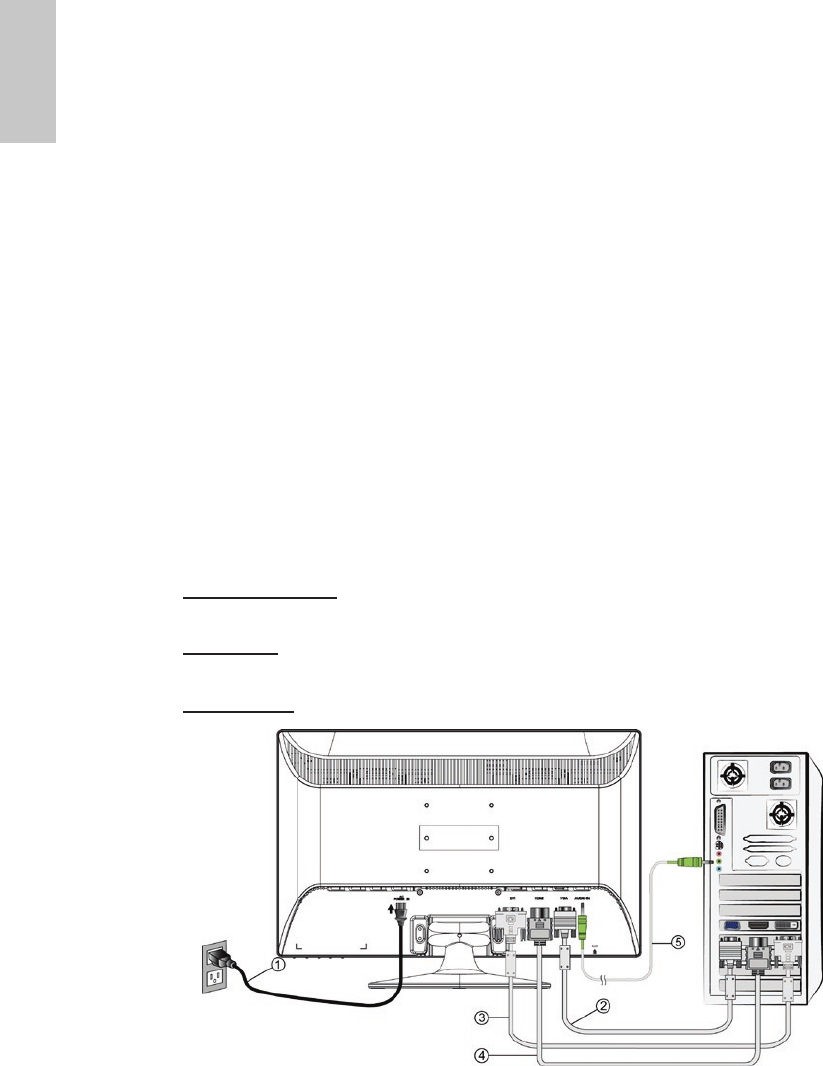
Quick Installation
1. Connect power cord
Connect the power cord to a properly grounded AC outlet, then to the monitor.
2. Connect analog video cable (D-Sub cable)
Make sure both monitor and computer are powered OFF. Connect the video
cable (D-Sub cable) to the computer, then to the monitor.
3. Connect DVI cable (Optional)
Connect the DVI cable from DVI output of computer to the DVI input of the monitor.
4. Connect HDMI cable (Not supplied)
Connect the HDMI cable from HDMI output of computer to the HDMI input of the
monitor.
5. Connect audio cable
Connect the audio cable from audio output of computer to the audio input of
the monitor.
6. Power-ON computer and monitor
Power-ON the computer, then Power-ON the monitor.
7. Windows users: Setting the Timing Mode (Resolution and Refresh Rate)
Example: 1920 x 1080 @ 60 Hz
Resolution Right-click on the Windows desktop > Properties > Settings >
“Desktop Area”. Set the resolution.
Refresh Rate (vertical frequency) See your graphic card’s user guide for instructions.


