


ENGLISH
27
to this jack.
1.4 Cabling
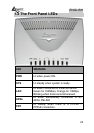
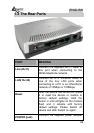
First you must connect the product to the ADSL line through
the RJ11 cable you have in equipment (in the port ADSL),
then connect to the RJ45 ports the PCs of your Lan or
others Switch. In the end. Once you’ve checked all the
connections, connect the AC Adapter to the WebShare 241
Router ADSL2+ and then to the socket. The product will
carry on immediately a diagnosis (60 seconds). Finished this
the Led PWR, SYS (eventually even the Led LAN, if
connected to PCs) will be fixed green. The Led ADSL, if
suitably connected, at first will be flashing and then it will
remain fixed.
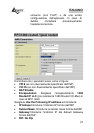
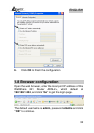
1.5 Default Settings
The WebShare 241 Router ADSL2+ can be configured with
your Web browser. The web browser is included as a
standard application in following operation systems, UNIX,
Linux, Mac OS, Windows 95/98/NT/2000/Me, etc. The
product provides a very easy and user-friendly interface for
configuration.
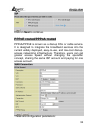
Before Configuration
This section describes the configuration required by LAN-
attached PCs that communicate with the WebShare 241
Router ADSL2+, either to configure the device, or for
network access. These PCs must have an Ethernet interface
installed properly, be connected to the WebShare 241
Router ADSL2+ either directly or through an external
Switch, and have TCP/IP installed and configured to obtain
an IP address through a DHCP server or a fixed IP address
that must be in the same subnet of the WebShare 241
Router ADSL2+. The default IP address of the WebShare
241 Router ADSL2+ is 192.168.1.254 and subnet mask is