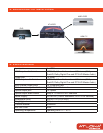
4. OPERATION CONTROLS and FUNCTIONS
2
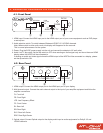
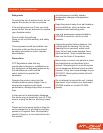
4.1. Front Panel
1. HDMI input: Connect the HDMI input port to the HDMI output port of your source equipment such as DVD player
or set-top-box.
2. Audio selection switch: To switch between Bitstream/LPCM7.1/5.1/LPCM2 channels.
Note: When switch to other audio mode, the display will disappear for few seconds.
This is normal phenomenon for the system.
3. Power: Plug the 5VDC power supply into the unit and connect the adaptor to AC wall outlet.
4. Audio Link TV dip switch: Set the dip switch to OFF when sending an audio signal only and do not have an HDMI
display where the HD570 will be connected to.
If sending an audio and video signal where the HDMI output of the HD570 will be connected to a display, please
set the dip switch to ON.
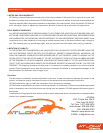
4.2. Rear Panel
1. HDMI output: Connect the HDMI output port to the HDMI input port of your display.
2. Multi channel output: Connect the audio channel output to the input of your amplifier equipment and follow the
amplifier connections.
FL: Front Left
FR: Front Right
LFE: Low Frequency Effect
FC: Front Center
RL: Rear Left
RR: Rear Right
RLC: Rear Left Center
RRC: Rear Right Center
3. Optical output: Connect Optical output to the display audio input or audio equipments for Dolby5.1/2 and
LPCM2 channels.
① ② ③
OPTICAL OUTMULTI CHANNEL OUTHDMI OUT
FL/FR LFE/FC RL/RR RLC/RRC
① ② ③ ④
DC 5V
HDMI INPUT
POWER
LPCM
5.1/7.1CH
2CH
BITSTREAM
AT-HD570
AUDIO LINK TV
OFF ON


