MSWU-81E 07/08/2013
34
5. Getting Started
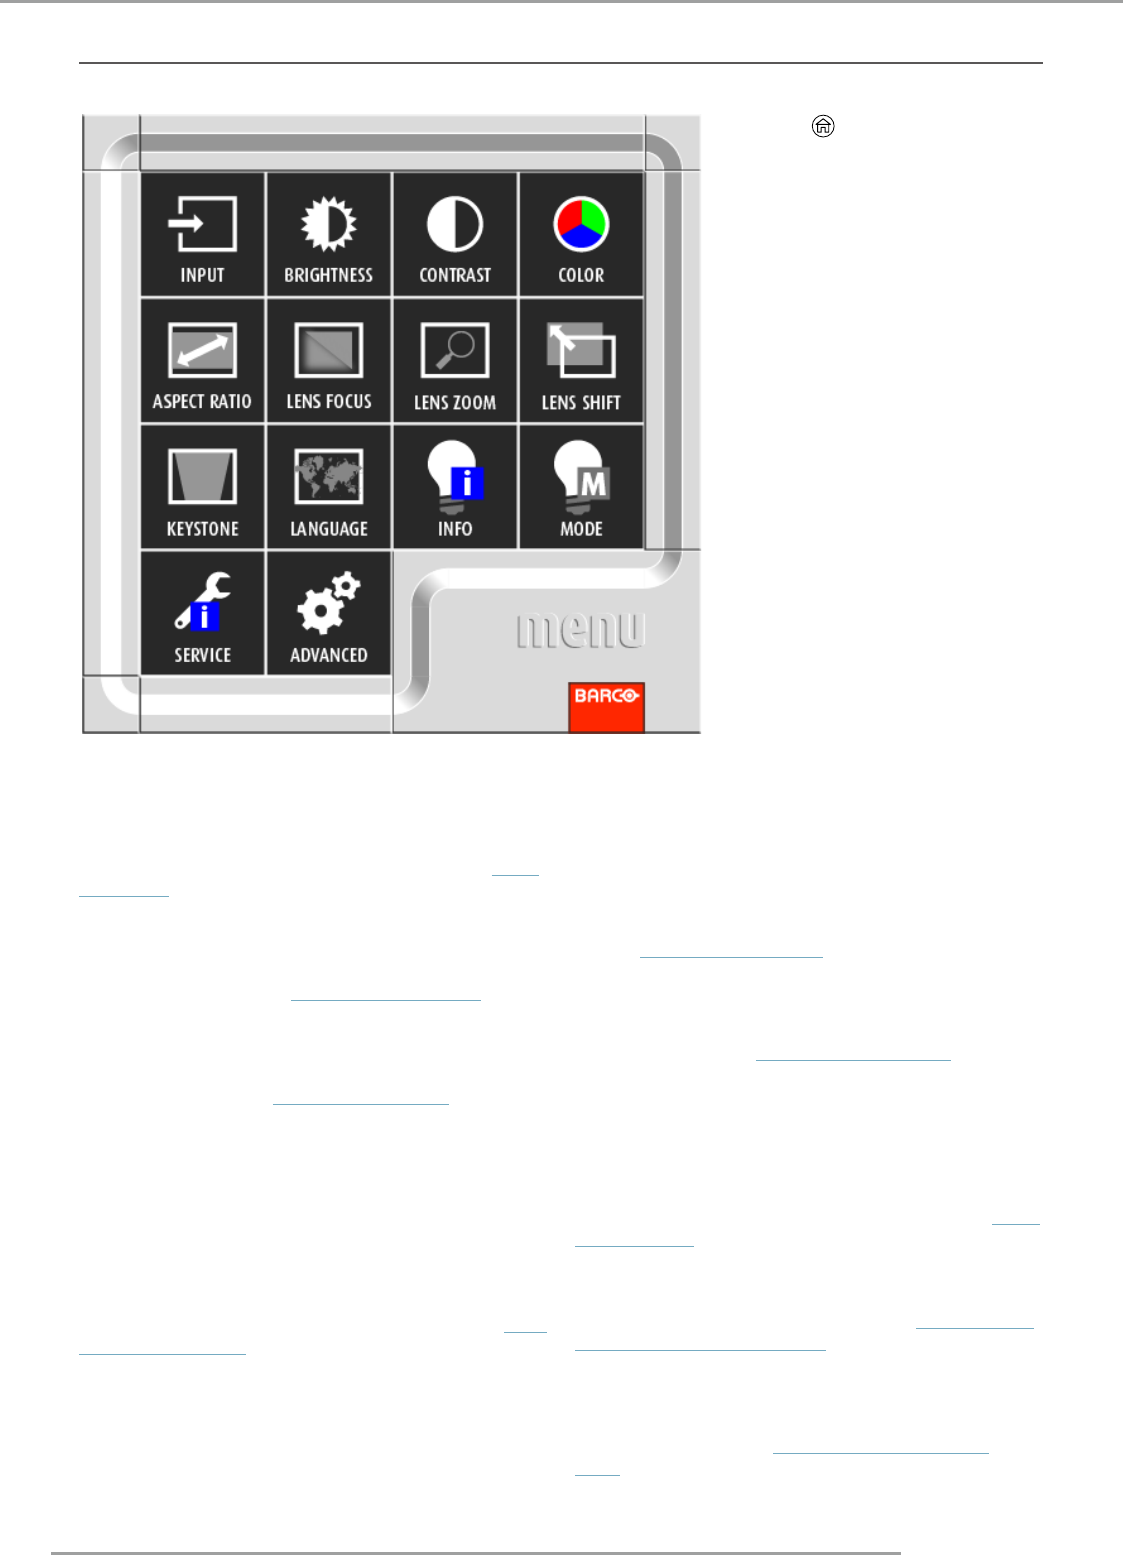
5.10 Introduction the OSD Lite on screen
Press on RCU or press "Home"
on projector rear cover, You can see
the OSD Lite on screen as above
picture.
INPUT
Use this function to select the input souce. You can choice
HDMI1, HDMI2, VGA, YUV1 and RGBHV/YUV2. Refer to page
37: 7. INPUT for futher message.
BRIGHTNESS
Adjust the level of black in the image to increas or decrease
image brightness. Refer to page 41: 8.3 Brightness
CONTRAST
Adjust the level of white in the image to increase or decrease
image contrast. Refer to page 41: 8.2 Contrast.
COLOR
Adjust the image’s color saturation. When oversaturated, the
colors in the image will appear to be very bright and vivid;
on the other hand, if colors are undersaturated, the image
will appear to be washed out.
ASPECT RATIO
You can select differnt aspect vis this function. Refer to page
45: 8.8 Aspect Ratio .
LENS FOCUS
Use this fuction to adjust the image from fuzzy to clear.
LENS ZOOM
Use this function to zoom in or zoom out the image's size.
KEYSTONE
Use this function to adjust the from the tilt to not inclined.
Refer to page 56: 11.6 Keystone
LANGUAGE
Use this function to select the different language of the OSD
Lite on screen. Refer to page 61: 12.9 Language.
INFO
Show the information of lamp.
MODE
Select ECO, Normal and Power mode of lamp. Refer to page
52: 10.2 Mode.
SERVICE
Display this projector's information. Refer to page 63: 13.2
Service message of the projector
Advance
This function is for futher adjust the projector. For
professional use. Refer to page 35: 6. ADVANCED OSD
MENU
