10
Overview
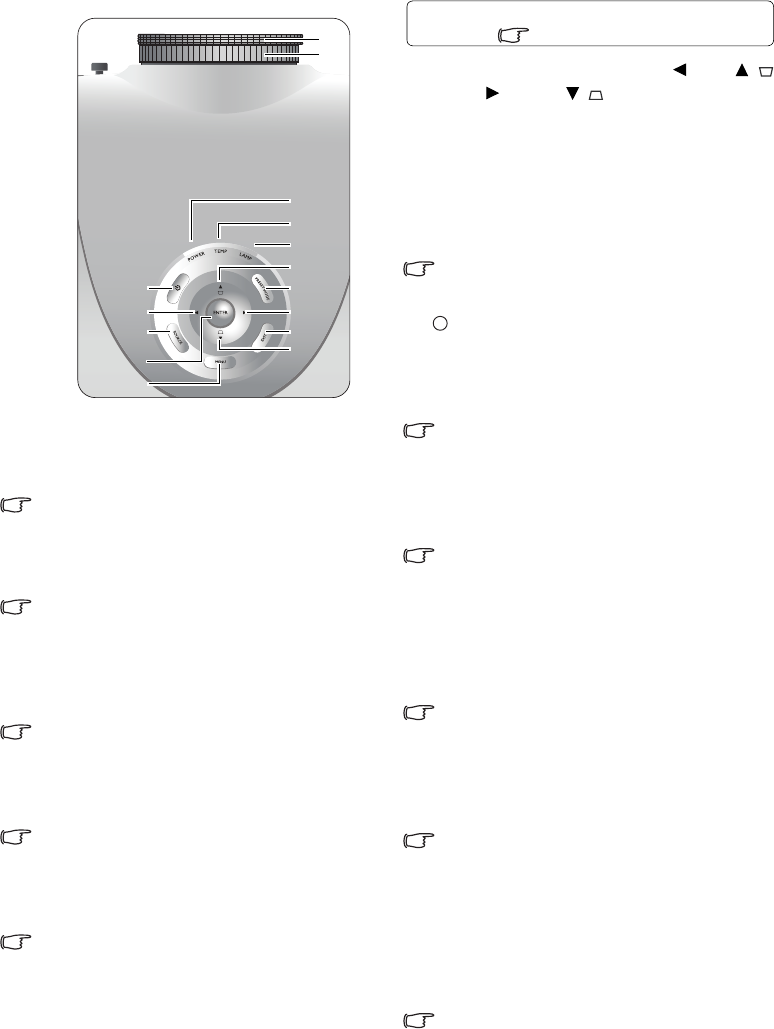
Controls and functions
Control panel
6. Arrow/Keystone keys (Left , Up / ,
Right , Down / )
Moves the current On-Screen Display (OSD)
menu selection in the direction of the arrow
being pressed when the OSD menu is
activated.
Manually corrects distorted pictures resulting
from an angled projection.
"Using the menus" on page 22, "Correcting
picture distortion" on page 25
7. POWER
Performs the same action as POWER ON/
OFF on the remote control.
Toggles the projector between standby and on.
"Turning the projector on" on page 20,
"Turning the projector off" on page 37
8. PRESET MODE
Sequentially selects a predefined picture setting
available for each input.
"Selecting a preset mode" on page 26
9. SOURCE
Performs the same action as the source
selection keys (COMP, VIDEO, S-VIDEO,
HDMI1, HDMI2, PC) on the remote control.
Switches sequentially through input sources.
"Selecting an input source" on page 21
10.EXIT
Goes back to previous OSD menus, exits and
saves any changes made using the On-Screen
Display (OSD) menu.
"Using the menus" on page 22
11. ENTER
Enacts the selected On-Screen Display (OSD)
menu item.
12.MENU
Toggles the On-Screen Display (OSD) menu on
and off.
"Using the menus" on page 22
1. Focus ring
Adjusts the focus of the projected image.
"Fine-tuning the image size and clarity" on
page 21
2. Zoom ring
Adjusts the size of the projected image.
"Fine-tuning the image size and clarity" on
page 21
3. POWER indicator light
Lights up or flashes when the projector is
operating.
"Indicators" on page 49
4. TEMPerature warning light
Lights up or flashes if the projector's
temperature becomes too high.
"Indicators" on page 49
5. LAMP indicator light
Lights up or flashes when the projector lamp
has developed a problem.
"Indicators" on page 49
1
2
3
4
5
7
6
910
6
12
11
6
8
6
For details, see the info provided behind the
hand sign .
I
I


