6
Using the remote control
6 720 606 990
B While holding the board in one hand
or resting it on a flat surface, remove
the front cover of the control board
by removing its 4 screws.
Remote control transceiver PCB
installation
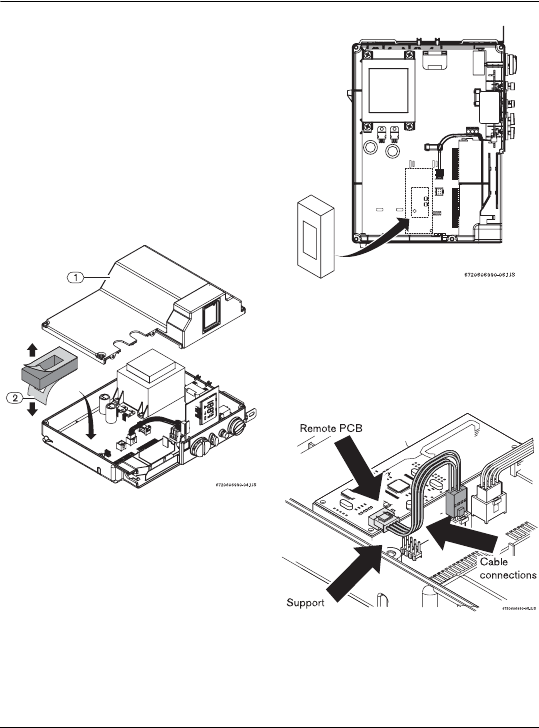
B Remove the protective cover (Fig. 5,
pos. 2) from one face of the support
and attach it to the main PCB as
shown in Fig. 6.
Fig. 5
B Remove the other protective cover
and attach the remote control PCB
as shown in Fig. 7.
Fig. 6 Support correct position
B Using the supplied cable connect
between the main PCB and the
remote control PCB as shown in Fig.
7.
Fig. 7
6720606990-0701_(Remote control).fm Page 6 Tuesday, January 30, 2007 10:07 AM


