19
3. 6. 3 Network Setup
The DVR can be connected to a TCP/IP
network to leverage the features which
depend on network connection.
Physically connect the DVR to the local
network (LAN) using a straight ethernet
cable.
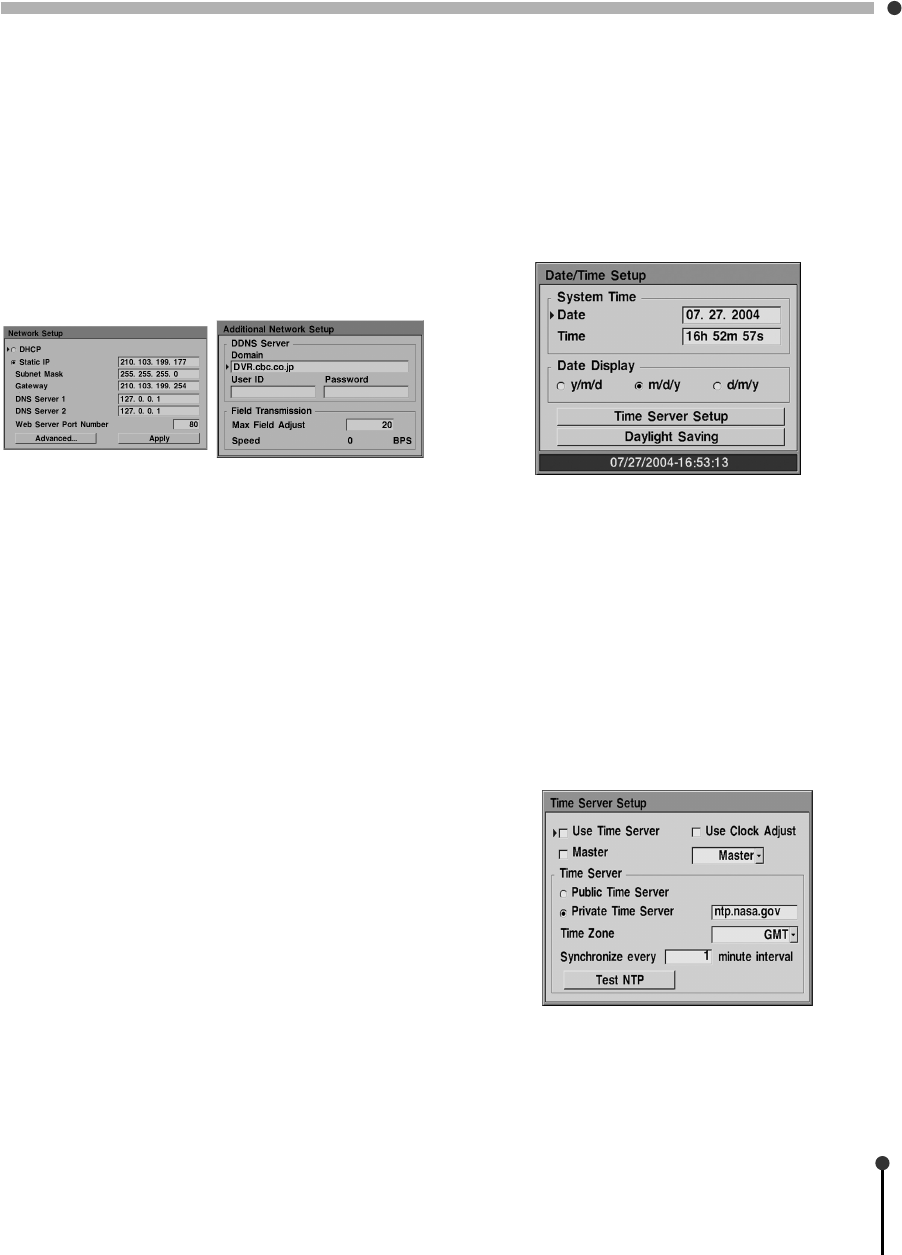
Network Setup
t Advanced t DDNSServer
• DDNS Server
The URL is created in the DDNS Server
setup and is used to connect instead of the
IP address.
• Domain
Domain supports only an account
registered at following site ;
‘www.dyndns.org’
• Field Transmission
Bandwidth of field number which services
to Client/WEB of Network can be
controlled by setup Max Field Adjust.
• DHCP
DHCP is a protocol used to automatically
configure the network settings of the DVR.
If a DHCP service is available, choose
DHCP and select the Apply button. Ask the
network administrator for more detail.
• Static IP
If DHCP is not available or to manually
configure the DVR, enter the IP address,
Subnet Mask, Gateway and at least one
DNS Server. Then select the Apply button.
If not known the network administrator can
supply this information.
• Web Server Port Number
The DVR can be viewed over the network
with a web browser. Typically the TCP port
used by HTTP is 80. However in some
cases it is better to change this port
number for added flexibility or security. If
desired change the port number. Valid
number is 80 ~ 19999.
3. 6. 4 Date/Time Setup
Keeping the correct date and time is critical
in DVR operation. While the date and time
can be set manually, it is far better to keep
the time synchronized automatically with a
time server on the network.
• System Time
Enter the correct date and time manually.
• Date Display
Choose the correct date format according
to the locale.
To automatically set the date and time select
Time Server Setup. Then configure the time
server and the local time zone. The DVR
must be connected to the network in order to
use this feature.
