


Stand-alone DVR Instruction Manual
142
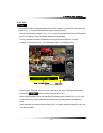
8-4.2. Connection
There are two ways to access the DVR through the DVR Master as follows.
▫ With Set Direct setting
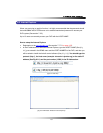
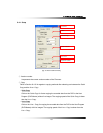
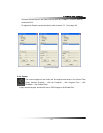
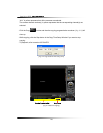
- Click the “CONNECT” button on the DVR Master and then the “Connect Dialog menu” as
shown in [Fig. 8-8] will be displayed.
- Click the “Set Direct” in the Connect Dialog menu and click the “EDIT” button.
- Enter the IP address (or WAN IP address of the Router) and Port number, which must be
the same as DVR has.
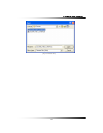
- Click the “EDIT” button again and then the connection list will be created in the Name List
(up to 20 lists).
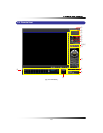
- Choose a Site Name in the Name Lists and click the “CONNECT” button in order to access
the DVR.
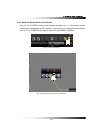
▫ With Get Server setting
- Click the “CONNECT” button on the DVR Master and the “Connect Dialog menu” as shown
in [Fig. 8-8] will be displayed.
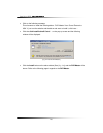
- Click the “Get Server” in the Connect Dialog menu and click the “EDIT” button.
- Enter the IP address, Port number and Site Name, which must be the same as the MNS
has (SETUP-click NETWORK-click MNS in the NETWORK menu: Refer to section 7-7.5
MNS on page 122).
- Click the “EDIT” button again and then the connection list will be created in the Name Lists
(up to 20 lists).
- Choose a Site Name in the Name Lists and click the “CONNECT” button in order to access
the DVR.
▫ With Domain setting
- Click the “CONNECT” button on the DVR Master and then the “Connect Dialog menu” as
shown in [Fig. 8-8] will be displayed.
- Click the “Domain” in the Connect Dialog menu and click the “EDIT” button.
- Type the DOMAIN name, Port number and User’s defined name.
- Click the “EDIT” button again and then the Domain list will be created in the Name Lists (up
to 20 lists).