


3
Table of Contents
Introduction 4
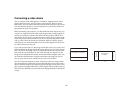
Positioning the projector 5
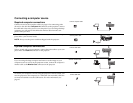
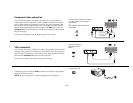
Connecting a computer source 6
Required computer connections 6
Optional computer connections 6
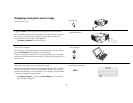
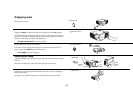
Displaying a computer source image 7
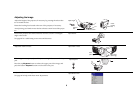
Adjusting the image 8
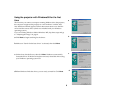
Using the projector with Windows 98 for the first time 9
Connecting a video device 11
Video connections 12
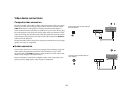
Video device connections 13
Composite video connection 13
S-video connection 13
Component video connection 14
VGA connection 14
Displaying video 15
Adjusting the image 15
Shutting down the projector 17
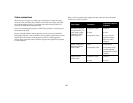
Troubleshooting your setup 17
Using the remote control 25
Using the audio 26
Using the keypad buttons 26
Optimizing computer images 27
Presentation features 27
Optimizing video images 28
Customizing the projector 28
Using the menus 29
Picture menu 30
Settings menu 33
Maintenance 36
Cleaning the Lens 36
Replacing the Projection Lamp 36
Cleaning the Lamp Housing Screens 38
Using the security lock 38
Appendix 39
Specifications 39
Projected image size 40
Red LED Behavior and Projector Errors 41
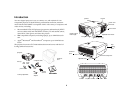
If you are experienced in setting up projection systems, use the Quick Setup
card that was included. For complete details on connecting and operating
the projector, refer to this User’s Guide.
The website also has technical specifications (an interactive image size cal-
culator, laptop activation commands, connector pin outs, a glossary, the
product data sheet), a web store to buy accessories, and a page for online
registration.
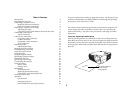
Important Operating Considerations
Do not place the projector on a tablecloth or other soft coverings that may
block the front or back vents. Do not use a non-approved ceiling mount. In
the unlikely event of the bulb rupturing, thoroughly clean the area in front
of the projector and discard any edible items that may have been placed in
that area.
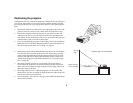
Do not place objects in
this area in front
2
f
t
(
.
6
m
)
of the projector