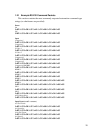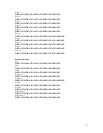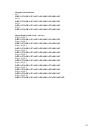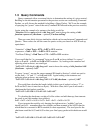
The checksum. This is the last part other than the Command ID Table and Value
Table you might need to create a command string. Again, unless your customer/job
requirements demand/specify it – YOU DO NOT NEED A CHECKSUM!! Assuming
that you absolutely need to have a checksum due to a customer/job requirement, the
checksum is fairly easy - add the value of every byte from the beginning of the string (at
STX) to the last “NUL” just before the ETX (0x03). For the “Power On” command, this
would be: 02 33 30 30 35 41 31 00 31 00
So you would add: 0x02 + 0x33 + 0x30 + 0x30 + 0x35 + 0x41 + 0x31 + 0x00 + 0x31
+0x00 = 0x16D
HINT: You can use the scientific calculator in Windows to figure this out in HEX.
Now we only deal with 8-bit values for bytes – and you can see (if you recall the
discussion about nybbles and bytes) that the checksum value is three hex characters or
three “nybbles”. This means the result is a 12-bit value. How we take care of this is very
easy – drop (truncate) the nybbles above the two lowest nybbles. If you do this to the
0x16D value you get 0x6D. If you are writing a software program – an easy way to do
this is to “AND” the checksum value with 0xFF in HEX or “255” in decimal.
If you’ve really been paying attention you’ll remember that the checksum is two
bytes – we made it easy to figure out these two by simply taking the 6 and the D (which
are part of a HEX notation number from our calculation) and using them as ASCII stand-
ins. So assume these two characters are ASCII and convert them down to HEX (“6”
becomes 0x36, “D” becomes 0x44). This is a form of data expansion – and is intended to
reduce the possible valid bit patterns which can be expected at these two byte locations to
16 possibilities.
For a last look at turning on the power for the iScan, let’s look at the whole string
including the checksum (underlined):
0x02 0x33 0x30 0x30 0x35 0x41 0x31 0x00 0x31 0x00 0x36 0x44 0x03
That is all there is to Command Packets. If you are still unclear on how this is
supposed to work, or you believe you are doing this correctly, but still have no success
controlling the iScan, please contact our Technical Support group.
19


