


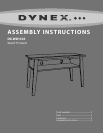

11
DX
-
WD
1335
Need help? Call 800-305-2204
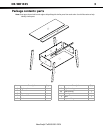
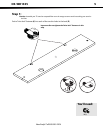
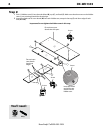
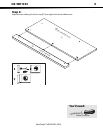
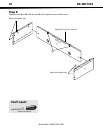
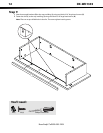
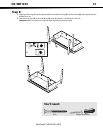
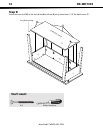
Step 6:
Caution: Check the parts carefully before assembling. Disassembly of glued parts is extremely difficult.
1 Fill the holes in the stop molding (J) 1/4 to 1/2 full with glue (R), then insert the wood dowels (P) into the holes.
Wipe away the excess glue.
2 Drop a few beads of glue (R) into the holes in the ends (A and B).
3 Align the ends (A and B) and the back (E) with the top (C) and the stop molding (J). Make sure that the dowels,
Twist-lock
® fasteners, and cam dowels align with the correct holes, then tighten the four hidden cams and two
Twist-lock® fasteners.
Note: Wipe away the excess glue with a damp cloth.
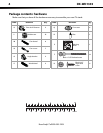
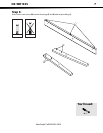
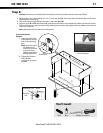
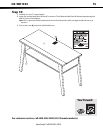
You’ll need:
®
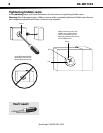
To use a Twist-lock®
fastener:
1 Insert the dowel end
of the fastener into the
hole of the adjoining
part.
Note: The dowel end of
the fastener must
remain fully inserted
in the hole of the
adjoining part while
locking the fastener.
2 Tighten the fastener
with a Phillips
screwdriver as tight as
possible.
Dowel end
S
u
r
f
a
c
e
w
i
t
h
T
w
i
s
t
-
l
o
c
k
®
f
a
s
t
e
n
e
r
S
u
r
f
a
c
e
w
i
t
h
h
i
d
d
e
n
c
a
m
s
Arrow
Maximum: 210°
Minimum:
190°
Fill the holes 1/4 to
1/2 full with glue.
Phillips screwdriverP (2) R (1)