Low Profile VESA Mount Kit User Guide
Overview
The Extron
®
Low Profile VESA
®
Mount Kit (LPVM-1) allows
monitors or Extron touch panels to be wall mounted to a two-gang
UL-certified junction box, a two-gang mud ring, or directly onto
any solid surface, such as brick, wood, masonry, or drywall. The kit
supports both the B-type (20 x 50 mm) and D-type (75 x 75 mm)
VESA mounting patterns. The monitor attaches to the wall at a fixed
angle with no tilting.
CAUTION: The maximum loads for the LPVM-1 are:
VESA B — 4.4 pounds (2 kg)
VESA D — 30.8 pounds (14 kg) if the LPVM-1 is
mounted directly to the wall, not a mud ring.
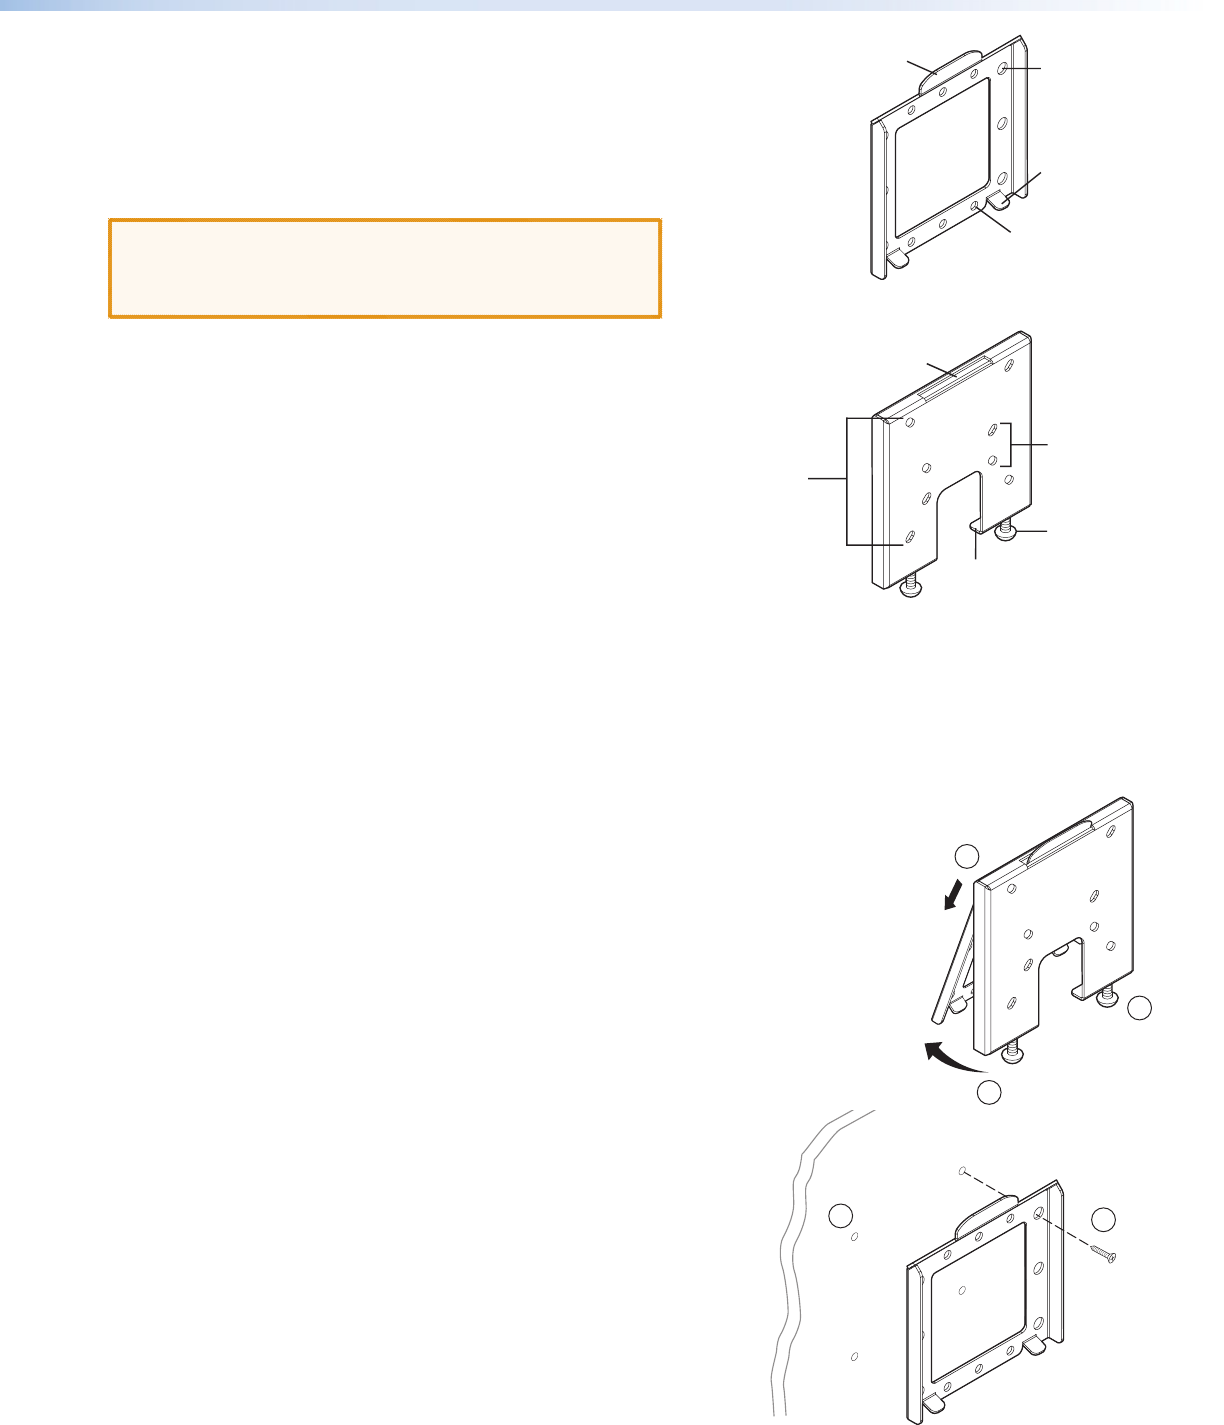
The kit consists of two separate steel plates, held together by two
locking screws. Plate 1, which attaches to the wall, has a protruding
tongue at the top. The tongue fits into a groove at the top of plate
2, which attaches to the back of the display device (see the figure at
right).
Optional Tools and Equipment
To mount the LPVM-1, you may need some or all of the following
items that are not provided by Extron:
• Mud ring or UL-certified junction box
• Tools for cutting a hole in drywall
• Conduit or surface raceway
• Power drill with a bit that is appropriate for the wall type
• Screwdriver
• Four screws or bolts, to attach the LPVM-1 to the wall (these must be appropriate for the type of wall).
Installation Instructions
To VESA mount a touch panel or monitor using the LPVM-1, follow these instructions:
Disassembling the LPVM-1
1. Use a Phillips screwdriver to loosen the two locking screws until the two plates of the
LPVM-1 can separate.
2. Swing the bottom tabs of plate 1 away from the bottom edge of plate 2.
3. Pull plate 1 down to remove the tongue from the groove in plate 2.
4. Select a suitable mounting site and decide whether the LPVM-1 will be mounted directly
to the wall (see below), or to a mud ring or UL-certified junction box (see the next page).
Mounting the LPVM-1 Directly to a Wall:
a. If the LPVM-1 is being mounted directly to drywall, you may cut a
hole in the drywall that is 2.5 x 2.5 inches (6.35 x 6.35 cm) to run
cables inside the wall cavity. If the LPVM-1 is attached to a solid wall
or you do not want to run cables through the drywall cavity, the
cables should be enclosed in conduit or raceway.
b. Use plate 1 to mark the position of the four holes in the wall and
drill four holes, using a drill bit that is appropriate for the wall type.
Plate 1 accommodates screws up to 1/4 inch in diameter.
c. Secure plate 1 to the wall with four screws or bolts that are
appropriate for the wall type. Ensure the tongue is facing up.
Extron LPVM-1
Plate 1
Extron LPVM-1
Plate 2
Tongue
Groove
Locking Screws
(#10-32 Phillips)
B-Type VESA
Mount Holes
D-Type VESA
Mount Holes
Holes to Secure
Plate 1 to Wall
Bottom Tabs (2)
Bottom Edge
Holes to Secure
Plate 1 to Mud Ring
or Junction Box
4b
4c
Screws (4)
Appropriate
to Wall Ty
2
1
3


