9
20-172-00
(
2-08
)
P
reparin
g
unit for remote control us
e
N
O
TE: The remote control operation requires the control
p
anel door o
f
the PTA
C
to remain open or be removed
from the unit. If electin
g
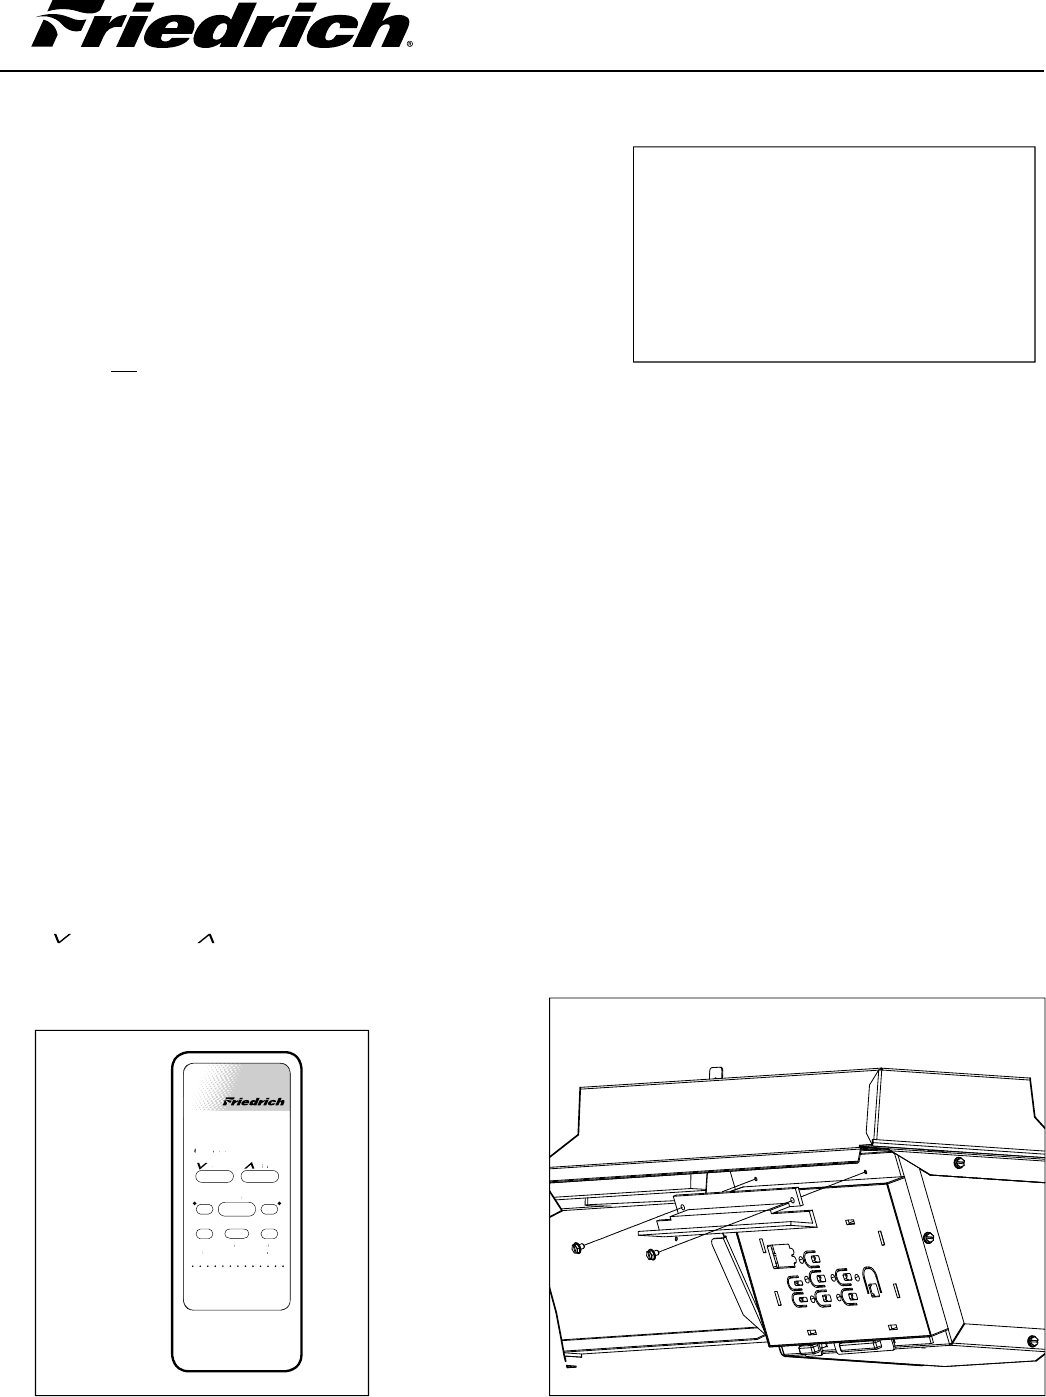
to use the fi ll piece, follow Steps
1-4.
O
therwise, proceed strai
g
ht to
S
tep 5
.
1
)
Remove the control panel door
f
rom the
f
ront
g
rille b
y
u
nhin
g
in
g
it from the
g
rille. This is done b
y
pushin
g
back on the top portion o
f
the door until the door is
r
eleased
f
rom the hin
g
es
.
2)
Remove the front
g
rille from the unit.
3
)
S
crew the
fi
ll piece to the unit usin
g
the screws provid-
e
d into the two screw holes above the control panel
.
4
)
Reattach the front
g
rille
.
5)
Turn on the PTA
C
uni
t
6)
Put batteries in the remot
e
7)
The remote control is now read
y
for operation
.
8)
Your unit should come alread
y
enabled to receive the
r
emote si
g
nal. I
f
a
f
ter all the steps are done and
y
our
u
n
i
t
d
oes not respon
d
to remote s
ig
na
l
,
h
o
ld
t
h
e temp
and the temp buttons simultaneousl
y
f
or three
s
econds, or until the displa
y
window shows "E" to
e
n
able
t
he
r
e
m
o
t
e.
Op
eratin
g
Instruction
s
H
AND HELD REM
O
TE
CO
NTR
O
L
F
or Use With Packaged Terminal Unit
s
Please read these instructions completel
y
be
f
ore
attemptin
g
installation.
N
O
TE: This kit is for use with PD model Friedrich
PTA
C
units with
S
D or later su
ffi
xes. For example:
PDE
09
K
3
SD
.
This kit will not work with prior models.
M
o
del PDXRC
PDXR
C
Re
m
o
t
e
C
ontro
l
L
o
w
T
e
T
T
m
p
m
e
r
a
r
r
t
u
t
t
r
u
u
e
r
r
C
o
o
l
P
o
P
w
e
w
w
r
C
o
C
C
o
l
e
l
l
r
F
a
F
F
n
O
n
O
l
y
l
W
a
W
W
r
m
r
r
e
r
H
e
HH
a
t
F
a
F
F
n
H
i
H
H
g
ii
h
g
F
a
F
F
n
Remote Control Operation
POWER -
Pr
ess
th
e
P
o
w
e
r
bu
tt
o
n
o
n
ce
. Th
e
u
nit will
au
t
o
m
a
t-
icall
y
turn on in the mode and
f
an speed it was last le
f
t on.
To set mode o
f
operation
C
OOL - Press the
C
ool button to automaticall
y
switch the
operatin
g
mode to C
OO
L.
HEAT
- Press the Heat button to automaticall
y
switch the
operatin
g
mode to Heat.
FAN ONLY - Press the Fan
O
nl
y
button if
y
ou want to run
the
f
an onl
y
.
C
OOLER - Press the
C
ooler button to raise the tempera-
ture sett
i
n
g
one
d
e
g
ree
.
WARMER
- Pr
ess
th
e
W
a
rm
e
r
bu
tt
o
n t
o
l
o
w
e
r th
e
t
e
m-
p
erature settin
g
one de
g
ree
.
To ad
j
ust
f
an spee
d
L
ow Fan - Press the Low Fan button to ad
j
ust the
f
an
s
pee
d
to
l
ow.
Hi
g
h Fan - Press the Hi
g
h Fan button to ad
j
ust the
f
an
s
peed to hi
g
h
.
Fill Pi
ece
In
s
t
a
ll
a
ti
on
Thi
s
kit
co
nt
a
in
s
.............................
Q
t
y
1. In
s
t
a
ll
a
ti
o
n in
s
tr
uc
ti
o
n
s
................
1
2. R
e
m
o
t
e
co
ntr
o
l
............................
1
3
. AAA batteries
...............................
2
4. Fill piec
e
......................................
1
5
.
Sc
r
e
w
s
#8
x
3/8
...........................
2


