- 9 - EN- 9 - EN
18. DISPLAY Button
TV Mode:
Displays the current channel number on the TV
screen.
DVD Mode:
[P.25]
Displays the current status on the TV screen.
19. SETUP Button
[P.26]
Hit to enter or exit the setup menu of TV or DVD.
20. TITLE Button
[P.20]
Displays the title menu.
21. CLEAR Button
[P.22]
Hit to clear or cancel a setting currently entered.
22. MODE Button
[P.23, 24, 25]
Hit to call up the program screen or the random
screen in the stop mode.
Hit to call up the Black Level Setting screen or
the Virtual Surround screen during playback.
23. SEARCH MODE Button
[P.22]
Hit to locate a desired point.
24. AUDIO Button
[P.24]
Hit to select a desired audio language or sound
mode.
25. SUBTITLE Button
[P.24]
Hit to select a desired subtitle language.
26. REPEAT Button
[P.23]
Repeats playback of the current disc, title, chap-
ter, or track.
27. ANGLE Button
[P.24]
Hit to change the camera angle to see the
sequence being played back from a different angle
(if available).
28. REPEAT A-B Button
[P.23]
Repeats playback of a selected section.
29. RETURN Button
[P.22]
Returns to the previous screen in the setup menu.
30. ENTER Button
[P.15]
Hit to accept a setting.
31. K / L / { / B Buttons
TV Mode:
[P.13]
Press to select a setting mode from the menu on
the TV screen.
Press to select or adjust from a particular menu.
DVD Mode:
[P.20]
Press to select a menu item.
32. DISC MENU Button
[P.20]
Calls up the DVD menu.
33. h Button [P.21]
Hit to view the DVD picture in fast reverse or
slow reverse motion.
g Button [P.21]
Hit to view in fast or slow forward motion.
34. ZOOM Button
[P.21]
Enlarges part of a DVD-reproduced image.
35. MUTE Button
[P.13]
Mutes the sound. Hit it again to restore sound.
36. SELECT Button
[P.11]
Hit to change to TV mode, external input mode or
DVD mode.
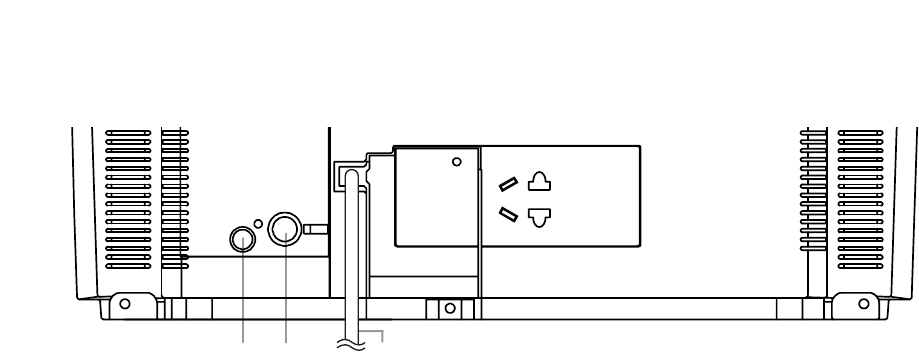
37. COAXIAL Jack
[P.11]
Connect to the digital input of an external
amplifier or decoder (for DVD Audio only).
38. ANT(ENNA). Jack
[P.10]
Connect to an antenna, cable system or satellite
system.
39. Power cord
[P.13]
Connect to a standard AC outlet (120V/60Hz).
NOTE:
•
Remove the power cord from the hook to avoid
breaking a wire before you connect to a stan-
dard AC outlet.
- REAR PANEL - [Fig.3]
3837
39
COAXIAL
ANT.
NOTE:
•
We do not recommend the use of universal remote controls. Not all of the functions may be controlled with
a universal remote control.
If you decide to use a universal remote control with this unit, please be aware that the code number given
may not operate this unit. In this case, please call the manufacturer of the universal remote control.


