5
How to Connect the 1080p HDMI Scaler
1. Connect the HDMI source to the 1080p HDMI Scaler using the supplied
HDMI cable.
2. Connect an optional external audio source to either the TOSLINK digital audio
input or the stereo mini-jack input using user supplied cables.
NOTE
1
: The 1080p HDMI Scaler will cross convert between some digital and
audio formats. All audio outputs (HDMI, digital TOSLINK, and analog stereo
mini-jack) will be active. The 1080p HDMI Scaler will not, however, down-mix
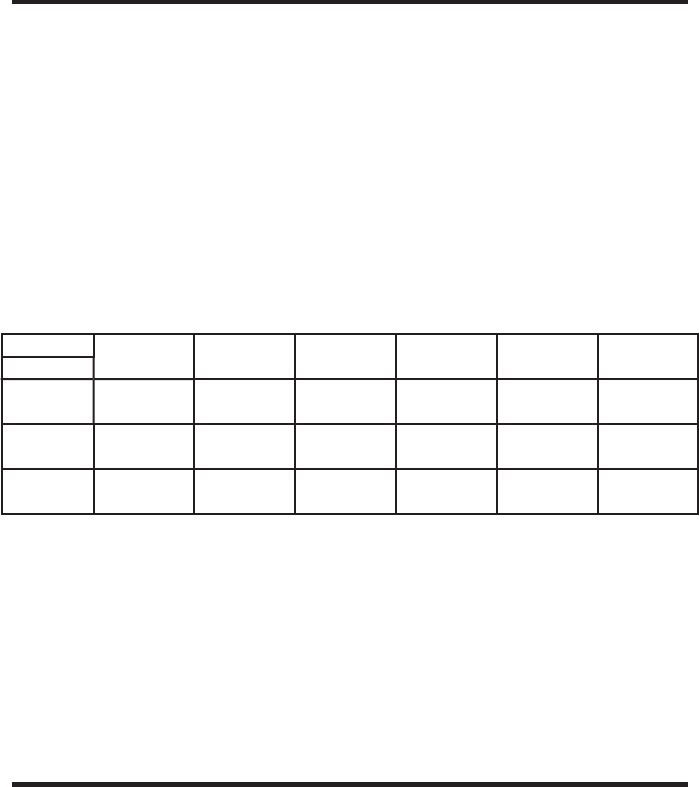
multi-channel audio formats to 2 channel analog stereo. Please see the chart
below to see if audio will be heard out of a particular output based on the audio
input format.
INPUT ►
HDMI
MULTICHANNEL
LPCM
HDMI
2 CHANNEL
LPCM
HDMI
DOLBY DIGITAL
& DTS
TOSLINK
2 CHANNEL
LPCM
TOSLINK
DOLBY DIGITAL
& DTS
ANALOG
STEREO
2 CHANNEL
OUTPUT ▼
HDMI
YES
*2 CHANNEL
YES YES YES YES YES
TOSLINK
YES
*2 CHANNEL
YES YES YES YES YES
ANALOG
STEREO
MINI-JACK
NO YES NO YES NO YES
*2 channels are the front right and front left speakers. It will not down-mix multi-channel to 2 channel audio
3. Connect the HDMI output on the 1080p HDMI Scaler to the display using the
supplied HDMI cable.
4. Connect either the TOSLINK digital audio output or the stereo mini-jack analog
output to the display or external audio processor using user supplied cables.
5. Plug the 5V DC power supply into the 1080p HDMI Scaler.
6. Power on the display fi rst, then the source.
The 1080p HDMI Scaler has a built in GUI for navigating the various functions.
The GUI is navigated by the front panel buttons or the optional RMT-SR-IR
remote control (sold separately).
OPERATING THE 1080P HDMI SCALER
CONNECTING AND OPERATING THE 1080P HDMI SCALER
