to the four-digit code “1234.” To activate the system,
use the
⁄
¤
Navigation Buttons n to highlight
t
he Parental Control Setting on the
S
YSTEM
SETUP
submenu, and press the Enter Button
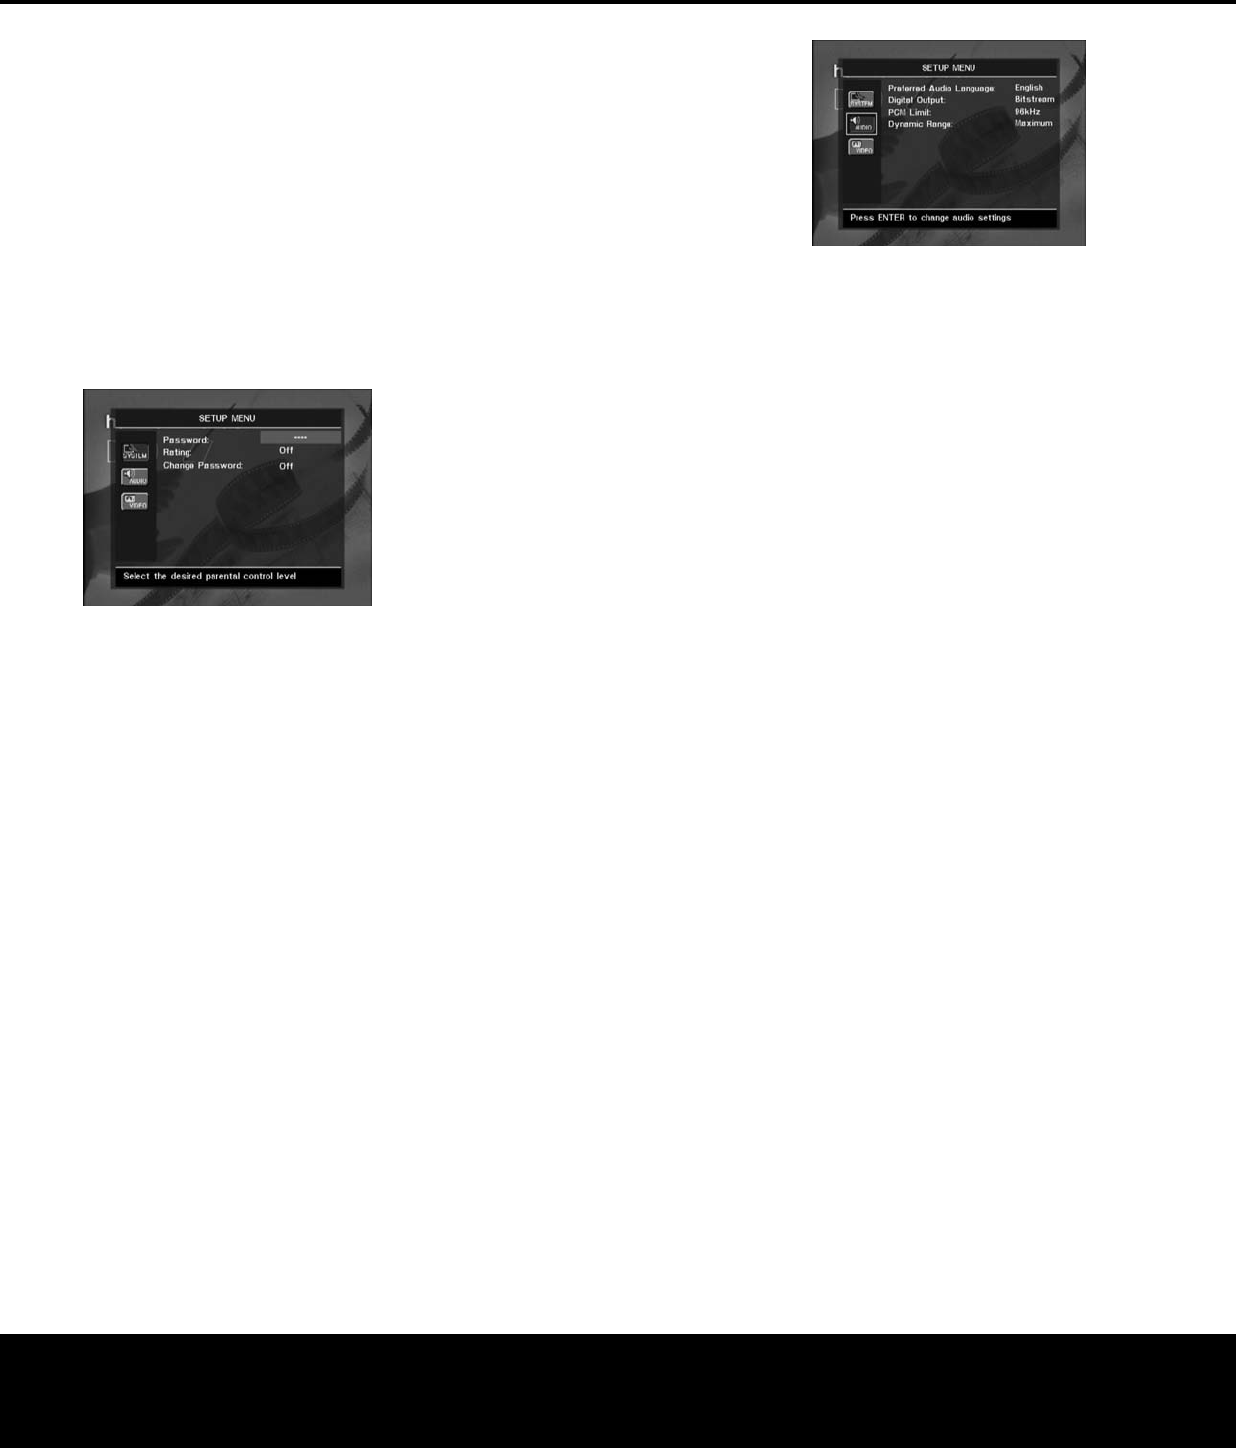
s. Select the “On” setting from the dropdown
menu, and the password screen will appear (see
F
igure 5.) Make sure the dashes on the Password
l
ine are highlighted, then enter the password code
using the
Numeric Keys R and press the ¤
Navigation Button n.
I
f you have entered the password correctly, the current
setting of the Rating line will be highlighted. You may
press the
Enter Button s to display the ratings
dropdown menu. Select a new rating using the
⁄¤
Navigation Buttons n and the Enter Button s.
Figure 5
The first time you use the DVD 27, it is recommended
that you scroll down to the Change Password line and
press the
Enter Button s to display the Change
Password screen. Use the
Numeric Keys R to
enter your new password once at the New Password
line, and a second time at the Confirm Password line.
The DVD 27 will return to the screen shown in Figure
5, where you may then change the Ratings Setting.
Since you had previously entered a valid password,
you will not be required to enter a password again
before changing the rating
.
However
,
once you press
the
‹› Navigation Button n and return to the
SYSTEM SETUP submenu, the new password
will take effect.
Disc Recognition: This setting controls the Disc
Recognition feature
. When turned on, it allows you to
pause a DVD,
remove it from the player,
play another
disc, and then resume playback of the original disc at
a later time from the point at which you paused. When
a previously played disc is reinserted in the DVD 27,
you will be presented with an on-screen status mes-
sage asking whether you wish to start playback from
the beginning of the disc or resume at the point where
you left off. Note that even when the setting is activated,
you must pause playback, rather than bring it to a full
stop
,
and the unit must not be tur
ned off between
discs. The DVD 27 is capable of storing the informa-
tion for up to five DVDs at a time.
PBC Support: This setting controls the activation of
PBC (Play Back Control) Support for VCD discs. If you
p
lan to play VCD discs, which are a CD-ROM-based
format that predates DVD, we recommend that the
setting be turned
ON. However, with PBC enabled,
the Repeat Track, Repeat Disc and Random functions
w
ill not be available for VCDs.
Screen Saver: The DVD 27 offers a Screen Saver
option to protect your TV or video display from dam-
age that may occur if the player is left turned on with
t
he same still image for a period of time, as there is a
possibility that the image may be “burned” into some
display devices. This is particularly important for plasma
displays and some CRT devices. Set Screen Saver to
ON so that the DVD 27 will run the screen saver
when no action has been detected for either one or
five minutes. Press a desired command key on the
front panel or remote to “wake” the DVD 27 and
resume normal operation.
Show Angle Icon: Some DVDs are programmed
with multiple-angle capability, allowing you to view the
same scene from a different camera angle. Normally,
the angle icon will be displayed on screen during
those scenes to inform you that you may press the
Angle Button m to change to a different view. If
you would find the appearance of the icon on-screen
distracting, select the Show Angle Icon setting in the
System submenu, and set it to
OFF. The Angle
Indicator
I will appear in the front-panel display
whenever multiple angles are available, regardless of
whether the on-screen icon appears.
Closed Ca
ption:
This setting enables viewing of
closed caption messages, if they have been encoded
in the video material. Closed captions are text displays
of the program’s dialogue, normally hidden from view,
that are made available for the hearing-impaired or
others
. Select the
ON setting to activate the
DVD 27’s closed captioning decoder so that these
messages may be viewed.
Audio Setup Submenu
This submenu establishes the DVD’s configuration for
general audio settings, such as preferred language and
digital audio settings.
As with all setup menus, press the
Setup Button j
to activate the main menu screen, and then press the
⁄¤ Navigation Buttons n until the AUDIO
SETUP
icon is highlighted, and press the Enter
Button
s again.
Figure 6
T
he following adjustments are available on the Audio
Setup menu:
Preferred Audio Language: This setting is used to
select the default language that will be used for pro-
gram playback. The factory default setting is English,
but you may choose French, Spanish, German or
Italian by making a selection from the dropdown
menu. To select a language other than those shown,
select
OTHER from the dropdown menu and
press the
Enter Button s. A screen will appear
with a list of language choices (see Figure 4). Use
the
⁄¤‹› Navigation Buttons n to select a
language. When the desired language is highlighted,
press the
Enter Button s to set it as the preferred
audio language. If you wish to exit this screen without
selecting a language, use the
⁄¤‹› Navigation
Buttons
n until the word RETURN at the bot-
tom of the screen is highlighted, and press the
Enter
Button
s to return to the AUDIO SETUP
screen.
This procedure selects a preferred audio program
language, but it will only be available when the disc
being played contains that language. The list of lan-
guages available on any given disc is always shown
on the disc jacket,
usually at the bottom of the back
cover. Note that the audio playback language may also
be changed at any time during playback using the
Audio Select Button c, as described on page 27,
but any changes made will only be effective during
playback of that disc.
Digital Output: This setting selects the digital audio
data stream that is routed to the
Optical Digital
Output
£ or the Coaxial Digital Output ¢.
Two choices are available:
•
Bitstream, the default setting, outputs the
Dolby Digital or DTS signal, as selected from the
disc’s menu or by using the
Audio Select Button
c, as explained on page 27. This setting should
be used when your receiver or processor is capable of
decoding signals in the Dolby Digital or DTS format.
•
PCM outputs a standard PCM signal for decoding by
receivers or processors that are not capable of
decoding a Dolby Digital or DTS bitstream. This set-
ting enables two-channel audio playback or matrix
decoding where available.
SYSTEM SETUP
SYSTEM SETUP 19
DVD 27 (120V) OM 12/20/05 2:18 PM Page 19


