


Radio Interference Statement:
The WinTV products have been tested and found to comply with the limits
for a Class B digital device, pursuant to part 15 of the FCC Rules. These
limits are designed to provide reasonable protection against harmful
interference in a residential installation. This equipment generates, uses,
and can radiate radio frequency energy and cause harmful interference to
radio communications. However, there is no guarantee that interference
will not occur in a particular installation. If this equipment does cause
harmful interference to radio or television reception, which can be
determined by turning the equipment off and on, the user is encouraged
to try to correct the interference by one or more of the following
measures: reorient or relocate the receiving antenna,increase the separa-
tion between the equipment and receiver, connect the equipment into an
outlet on a circuit different from that to which the receiver is connected,
consult the dealer or an experienced radio/TV technician for help.
FCC ID: H90WINTV
CE Statement: This equipment has been tested and complies with EN
FCC Statement
N
ote: the latest USB-Live2 software can be found at
http://www.hauppauge.com/site/support/support_hvr950Q.ht
ml
Jerky video with live video
Jerky or distorted video can be caused by two things in your PC
or laptop: a slow CPU which cannot decode the video signal
fast enough, and a graphics system which cannot keep up with
the video decode.
Many times, improving the performance of the graphics display
will fix the jerky video display. Here are some tips on improving
graphics performance:
- Use the latest graphics driver: graphics drivers are often
‘tweaked’ to improve performance, especially the built-in
graphics on laptops. Check the Microsoft Windows update site
to download the latest graphics driver for your computer. For
Dell computers, check the Dell website for the latest graphics
driver.
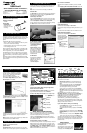
- Use WinTV v7 Video Renderer settings to optimize
graphics performance: The Video Renderer is found in the
General tab of WinTV v7, and is used to change the display
mode of a graphics card for TV watching. This setting does not
affect any other Windows program.
The default mode is EVR. The other modes are VMR9, VMR7
and Overlay. Each mode uses a different process to render
video. Try each mode and use the one which gives you the best
results.
To use hardware graphics acceleration, put a check in the
tick box Use hardware acceleration when possible. This will
allow your graphics system to use hardware acceleration for
video decode. Note: graphics hardware acceleration does not
work on all systems.
Keyboard shortcuts
button, then click on the Capture folder. You will see the
settings for image capture under Snapshots. You can chose
between BMP and JPEG formats.
TV Scheduler
WinTV v7’s built-in TV Scheduler allows you to schedule video
recordings. Once a record event is set, WinTV v7 can be closed
and will “wake up” at the desired time and tuned to the desired
channel.
When a scheduled record event takes place, the WinTV v7
application records “in background”.
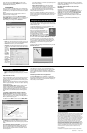
The TV Scheduler can be found in the WinTV v7 Options
menu. Right click your mouse button in the TV window to see
the Options menu. Click Scheduler. To set up an event for
timed watching or recording, click the Add button.
The items that need to be set for each event are:
- Name: you can add a name to the recording. If you do not
enter a name, the name will be in the channel/date format.
- Channel: chose one of your scanned channels.
- Start time: set to the desired start time. Click on the hour
to set the hour, the minute to set the minute. Note: It takes
about 15
seconds to
launch the
WinTV and
start
recording.
- Duration:
number of
minutes in
the recorded
program.
- Recurrance:
one time,
daily, weekly.
Note: If you
Ctrl A Aspect ratio
Ctrl D Display the video
and audio format
of the TV program
Ctrl F Freeze the video
Ctrl Z Open TV
Scheduler
Ctrl W Full screen toggle
Alt F Open File menu
for playback
Alt M Open the Task
Menu
Alt P Previous video
source
Ctrl Q Pause
Ctrl P Play
Alt R Record
Alt S Stop
Alt T Start video
Ctrl C Catch up
Ctrl > Skip ahead
Ctrl < Skip back
If this setting does not help, or if you experience WinTV not
responding after a channel change, then your graphics system
cannot use hardware graphics acceleration. In this case go
back to settings and uncheck “use hardware acceleration” and
rerun WinTV.
Uninstalling the WinTV driver and applications
Run the hcwclear.exe from the installation CD. Select OK A
black screen will briefly appear and once it has disappeared the
software will be removed. If you now re-start the computer you
will be at Step 4 of the installation.
Troubleshooting
QI-USBLIVE2_v1 January 19, 2010
The USB-Live2 package includes a DVD disk burning package
called ‘DVD MovieFactory’. This program is found on the ‘ULead
DVD MovieFactory’ CD.
To install DVD MovieFactory on your PC, insert the CD. The
installer should start automatically. Click ‘Next’
to continue through the installation.
When you have finished the installation, you
will see the DVD MovieFactory icon on your
Windows desktop. Double click on it to start
the DVD MovieFactory ‘launcher’.
To create a DVD or CD movie disk, click Video
disk / New project. Chose the type of disk you want to create
(the most common disk is Create a Video Disk and click OK.
To create a DVD movie, you must record your videos using
WinTV v7, and then import them into DVD MovieFactory. You
can record either .TS files (the default recorded file format) or
.MPEG files since both formats are recognized by DVD
MovieFactory.
To bring your video recordings into DVD MovieFactory, click the
Add video files button.
In DVD MovieFactory, you can trim your videos by double
Making DVD movies with DVD MovieFactory
clicking them while in the timeline bar. When you are finished
adding videos, click Next and proceed to creating a DVD menu
and then onto DVD burning.
Recording videos with WinTV v7 for use in DVD
MovieFactory
Recordings made with the USB-Live2 in the WinTV v7
application are normally saved in the MyVideos directory, To
change this directory, click the Settings menu and then the
Folders tab. You can set the directory in Recorded videos.
With the WinTV v7 application, every time you create a
recording a new file is automatically created. The file will be
formatted as:
(ChannelNumber)_(ChannelName)YearMonthDay_TIme.
set for Record Weekly, you must also specify the Day of the
Week for the recording.
- Date to Begin Program: today's date is the default.
Change this if you want to schedule on another date.
- Source selection: leave set at WinTV to bring up the WinTV
at the requested time and on the requested channel.
Once these are set, click OK. You can add more recordings,
clicking OK after each event is set.
When you are finished click Close. The WinTV program does
not have to be running for the Schedular to work. If WinTV is not
running, it takes about 15 seconds to start WinTV and to start
the recording of TV.