


43
—
—
Audio
Video1
Language
General
V2
Exit
Move
TV Screen
Component Video
S-Video Out
Screen Saver
16:9(Wide
)
Interlace
S1
S2
SETUP
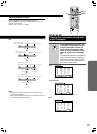
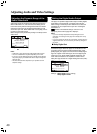
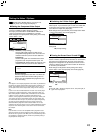
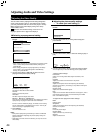
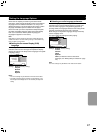
■ Turning the Screen Saver On and Off
Expert
As a protective function against residual images on the TV
screen or monitor, a phenomenon referred to as “screen burn”,
the screen saver appears when the same screen has been
displayed for a length of time. By default, the screen saver is
turned on. However, the screen saver function can be turned
on and off at your discretion.
Make changes to the [Screen Saver] setting in the Setup
screen Video 1 menu in the [Expert] menu mode (page 39).
—
—
—
Audio
Video1
Language
General
V2
Exit
Move
TV Screen
Component Video
S-Video Out
Screen Saver
16:9(Wide
)
Interlace
S2
On
Off
SETUP
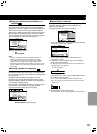
Settings: On (Factory setting)
Off
Note
Pressing 8 (or £ ) displays a playback screen, and pressing 8 (or
£ ) again resumes playback.
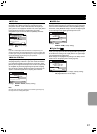
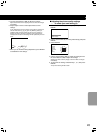
■ Switching the S Video Output
Expert
You can Switch the kind of S Video signal output from the S
Video outputs. If you connected your TV with an S Video cord,
in rare cases the TV picture may appear stretched. In this
case switch the output from [S2] to [S1].
Make changes in the [S-Video Out] in the Setup screen Video
1 menu in the [Expert] menu mode (page 39).
Settings:S1
S2 (Factory Setting)
Setting the Video 1 Options
Expert
denotes more detailed settings. If the item is not
displayed, please refer to page 39 to display it.
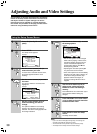
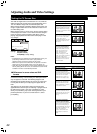
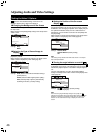
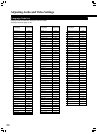
■ Setting the Component Video Output
Compared to a standard interlaced TV picture, a progressive
scan TV is capable of stable, flicker-free images.
Set only if you connected the COMPONENT VIDEO OUT
jacks to a progressive scan-compatible TV or monitor.
Make changes to the [Component Video] setting in the Setup
screen Video 1 menu.
Settings: Interlace (Factory Setting)
Use this setting with regular TVs that are not
compatible with progressive scan. Check the TV’s
instruction manual if you are not sure about this.
Progressive
Use this setting with TVs and monitors that have
progressive scan component video inputs. The
PROGRESSIVE indicator lights up. Check the TV’s
instruction manual if you are not sure about this.
Auto Progressive
Switches to progressive scan when 16:9 DVDs are
played,4:3 DVDs uses interlace setting. Your TV/
monitor must be compatible with progressive scan
to use this setting.
Tip
If this player is set to output progressive-scan video, it’s possible that
the picture will appear stretched when playing discs recorded in 4:3
format. This happens when the TV’s aspect ratio is set at 16:9. To
see the picture in its correct aspect ratio, change the TV setting to
4:3.
If your TV can not be switched between 4:3 and 16:9, set this player
to [Interlace] or [Auto Progressive]. In Auto progressive mode, 4:3
discs will be played in Interlace mode, while discs that are recorded
in both 4:3 and 16:9 will play in interlace mode during the 4:3
sections, and in progressive mode during the 16:9 parts. Switch your
TV’s aspect ratio to the most suitable setting (for more details, see
the manual that came with your TV). When set to [Auto Progressive],
you may see picture disturbance when this player (and the TV)
switches between progressive and interlace modes. This is not a
malfunction of either this player or the TV. Picture disturbance should
only occur when switching from a menu screen to the main feature,
for example.
Note
If you connect a TV that is not compatible with a progressive scan
signal and choose one of the progressive scan settings, you will not
be able to see any picture at all. With your TV connected using either
the composite or S-Video terminals, choose the [Interlace] setting in
the [Component Video] menu.
—
—
Audio
Video1
Language
General
V2
Exit
Move
TV Screen
Component Video
S-Video Out
Screen Saver
16:9(Wide
)
Interlace
Progressive
Auto Progressive
SETUP
PROGRESSIVE