


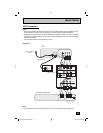

19
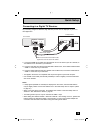
By connecting a Digital TV Receiver, high definition pictures can be displayed on your TV in
their digital form.
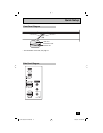
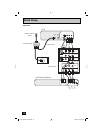
HDMI 1
R - AUDIO - L
SERVICE
ONLY
DIGITAL-IN
1
2
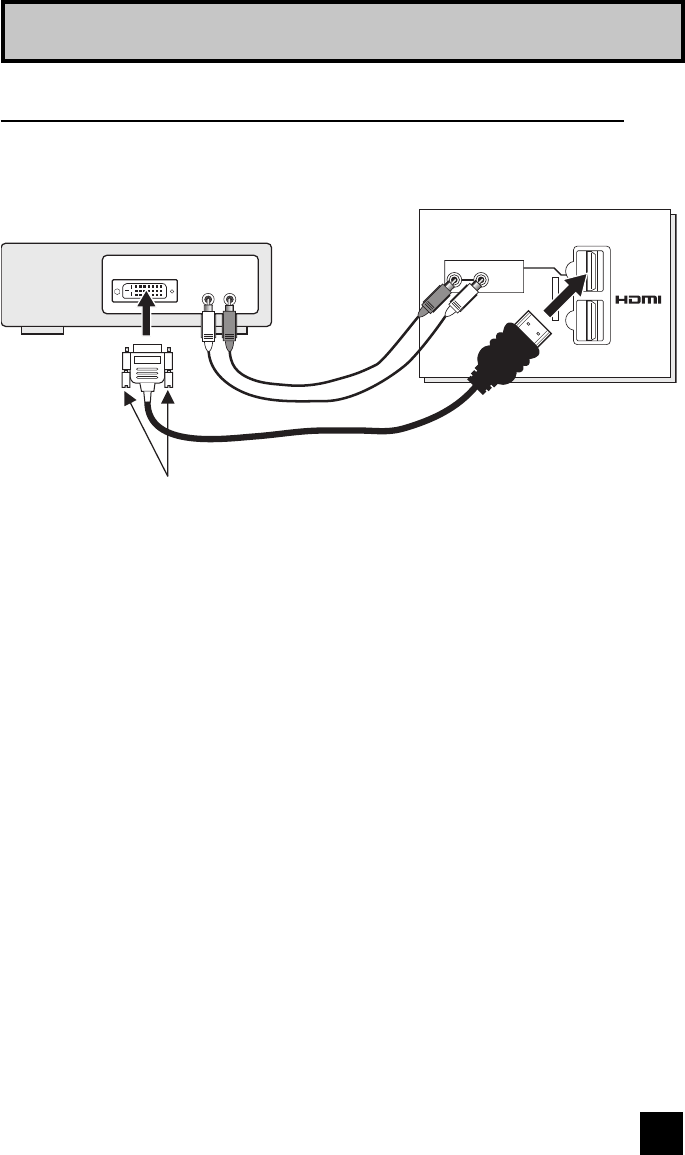
HDMI to DVI Cable
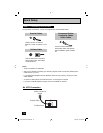
After the connections have been made,
tighten the screw to secure the cables.
DTV device
Digital Out Audio Out
L R
TV Rear Panel
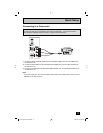
Connecting to a Digital TV Receiver
1) Connect the HDMI to DVI Cable from the DIGITAL OUT on the back of your DTV decoder, to
the DIGITAL-IN on the back of your television.
2) Connect a red cable from the DTV decoder RIGHT AUDIO OUT, to the RIGHT AUDIO INPUT
"HDMI 1" on the back of your television.
3) Connect a white cable from the DTV decoder LEFT AUDIO OUT, to the LEFT AUDIO INPUT
"HDMI 1" on the back of your television.
• The digital-in terminal is not compatible with the picture signal of a personal computer.
• Use a HDMI to DVI cable (commercially available) in order to digitally connect the television
with a DTV decoder.
Notes:
• If 480p signals (640x480 or 720x480) are displayed on the screen, the horizontal balance
may be slightly shifted. Access the “DIGITAL-IN” in the initial setup menu to adjust it. (Refer
to page 50.)
• When you do the above connection, set "DIGITAL-IN1 AUDIO" in the Initial Setup menu to
ANALOG. See "DIGITAL-IN1 AUDIO", page 48.
• The Analog Audio input can only be used with the HDMI 1 input.
• When setting the “DIGITAL AUDIO – ANALOG / DIGITAL” menu setting on the TV, please note
that this setting only effects the HDMI 1 jack and that if you use a DVI to HDMI adapter this
connection must be made to the HDMI 1 along with analog audio cables.
Quick Setup
LCT2139-001A-A ENG.indd 19LCT2139-001A-A ENG.indd 19 4/28/06 9:42:55 AM4/28/06 9:42:55 AM