February 13, 2002 9:59 am Page 4
—4—
Master Page: Right
After the 1 is pressed for the first time to power on the recorder,
the recorder starts Auto Set Up or Preset Download.
TTENTION:
If you have connected the recorder to a TV offering T-V Link via a
fully-wired 21-pin SCART cable and if the TV is turned on, the
recorder automatically performs the Preset Download even if you
perform Auto Set Up.
Before starting:
● Perform “Basic Connections” (
੬
3).
● Set the TV to its AV mode (with AV connection) or UHF
channel 36 (with RF connection).
Auto Set Up
— Auto Channel Set/Auto Clock Set*/Auto Guide Program
Number Set*
* If you select a country in Central or Eastern Europe, set the clock
and Guide Program Number manually.
A
Turn on recorder
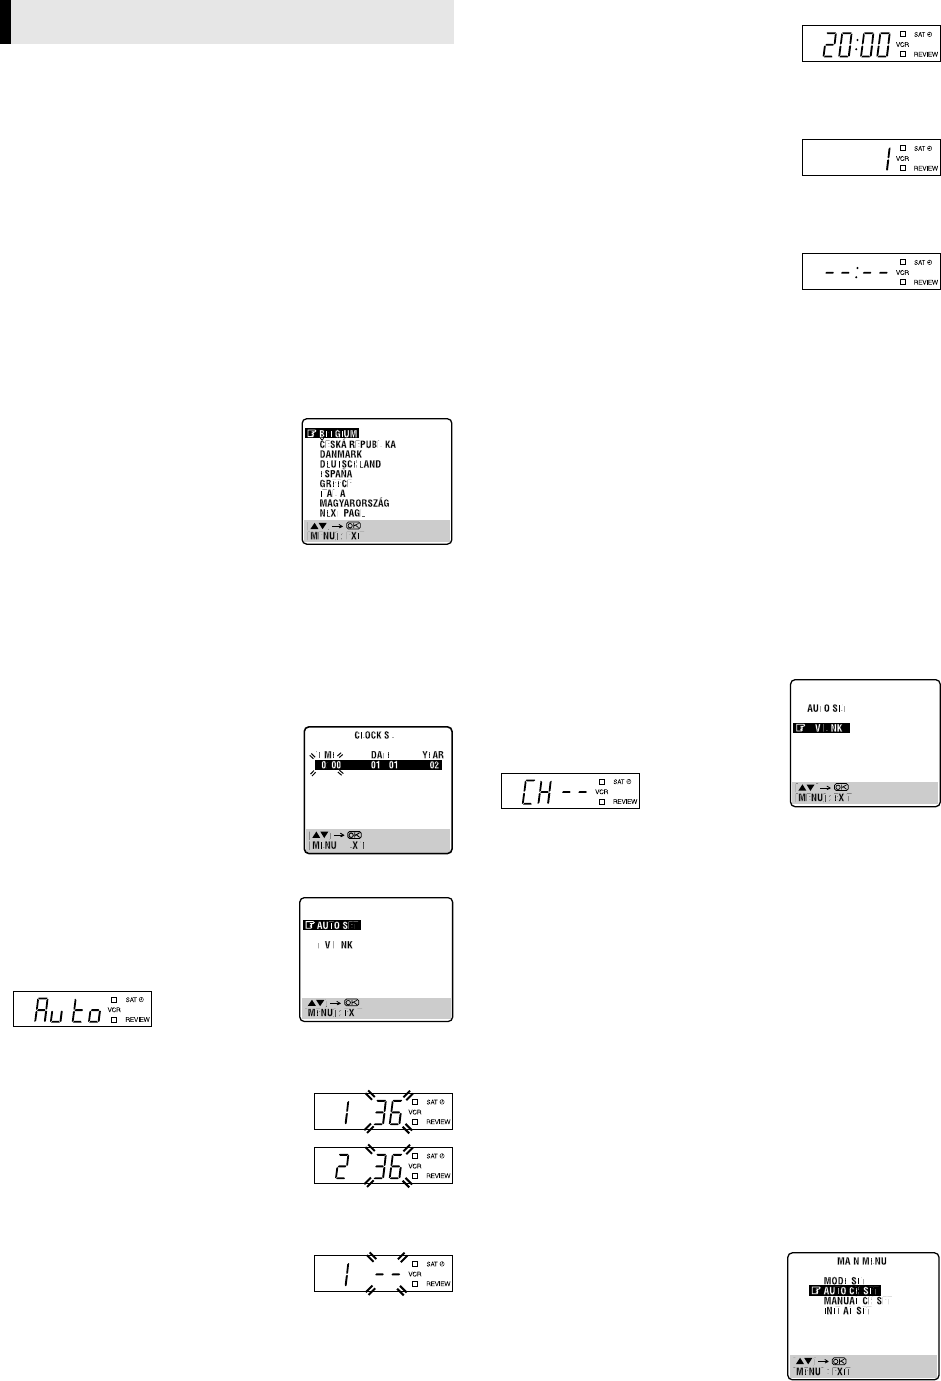
Press 1. The Country Set screen appears
on the screen.
● If you have connected your TV to the
recorder with RF connection and the on-
screen display appearing on UHF
channel 36 looks distorted, perform
“Video Channel Set” (
੬
16).
B
Select your country
Press rt to place the pointer next to your country, then press OK.
The language is automatically selected for the on-screen display
depending on the country you have selected. The AUTO SET/T-V
LINK screen appears.
● If you select BELGIUM or SUISSE and press OK, the Language
Set screen appears. Press rt to place the pointer next to the
desired language, then press OK. Go to step
3
33
3.
● If you select MAGYARORSZÁG, CESKÁ
REPUBLIKA, POLSKA or OTHER
EASTERN EUROPE, press OK. The Clock
Set screen appears. Press rt until the
desired time appears, then press OK or
e. Set the date and year in the same way.
(Holding rt changes the time in
30-minute intervals, or changes the date
in 15-day intervals.) Then press MENU and go to step
3
33
3.
C
Perform Auto Set Up
Press rt to place the pointer next to
“AUTO SET” and press OK or e.
● If you are using the display panel, press
rt to select “Auto” and press OK or e.
● Do NOT press any button during Auto Set Up.
D
Confirm/Set video channel
With RF connection
The video channel that is shown on the display
panel is your video channel. Press OK.
● If you have selected MAGYARORSZÁG,
CESKÁ REPUBLIKA, POLSKA or OTHER
EASTERN EUROPE in step
2
22
2, “2” appears
instead of “1”.
● To view picture signals from the recorder, set your TV to the
video channel.
With AV connection
Press PR – until the display panel shows
“1 – –” (or “2 – –”). Now the video channel
is set to off. Then press OK.
● To view picture signals from the recorder, set your TV to its AV
mode.
E
Check results
If both Auto Channel Set and Clock Set
have been performed successfully, the
correct current time is displayed.
Turn on the TV and select its video channel or AV mode. Then
make sure that all necessary stations have been stored in the
recorder’s memory by using the PR button(s).
If Auto Channel Set has succeeded but
Clock Set has not, “1” is displayed.
A
Turn on the TV and select its video
channel or AV mode. Then make sure that all necessary stations have
been stored in the recorder’s memory by using the PR button(s).
B
Perform “Clock Set” (
੬
13).
If both Auto Channel Set and Clock Set
have failed, “– –:– –” is displayed.
Make sure the cables are connected
properly. Turn off the recorder once, then turn the recorder back on
again. The Country Set screen appears on the screen. Perform Auto
Set Up or Preset Download again.
Preset Download
— Auto Channel Set by downloading preset data from TV/
Auto Clock Set*/Auto Guide Program Number Set*
* If you select a country in Central or Eastern Europe, set the clock
and Guide Program Number manually.
TTENTION:
You can use this function only with a TV offering T-V Link, etc.* Be
sure to use a fully-wired 21-pin SCART cable.
* Compatible with TVs offering T-V Link, EasyLink, Megalogic,
SMARTLINK, Q-Link, DATA LOGIC or NexTView Link via fully-wired 21-
pin SCART cable. The degree of compatibility and available functions
may differ by system.
Before starting:
Perform steps
1
11
1 – 2
22
2 of “Auto Set Up”.
A
Perform Preset Download
Press rt to place the pointer next to “T-V
LINK” and press OK or e.
● If you are using the display panel, press
rt to select “CH – –” and press OK or e.
● Do NOT press any button during Preset Download. When Preset
Download is completed, “COMPLETED” appears for about
5 seconds, then the normal screen appears.
B
Check results
Perform step
5
55
5
of “Auto Set Up”.
C
Set video channel to off
Perform “Video Channel Set” (
੬
16).
NOTES:
● Depending on the area, the recorder cannot perform Auto Set
Up or Preset Download properly.
● In the area where no TV station transmits a PDC (Programme
Delivery Control) signal, the recorder can perform neither Auto
Clock Set nor Auto Guide Program Number Set.
● If you have moved to a different area, perform “Video Channel
Set” (
੬
16) (with RF connection), “Tuner Set” (
੬
13) and
“Clock Set” (
੬
13) as required.
● If a new station starts broadcasting in your area, perform “Tuner
Set” (
੬
13) and, if necessary, “Video Channel Set” (
੬
16).
Language Set
You can change the language setting manually as required.
A
Access Main Menu screen, then Auto
Channel Set screen
Press MENU. Press rt to place the
pointer next to “AUTO CH SET”, then press
OK or e.
Initial Settings
HR-J690EU-001EN.fm Page 4 Wednesday, February 13, 2002 9:59 AM
