


Page 6 March 9, 2001 9:16 am
A
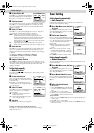
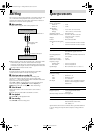
Set Auto Clock to ON
Press OK or
e
on the Remote repeatedly to
move the highlight bar to “AUTO CLOCK”,
then press
rt
so that “ON” is selected.
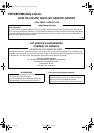
B
Select host channel
You can either select “AUTO” or enter a PBS channel number.
Press OK or
e
to move the highlight bar to “HOST CH”, then
press
rt
repeatedly until “AUTO” or the desired PBS channel
number is selected.
C
Select D.S.T. mode
Press OK or
e
to move the highlight bar to “D.S.T.”, then press
rt
repeatedly until the desired setting is selected.
AUTO
: Select if you want to adjust your VCR’s clock
automatically by the incoming signal from the host
channel. (Auto Daylight Saving Time enables automatic
adjustment of the VCR’s clock at the start and end of
Daylight Saving Time.) Be sure to select the correct time
zone manually in step
4
44
4
.
ON
: Adjustment will be made by the built-in clock itself.
OFF
: Select when Daylight Saving Time does not apply to you.
D
Select time zone
Press OK or
e
to move the highlight bar to “TIME ZONE”, then
press
rt
repeatedly until “AUTO” or the desired time zone is
selected. Each time you press the button, the time zone changes
as follows:
{
AUTO
{
ATLANTIC
{
EASTERN
{
CENTRAL
{
MOUNTAIN
{
PACIFIC
{
ALASKA
{
HAWAII
{
(back to the beginning)
E
Complete Semiauto Clock Set
Press MENU to return to normal screen. Turn off the VCR. “Aut”
will appear on the display panel while the clock is being set. The
current clock time will appear automatically when the clock
setting is complete.
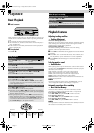
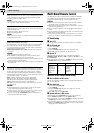
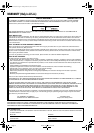
Setting clock manually
— Manual Clock Set
First follow steps
1
11
1
to
2
22
2
in “Preparations” above, then go to the
following steps.
A
Set time, date and year
Press
rt
until the desired time appears,
then press OK or
e
. Set the date and year
in the same way.
● Holding
rt
changes the time in 30-
minute intervals, or changes the date in
15-day intervals.
B
Select D.S.T. mode
Press OK or
e
to move the highlight bar to
“D.S.T.”, then press
rt
to select the
desired setting.
ON
: Adjustment will be made by the
built-in clock itself.
OFF
: Select when Daylight Saving Time
does not apply to you.
C
Start clock
Press MENU and normal screen appears.
To make corrections any time during the process
Press OK or
e
repeatedly until the item you want to change
blinks, then press
rt
.
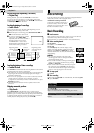
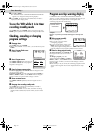
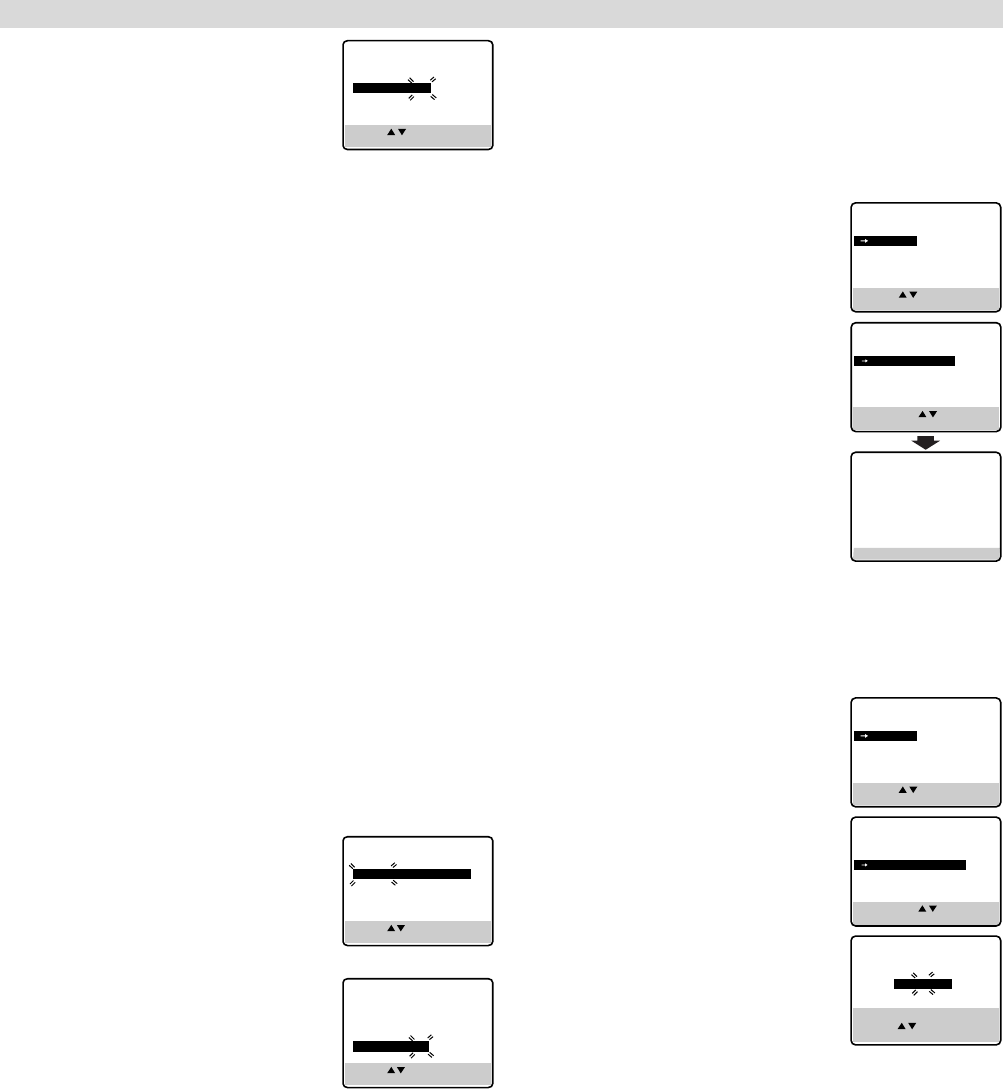
Tuner Setting
Setting channels automatically
— Auto Channel Set
Perform Auto Channel Set only if channels have not been set
correctly by the Plug&Play setting.
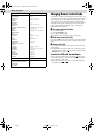
A
Access Main Menu screen, then Tuner
Set screen
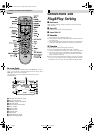
Press MENU on the Remote. Press
rt
to
move the highlight bar (arrow) to “TUNER
SET”, then press OK or
e
.
B
Perform Auto Channel Set
Press
rt
to move the highlight bar (arrow)
to “AUTO CHANNEL SET”, then press OK
or
e
. The VCR selects the correct band (TV
or CATV) automatically during Auto
Channel Set.
● When Auto Channel Set is complete,
“SCAN COMPLETED” appears on
screen.
● If the scan was unsuccessful, “SCAN
COMPLETED–NO SIGNAL–” appears
on screen. Check the connections and
start again.
Press MENU to return to normal screen.
Setting channels manually
— Manual Channel Set
You can add the channels you want or delete the channels you do
not want manually.
A
Access Main Menu screen, then Tuner
Set screen
Press MENU on the Remote. Press
rt
to
move the highlight bar (arrow) to “TUNER
SET”, then press OK or
e
.
B
Access Manual Channel Set screen
Press
rt
to move the highlight bar (arrow)
to “MANUAL CHANNEL SET”, then press
OK or
e
.
C
Add or skip desired channels
To add channels
A Press the Number keys on the Remote
to input a channel number you want to
add.
B Press OK or
e
to set to “ADD”.
C Repeat A to B to add other channels.
Press MENU to return to normal screen.
To skip channels
A Press
rt
or the Number keys to select a channel number you
want to skip.
B Press OK or
e
to set to “SKIP”.
C Repeat A and B to skip other channels. Press MENU to return
to normal screen.
PRESS ( , ), THEN (OK)
PRESS (MENU) TO END
CLOCK SET
TIME DATE YEAR
1:00PM 12/24 00 SUN
AUTO CLOCK : ON
HOST CH : AUTO (CATV)
D.S.T. : AUTO
TIME ZONE : AUTO
PRESS ( , ), THEN (OK)
PRESS (MENU) TO END
CLOCK SET
TIME DATE YEAR
– –:– –AM 1/ 1 00
AUTO CLOCK : ON
HOST CH : AUTO (CATV)
D.S.T. : AUTO
TIME ZONE : AUTO
PRESS ( , ), THEN (OK)
PRESS (MENU) TO END
CLOCK SET
TIME DATE YEAR
1
:
00
AM 12/ 24 00 SUN
AUTO CLOCK : OFF
D.S.T. : ON
MAIN MENU
FUNCTION SET
TUNER SET
INITIAL SET
PRESS ( , ), THEN (OK)
PRESS (MENU) TO END
AUTO CHANNEL SET
SCANNING...
PRESS (MENU) TO END
TUNER SET
BAND CATV
AUTO CHANNEL SET
MANUAL CHANNEL SET
SELECT WITH ( , ) AND (OK)
PRESS (MENU) TO END
MAIN MENU
FUNCTION SET
TUNER SET
INITIAL SET
PRESS ( , ), THEN (OK)
PRESS (MENU) TO END
TUNER SET
BAND CATV
AUTO CHANNEL SET
MANUAL CHANNEL SET
SELECT WITH ( , ) AND (OK)
PRESS (MENU) TO END
MANUAL CHANNEL SET
(CATV)
CH 45 ADD
PRESS NUMBER KEY (0–9)
OR ( , ), THEN (OK)
PRESS (MENU) TO END
– Initial Settings –
HR-A5U-EN.fm Page 6 Friday, March 9, 2001 9:16 AM