


EN 15
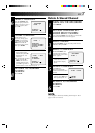
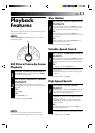
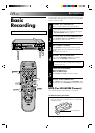
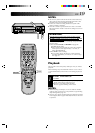
Tape Position Indicator
The tape position indicator appears
on screen when, from the Stop
mode, you press FF, REW or
perform an Index Search. The
position of “5” in relation to “0”
(beginning) or “+” (end) shows you
where you are on the tape.
”O.S.D.” (੬ pg. 5) must be set to
“ON”, or the indicator will not
appear.
NOTE:
Depending on the type of tape used, there may be times when
the indication is not correct.
0
+++
3
1:23:45
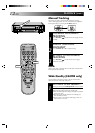
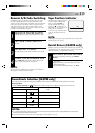
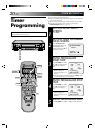
Soundtrack Selection [E639EE only]
Your video recorder is capable of recording three soundtracks (HI-FI L, HI-FI R and NORM) and will play back the one you select.
During Playback
Pressing AUDIO MONITOR (or on the remote control) changes the soundtrack being played back as follows:
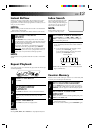
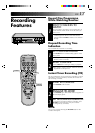
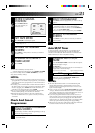
Simply by pressing one button, the recorder stops, rewinds, and
ejects the tape for you. A quick and easy way to rewind rental
video tapes before you return them to the shop.
ACTIVATE RENTAL RETURN
1
Anytime except during recording, press RENTAL
RETURN.
● The recorder will rewind the tape to the beginning
and eject it.
● ] on the display panel will blink while in the
Rental Return mode.
● To cancel the Rental Return mode, press STOP.
Rental Return (E639EE only)
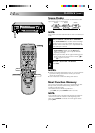
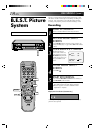
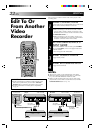
REMOVE POWER SUPPLY
1
Unplug the mains power cord from the mains outlet.
SET A/B CODE SWITCH
2
Set to B.
RE-SUPPLY POWER
3
Plug the mains power cord back into the mains outlet.
TURN THE RECORDER ON
4
Press OPERATE on the remote control. The recorder
will now only respond to B code signals.
NOTE:
Some TV sets may malfunction in response to the B mode. If
this happens, switch back to the A mode.
Remote A/B Code Switching
The remote control is capable of controlling two JVC video
recorders independently; one set to respond to the remote
control’s A code control signals and another set to respond to B
code control signals. The remote control is preset to send A
code signals because your video recorder is initially set to
respond to A code signals. You can easily modify your video
recorder to respond to B code signals.
NOTES:
●
"L + R" should normally be selected. In this mode, Hi-Fi stereo tapes are played back in stereo, and the NORM track is played back
automatically for tapes with only normal audio.
●
"O.S.D." must be set to "ON" or the on-screen displays will not appear (
੬
pg. 5).
TRACK
Recorder's Front Panel On-Screen Display
USE
L + R HI FI For Hi-Fi stereo tapes
LR
L HI FI For main audio of Bilingual tapes
L
R HI FI For sub audio of Bilingual tapes
R
NORM NORM For audio-dubbed tapes
L + R + NORM HI FI For audio-dubbed tapes
NORM