


4
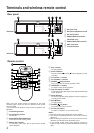
Terminals and wireless remote control
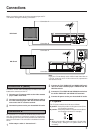
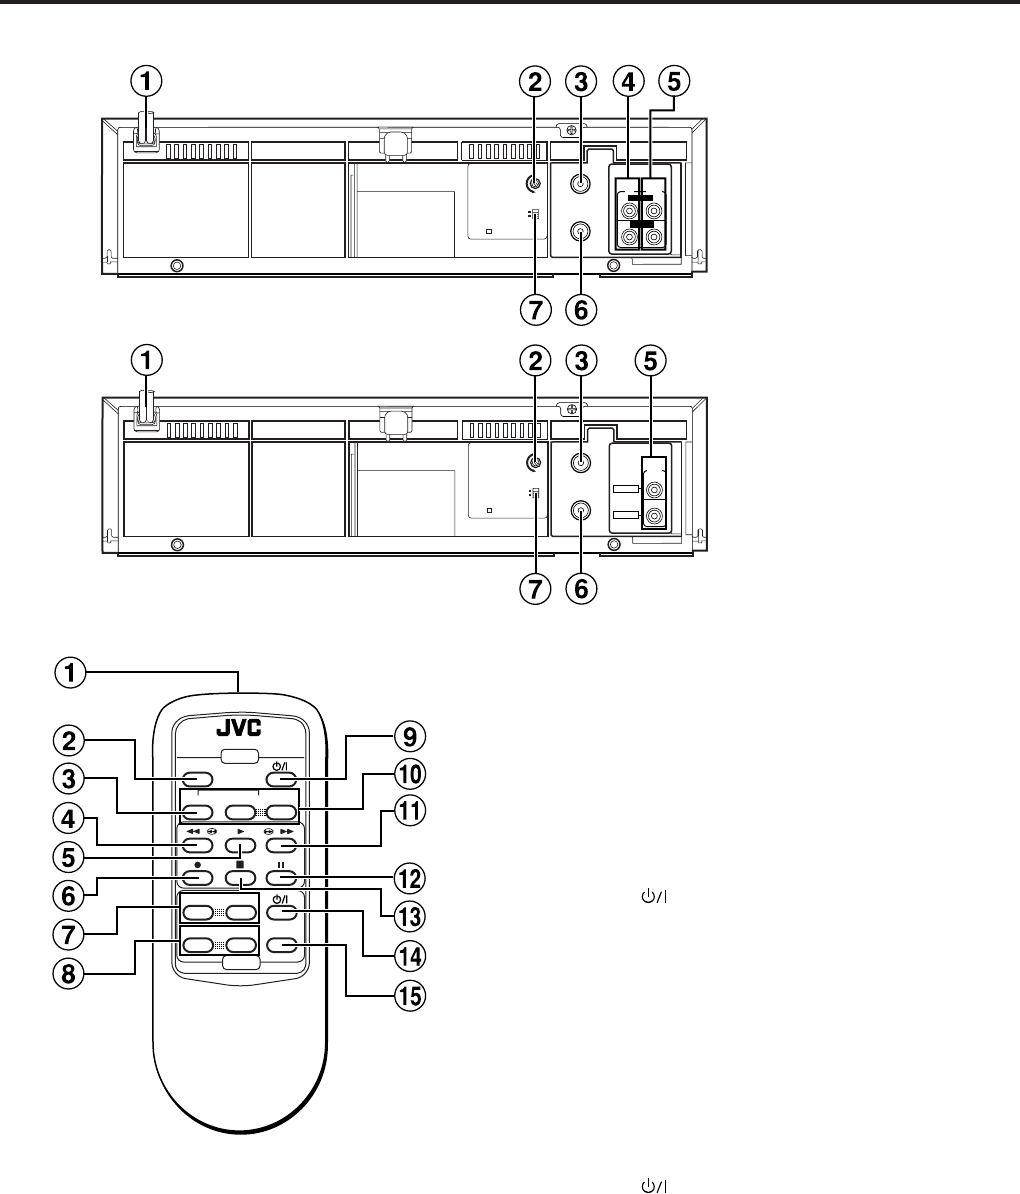
Rear panel
1 AC power cord
2 RF channel adjustment screw
3 RF. OUT terminal
4 AUDIO/VIDEO IN terminals
(HR-JP34K only)
5 AUDIO/VIDEO OUT terminals
6 ANT. IN terminal
7 TV system switch
IN OUT
AUDIO
VIDEO
RF OUT
ANT.IN
32(24)
40(27)
K
G
002
-
TV CH +
-
VOLUME
+
AUTO
-
TRACKING
+
REMOTE CONTROL UNIT
TV/VCR
TV/VCR
TV
VIDEO
Remote control
When using the remote control for operation of the video
cassette player, make sure that it is pointed at the remote
sensor window.
You can also use the player’s remote control to operate a JVC
television.
1 Transmitting window
2 TV/VCR (Player) button
Not function
3 Digital AUTO TRACKING button
To cancel the Auto tracking mode.
4 Rewind 1 + button
To rewind the video tape. Also to start reverse shuttle
search playback.
5 Play 3 button
To start playback.
6 Record ¶ button
Press the Record
¶¶
¶¶
¶ and Play
3 3
3 3
3 buttons together, to start
recording.
7 TV channel –/+ buttons
8 TV VOLUME –/+ buttons
9 POWER (Player) button
To turn the power on and off (standby mode).
0 TRACKING –/+ buttons
To adjust tracking during playback.
! Fast forward ¡ Z button
To fast forward the video tape. Also to start forward shuttle
search playback.
@ Pause 8 button
To freeze the picture during playback. Also to engage the
recording pause mode.
# Stop 7 button
To stop playback.
$ POWER (TV) button
To turn the TV power on and off.
% TV/VCR (TV) button
To switch TV between TV and VCR (or AV).
Notes:
• Point the remote control toward the sensor window.
• The maximum operating distance of the remote control is
about 8 m.
• When inserting the batteries, be sure to insert in the correct
directions as indicated under the battery cover.
• If the remote control doesn’t work properly, remove its
batteries, wait a short time, replace the batteries and then try
again.
HR-JP34K
OUT
AUDIO
VIDEO
RF OUT
ANT.IN
32(24)
40(27)
K
G
001
HR-JP14A