— 7 —
Page 7 October 31, 2002 1:35 pm
Tuner Setting
Setting channels automatically
— Auto Channel Set
Perform Auto Channel Set only if channels have not been set
correctly by the Plug&Play setting.
A
Access Main Menu screen, then Tuner
Set screen
Press MENU on the Remote. Press
rt
to
move the highlight bar (arrow) to “TUNER
SET”, then press OK or
e
.
B
Perform Auto Channel Set
Press
rt
to move the highlight bar
(arrow) to “AUTO CHANNEL SET”, then
press OK or
e
. The VCR selects the correct
band (TV or CATV) automatically during
Auto Channel Set.
● When Auto Channel Set is complete,
“SCAN COMPLETED” appears on
screen.
● If the scan was unsuccessful, “SCAN
COMPLETED–NO SIGNAL–” appears on
screen. Check the connections and start
again.
Press MENU to return to normal screen.
Setting channels manually
— Manual Channel Set
You can add the channels you want or delete the channels you do
not want manually.
A
Access Main Menu screen, then Tuner
Set screen
Press MENU on the Remote. Press
rt
to
move the highlight bar (arrow) to “TUNER
SET”, then press OK or
e
.
B
Access Manual Channel Set screen
Press rt to move the highlight bar
(arrow) to “MANUAL CHANNEL SET”,
then press OK or
e.
C
Add or skip desired channels
To add channels
A Press the Number keys on the Remote
to input a channel number you want to
add.
B Press OK or
e
to set to “ADD”.
C Repeat
A
to
B
to add other channels.
Press MENU to return to normal screen.
To skip channels
A Press
rt
or the Number keys to select a channel number you
want to skip.
B Press OK or
e
to set to “SKIP”.
C Repeat
A
and
B
to skip other channels. Press MENU to return
to normal screen.
Basic Playback
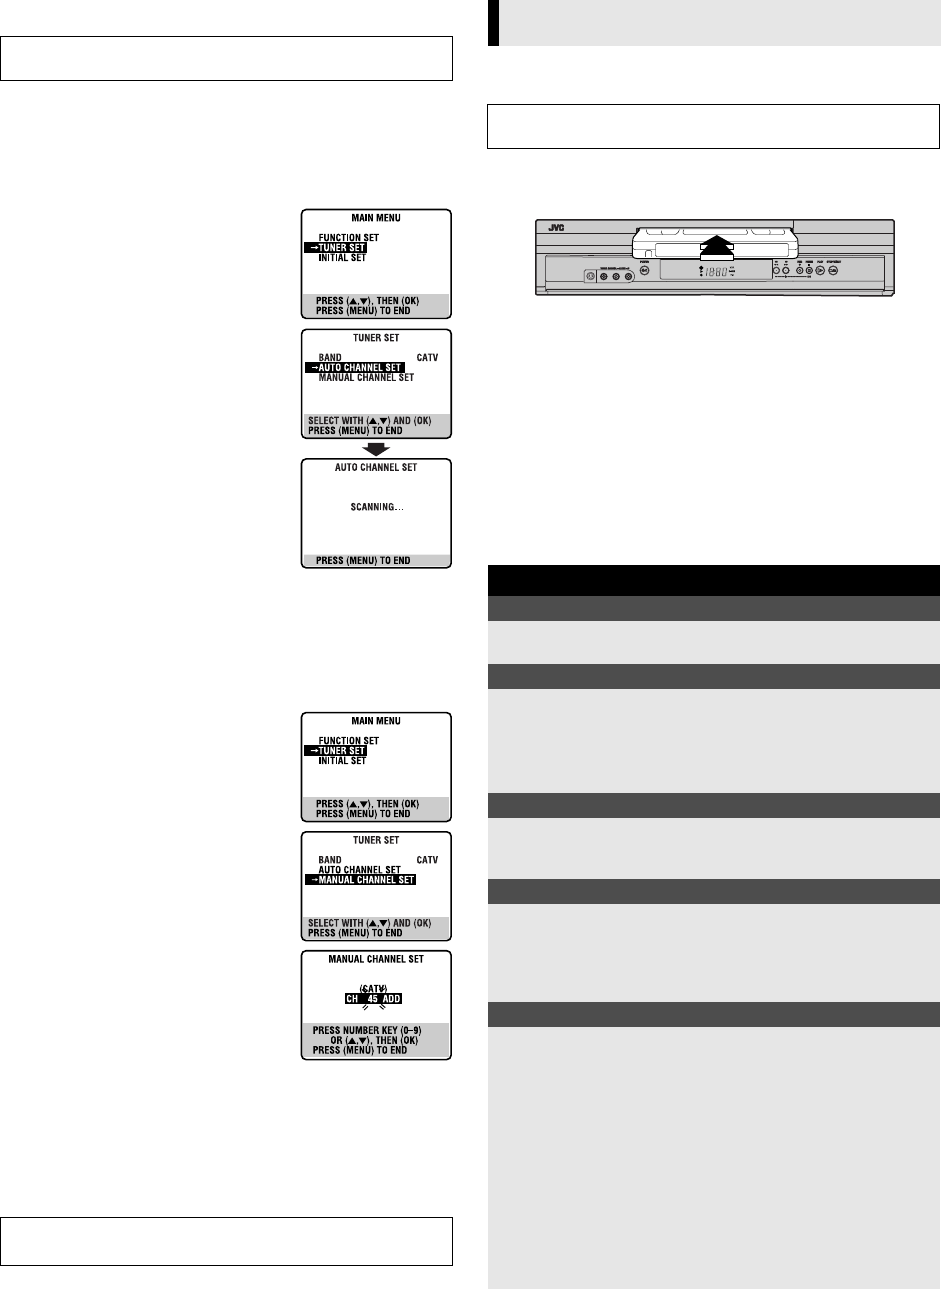
A
Load a cassette
Make sure the window side is up, the rear label side is facing you
and the arrow on the front of the cassette is pointing towards the
VCR.
● Do not apply too much pressure when inserting.
● The VCR turns on, and the counter on the on-screen display is
reset, automatically.
● If the cassette’s record safety tab has been removed, playback
begins automatically.
B
Start playback
Press PLAY (
4
).
● The S-VHS indicator lights up when you play back a tape
recorded in S-VHS mode or in S-VHS ET mode (
੬
pg. 9).
Turn on the VCR and TV, and select the VCR channel (or AV
mode).
After a power failure occurs, band selection will be reset to
“CATV”.
Playback
Turn on the VCR and TV, and select the VCR channel (or AV
mode).
During playback
Stop playback
Press STOP (
8
) on the
Remote.
OR Press STOP/EJECT (
0
) on
the VCR.
Pause playback and view still picture
Press PAUSE (
9
).
● Press PLAY (
4
) to resume normal playback.
NOTE:
During still picture, vertical vibration may appear on the TV
screen. Press CH
r/t on the Remote to get a clearer picture.
Pause and Frame-by-Frame playback
Press PAUSE (
9
) to pause, then press
2
or
6
(or PAUSE (
9
))
repeatedly.
● Press PLAY (
4
) to resume normal playback.
Picture Search
Press REW (
3
) or FF (
5
). Press REW (
3
) or FF (
5
)
again to perform high-speed search.
● Each time you press REW (
3
) or FF (
5
), the search speed
changes between low-speed and high-speed.
● Press PLAY (
4
) to resume normal playback.
Variable-Speed Picture Search (including slow-motion)
Press
2
or
6
repeatedly.
● Press PLAY (
4
) to resume normal playback.
● Each time you press
2
or
6
, the playback speed
changes. To decrease the speed during picture search, press the
opposite direction button repeatedly.
● During still picture, press and hold
6
to start forward (or
2
to start reverse) slow motion playback. When you release
the button, still picture resumes. During still picture, holding
PAUSE (
9
) for more than 2 seconds also starts forward slow
motion playback. If you press PAUSE (
9
) again, still picture
resumes.
NOTE:
During slow motion, some noise may appear on the TV screen.
Press CH
r
/
t
on the Remote to eliminate the noise.
S-VIDEO
CONTINUED ON NEXT PAGE
HR-S1902U-EN.fm Page 7 Thursday, October 31, 2002 1:36 PM


