


36
EN
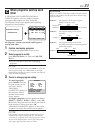
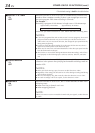
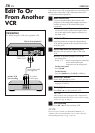
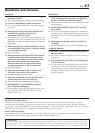
ANT. IN
RF OUT
AUDIO
VIDEO
R
L
OUT
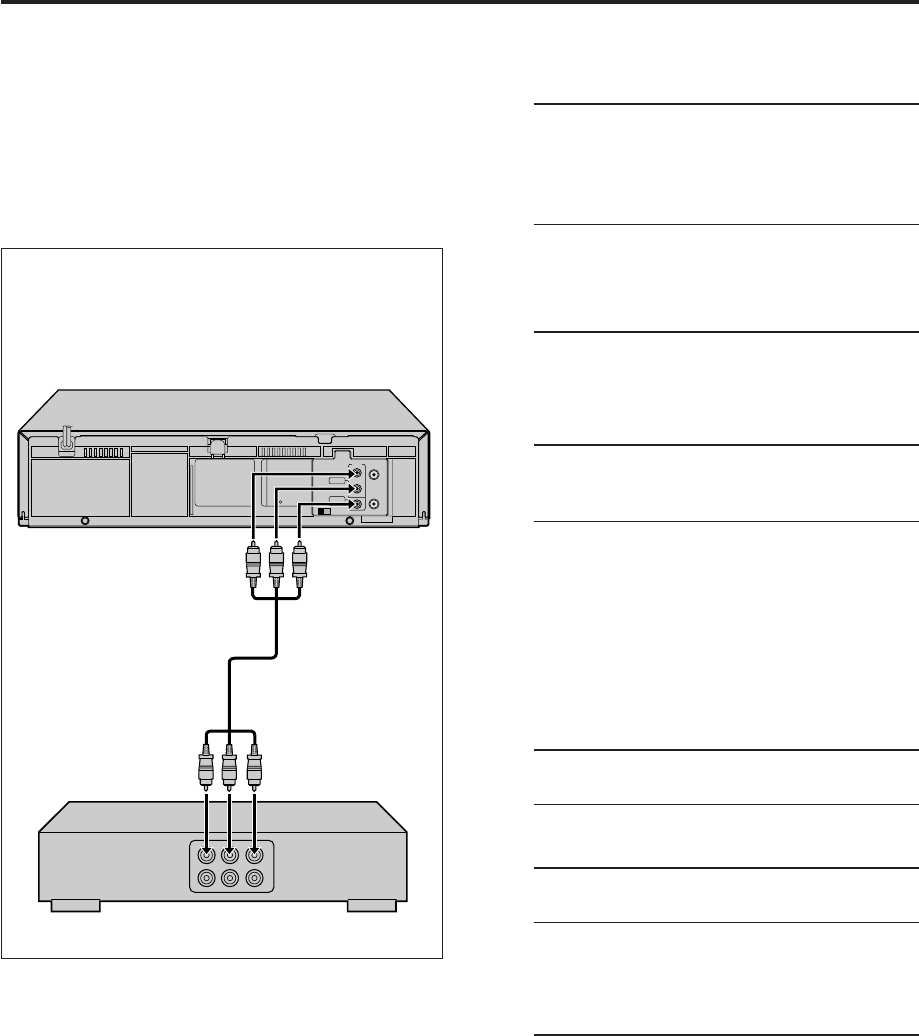
Edit To Or
From Another
VCR
You can use your VCR as the playback or recording VCR.
● Refer also to the other VCR’s instruction manual for
connection and its operations.
1
Make connections
Connect an audio/video cable between the
playback VCR’s audio/video output connectors
and the recording VCR’s audio/video input
connectors.
● When using this VCR as the recording VCR,
connect this VCR’s audio/video input connec-
tors to the audio/video output connectors on
the other VCR.
2
Load cassettes
Insert the playback cassette into the playback
VCR and the cassette to be recorded on into the
recording VCR.
3
Select input mode on recording VCR
Select the correct external input on the other
VCR.
● On this VCR (when using this VCR as the
recording VCR);
Select “F-1” — when connecting the camcorder
to the audio/video input
connectors on the front panel.
On the front panel:
Press CH5∞.
On the Remote:
Press the Number key "0 (AUX)" or CH +/–.
4
Select EDIT function
Set the EDIT function to “ON”.
● On this VCR, follow the procedure described
on pages 32 and 33.
5
Start playback
Press PLAY ( 3 ) on the playback VCR.
NOTE:
If the playback VCR is equipped with a superimpose/
OSD disable feature then set it to “OFF” before starting
playback (
੬
pg. 32 and 33).
6
Start recording
Press REC ( ¶ ) on the recording VCR.
NOTE:
Be sure to select “AUTO” for “PICTURE CONTROL” (or
“NORM” when “AUTO PICTURE” is set to “OFF”) after you
finish dubbing the tapes (
੬
pg. 32 and 33).
Another VCR
(for recording)
Audio/video cable
(not supplied)
This VCR (for playback)
To AUDIO/
VIDEO OUT
Connection
Ex. When using this VCR as the playback VCR
To Audio/
video Input
EDITING