


25
OPERATION
Operation with tape
Timer recording using On Screen
Display
You may set up to seven timer record events within
one month of the current date.
Note
Before setting the timer make sure that you have set
the VCR clock correctly and you know which stations
you have tuned TV stations on your VCR.
11
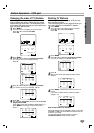
Insert a video cassette with protection tab into your
VCR.
The video cassette should have the window side
facing up and the arrow facing away from you.
22
Press MENU.
Press 1 or 2 to select REC.
Press OK.
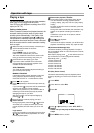
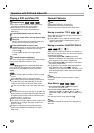
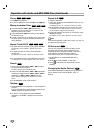
33
Press OK to start setting the timer record event.
If all timer record events are full press
33
or
44
to
select the event that you wish to remove and
replace.
Press 1 to delete the event.
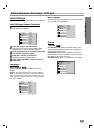
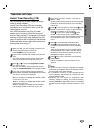
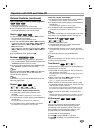
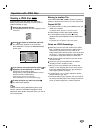
44
Press the numbered buttons to enter the station
that you wish to record.
When selecting stations 1 - 9, press 0 first, then the
channel number; for example Stations 3 - 03. You
may also select Channels by pressing
33
or
44
.
Once selected press 2.
If you wish to record from AUDIO IN (L/R) and
VIDEO IN on the front or from the EURO SCART
sockets on the back of your unit, press AUX to
select for correct display (AV1, AV2 or AV3).
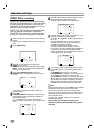
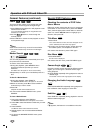
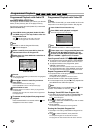
55
Press the numbered buttons to enter the date of
the programme.
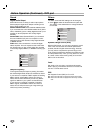
If you press OK before entering the date you may
select one of the following automated recording
features. Press 1 or 2 to select, then press OK to
confirm.
DLY To record every day (except Saturday and
Sunday) at the same time.
SU~SA To record at the same time every week.
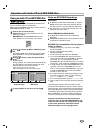
66
Press the numbered buttons to enter the recording start
and end times of the programme that you wish to record.
Please note your VCR uses a 24 hour clock. e.g.
1pm will be displayed as 13:00.
You may also select the the start and end times by
pressing
33
or
44
.
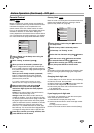
77
Press 2 and press
33
or
44
to switch PDC on or off.
Press 2 to select the recording speed.
Press
33
or
44
to select the desired tape speed (SP, IP, or LP).
IP mode determines how much tape is left and
switches speed from SP to LP, if necessary, to
complete recording the program. IP mode is not
selected when PDC is ON.
88
Check that the timer event details are correct.
Press MENU twice.
If PLEASE CHECK is displayed, you have entered
incorrect and will need to re-enter the data.
Press POWER to switch your VCR Standby.
TIMER will appear in the display window while your
VCR waits to make the recording.
will appear in the display window while your VCR
waits to make the recording.
To watch a DVD during timer recording standby
mode, press POWER and VCR/DVD to switch to
DVD mode.
Notes
If at a later date you wish to delete or change any of the
settings in timer event memory you may do so without
having to enter all the timer event information again.
Simply display the timer event screen. Press
33
or
44
to
select the event that you wish to delete or change.
Press 1 to delete the event...or
Press OK to change; then press 1 or 2 to select;
Station, Date, Start and End times and Recording
speed. Press
33
or
44
to enter the correct information.
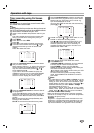
If Timer record events Overlap...
Make sure that the preset times of the timer recording
events do not overlap. If they do, the earlier programme
will always be given priority.
Example:
Programme 1 is programmed to start at 16:00 and end at 17:00.
Programme 2 is programmed to start at 16:30 and end at 17:30.
(In this case, Programme 1 will be recorded in its entirety, but
only the last 30 minutes of Programme 2 will be recorded.)
PR DATE
T I M E
- - - - SP
- - - - SP
- - - - SP
- - - - SP
- - - - SP
- - - - SP
PR-01 16
- - - - - - - -~::
- - - - - - - -~::
- - - - - - - -~::
- - - - - - - -~::
- - - - - - - -~::
- - - - - - - -~::
- - - - - - - -~::
SP
i
OK
DLY SU MO TU WE TH FR SA
PR
DATE
T I M E
- - - -
16
SP
- - - -
SP
- - - -
SP
- - - -
SP
- - - -
SP
- - - -
SP
PR-01
- - - - - - - -~::
19 00 20 00~::
- - - - - - - -~::
- - - - - - - -~::
- - - - - - - -~::
- - - - - - - -~::
- - - - - - - -~::
SP
i
PR
DATE
T I M E
- - - -
16
SP
- - - - SP
- - - - SP
- - - - SP
- - - - SP
- - - - SP
PR-01
- - - - - - - -~::
19 00 20 00~::
- - - - - - - -~::
- - - - - - - -~::
- - - - - - - -~::
- - - - - - - -~::
- - - - - - - -~::
i
SP
PR DATE
T I M E
- - - -
- -
SP
- - - - SP
- - - - SP
- - - - SP
- - - - SP
- - - - SP
- -
- - - - - - - -~::
- - - - - - - -~::
- - - - - - - -~::
- - - - - - - -~::
- - - - - - - -~::
- - - - - - - -~::
- - - - - - - -~::
SP
i
PR DATE
T I M E
- - - -
- -
SP
- - - - SP
- - - - SP
- - - - SP
- - - - SP
- - - - SP
PR-01
- - - - - - - -~::
- - - - - - - -~::
- - - - - - - -~::
- - - - - - - -~::
- - - - - - - -~::
- - - - - - - -~::
- - - - - - - -~::
SP
i