


24
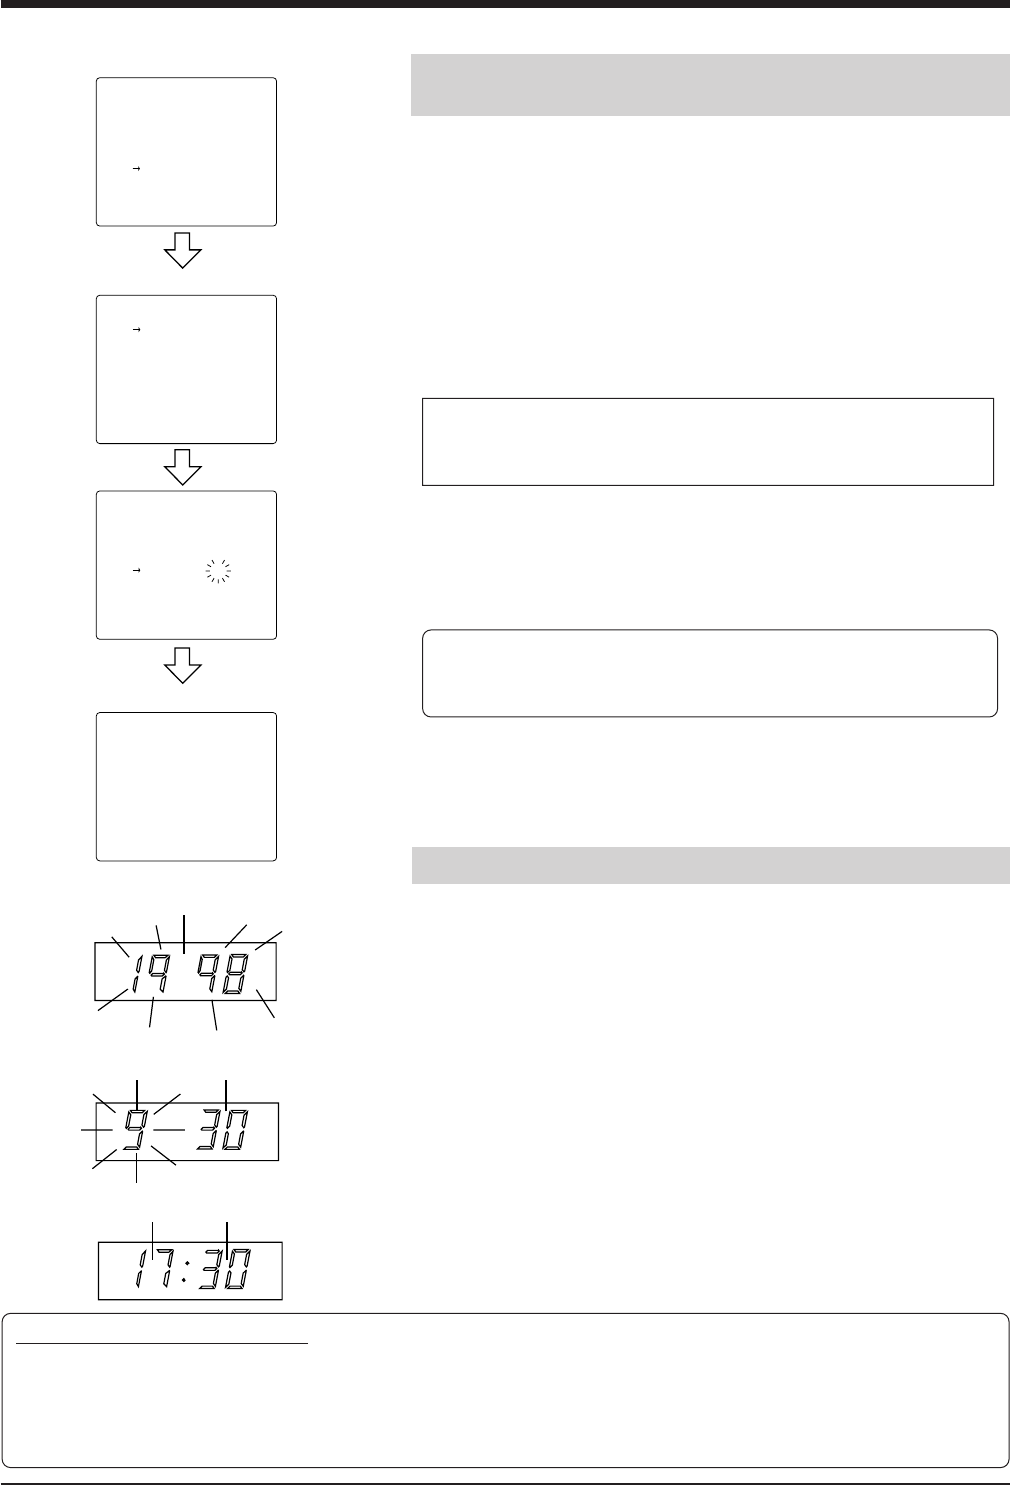
1 7 : 3 0 : 0 1 L24H
9 – 30 – 1998
MAIN MENU
PROGRAM TIMER
FUNCTION
ALARM IN
POWER LOSS
HOUR METER
CLOCK ADJUST
PRESS (SHIFT, SET)
PRESS (MENU) TO END
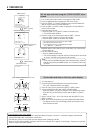
CLOCK ADJUST
YEAR 2000
MONTH 1
DAY 1
HOUR 0
MINUTE 0
PRESS (SHIFT, SET)
PRESS (MENU) TO END
CLOCK ADJUST
YEAR 1998
MONTH 9
DAY 30
HOUR 17
MINUTE 30
PRESS (SHIFT, SET)
PRESS (MENU) TO END
6 PREPARATION
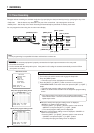
[SHIFT +/-] button and
[SET +/-] button
[MENU] button
(Date/time setting screen)
[SET +/-] button
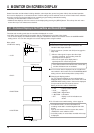
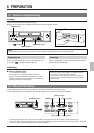
Set the date and time using the CLOCK ADJUST menu
screen.
1 Turn on this unit and the monitor and engage the Stop mode.
2 Press the [MENU] button to display the main menu screen.
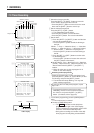
3 Press the [SHIFT +] or [SHIFT -]button to select <CLOCK ADJUST>.
(Set the cursor arrow to <CLOCK ADJUST>.)
4 Press the [SET +] or [SET -] button to display the CLOCK ADJUST
screen on the monitor.
5 Select the item to be set.
• Press the [SHIFT +] or [SHIFT -] button to select the item.
[ The selected item will blink.
6 Enter the value for the selected item with the [SET +/-] button.
• Press the [SET +] button to increase the number.
• Press the [SET -] button to decrease the number.
• The setting range for the year is from 1997 to 2096.
• This VCR uses the 24-hour clock.
• If an invalid date is set, it is automatically corrected.
(e.g.) 1999-2-29 [ 1999-2-28
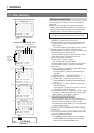
Ⅲ Repeat steps 5 and 6 until the year, month, date, hour, and minutes
have all been set.
7 End date and time setting.
• Press the [MENU] button twice.
[ The normal display is restored and the set date and time are shown
on screen. The time count starts from 00 seconds.
Note:
• If you press the [OPERATE] button after setting the date and time
without first pressing the [MENU] button, the set date and time are
canceled.
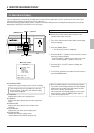
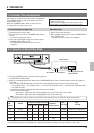
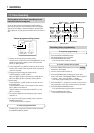
(Menu switch <POSITION> set to L-UP)
1 Turn the power on.
2 Press the [COUNT/CLOCK] button for at least 2 seconds.
• The “year” indication blinks in the display.
3 Enter the value for the year with the [SET+] or [SET-] button.
4 Press the [SHIFT+] button: the “month” indication blinks.
• Press the [SHIFT+] or [SHIFT-] button to move the blinking section.
• Enter the value for the blinking section with the [SET+] or [SET-]
button.
5 Set the “month”, “day”, “hour” and “minute” with the [SHIFT+/-] and
[SET+/-] buttons.
6 When you have finished setting, press the [COUNT/CLOCK] button.
• The display returns to the clock display mode and the time count
starts from 00 seconds.
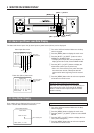
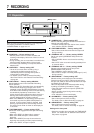
Time indication on the VCR's display
• When the power is turned off, the time is displayed. When the power is turned on, set the time display mode with the
[COUNT/CLOCK] button to display the current time.
• The first time you turn on the power, the time display shows a blinking "0:00:00".
• When the built-in backup battery capacity is low, the error indication E-10 appears on the display. Contact your local JVC
dealer to replace the built-in battery.
Set the date and time on the front panel display
(Normal screen)
(Main menu)
MONTH DAY
HOUR
MINUTE
YEAR