


- 14 -
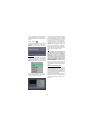
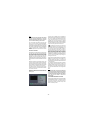
The Channel List screen displays the list of
channels in the receiver's memory, with a quarter-
screen image window showing the selected channel,
and can be used to change channels for viewing,
delete channels from the memory, edit the name of
the channel as it appears in the list and on-screen,
lock a channel against viewing by younger members
of the family, and set up favourite channels.
Channel List functions are carried out on one
channel at a time. The channel to be affected is first
highlighted in the list using the [UP] or [DOWN]
keys.
SELECT
This function selects a channel for viewing and is
an alternative to using the [P+] and [P-] keys,
channel number or EPG. Highlight the channel to be
viewed, highlight the OK button at the base of the
screen using the [LEFT] or [RIGHT] keys and press
[OK]. The highlighted channel now appears in the
image window and you can leave the Channel List
to view the channel by pressing [MENU].
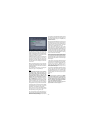
DELETE
The initial installation of the DVB - T3 receiver can
produce duplicate entries in the channel list from
transmitters operating at different frequencies in
adjacent areas, and you may wish to delete these
duplicate entries from the list. In addition, other
channels which you do not want in the list.
Highlight the channel to be deleted, highlight the
DELETE button at the base of the screen using the
[LEFT] or [RIGHT] keys, and press [OK]. The
highlighted channel is deleted from the list.
You can now perform further editing on the channel
list, or return to normal broadcast viewing by
pressing the [MENU] key.
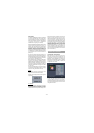
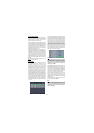
EDIT NAME
The channel names which appear in the channel list
and the information banner are assigned by the
broadcasters and some longer names are
abbreviated to become unrecognisable. You can edit
the names to suit your preferences with the Edit
Name function.
Highlight the channel to be renamed, highlight the
EDIT NAME button at the base of the screen using
the [LEFT] or [RIGHT] keys, and press [OK]. The
highlighted channel name appears on the right of the
screen with the first character highlighted by a
cursor. Any of the 15 characters that make up a
channel name can be highlighted using the [LEFT]
or [RIGHT] keys and the highlighted character
changed by pressing the [UP] or [DOWN] keys to
cycle through the alphabet, numbers and other
characters available.
When the required changes have been made,
pressing [OK] stores the new name and returns to
the Channel List screen. Alternatively, pressing
[MENU] will abandon the name change and return
to the previous name.
You can now perform further editing on the channel
list, or return to normal broadcast viewing by
pressing the [MENU] key.Using the other two
functions of the Channel List menu screen - LOCK
and FAVOURITES - is dealt with in the next sections.
Hint
You can also enter a channel name using the
number keys on the remote control. Each key
represents several letters and pressing a key
several times will enter each letter (in both
capitals and lower case), and the number, in
turn, in the character position marked by the
cursor. The zero key enters all the punctuation
marks available and a blank space. With
practise, this is a very quick means of entering
the required letters into the channel name.
EDIT NUMBER
In Edit PR List reordering can be done by moving
the channels to new positions. In order to do that
Edit Number button is highlighted by using [LEFT]
or [RIGHT] keys keys. Press OK button to activate
this menu. A small box appears on the screen. By
means of Number buttons on the remote control
attain the new channel number and press OK. The
new channel number moves automatically to its new
position.
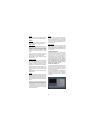
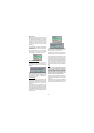
CHANNEL AND MENU PROTECTION
CHANNEL LOCK
Some channels broadcast material which you do not
want younger members of the family to watch. Any
channel can be 'locked' so that it cannot be selected
for viewing without first a four-digit PIN code being
entered. In this way any channel not suitable for
younger viewers can be protected.
The channel lock is applied with the Channel List
menu. Press the [MENU] key on the remote control
handset to display the Main Menu and then, using
the [UP] or [DOWN] keys on the remote control,
choose the Edit PR list and press the [OK] key.
Highlight the channel to be locked using the [UP] or
[DOWN] keys. Now select the LOCK button at the
base of the screen with the [LEFT] or [RIGHT] keys
and press [OK].
A window requesting the PIN code is displayed and
the four-digit code should be entered using the
number keys on the remote control, followed by the
[OK] key. A lock icon is then displayed alongside the
channel name in the channel list.