15
Installation and connection
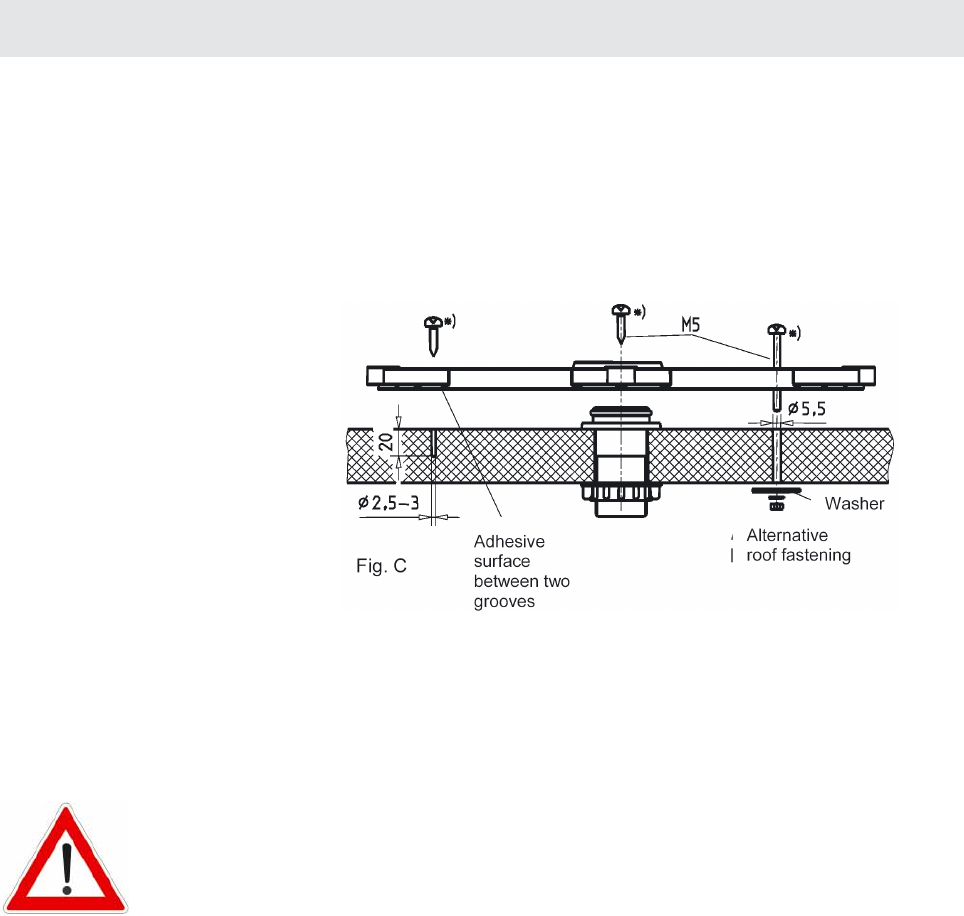
• For very thin roof panel materials and insuffi cient support in the
insulating material, through holes (Ø: 5.5 mm) into the interior of
the vehicle are necessary and galvanised M5 tallow drop screws of
suffi cient length should be used.
Make sure that you use a suffi ciently strong support that can
absorb the screw forces (large plain washer or complete reinforcing
plate).
Figure: C
*) (not included)
• Create the holes necessary to secure the mounting plate (Fig. C).
• In addition to the screwed connection, the mounting plate and roof
duct must be bonded to the roof with adhesive and sealed. This is
done using the Sikafl ex
®
291 sealing glue supplied, which is ideally
suited for this purpose due to its broad range of adhesion.
Before you begin working with the Sikafl ex
®
291 sealing glue,
make sure that you have carefully read the safety information
for Sikafl ex
®
products on page 34 and the technical data sheet
on page 35 in this manual!
The prerequisite for good adhesive properties is a clean, dry and
grease-free substrate. You should therefore clean the roof surface with
a suitable cleaning agent within in a circumference of 15 cm around the
drilled hole and allow the surface to dry thoroughly.
For painted surfaces, it must be ensured that the coat of paint has the
required adhesive properties with the substrate.
If the coat of paint is already loose or foliated, it must be removed
down to a stable layer in the area of the adhesive surface. If you have
any doubts concerning the adhesive properties, consult a specialist in
painting and lacquering or the manufacturer of your vehicle.
Under certain circumstances, it may be necessary for you to improve
the adhesive properties of the roof surface by pre-treatment with a
cleaning agent available from specialist dealers (e.g. Sika
®
Cleaner) or
a primer (e.g. Sika
®
Primer).
The procedure for glueing the mounting plate is as follows:


